
Trees
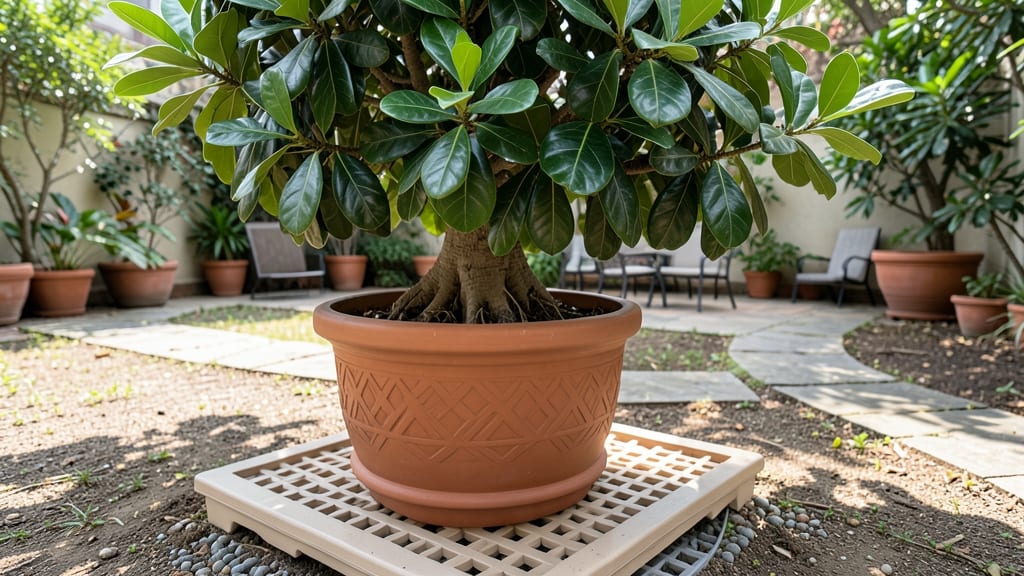
Choosing the right large pots for trees isn’t just about size—it’s about giving roots room to breathe while keeping your tree stable for years to come. 🌳 After struggling with flimsy containers that toppled my young oak, I learned that heavy-duty materials like thick plastic or fiberglass make all the difference.
The key is matching pot depth to root growth: a 24-inch diameter pot works for small trees, but mature specimens need 36 inches or more to prevent root-binding.
Material matters just as much as size. Terracotta looks pretty but dries out fast, while lightweight plastic may not hold up against strong winds. My go-to is reinforced polyethylene—durable, lightweight enough to move (when necessary), and built to last through seasons.
Drainage holes are non-negotiable, but adding a 2-inch gravel layer at the bottom prevents clogging while keeping roots oxygenated.
You’ll end up with a tree that grows stronger, not just taller—deep roots anchor it against storms, and the right soil mix (chunky, well-draining) keeps nutrients flowing. Place your potted tree where it gets the same sunlight as it would in the ground, and mulch annually to retain moisture.
The payoff? A tree that thrives in a pot for 5+ years without outgrowing its home.
Works for Japanese maples, dwarf fruit trees, or even small citrus—just adjust pot size to match the tree’s mature height. The secret isn’t forcing a tree into a tiny pot; it’s giving it the luxury of space from day one. Ready to pick the perfect container?
📚 In This Guide
- What you need
- Instructions
- Tips and common mistakes
- Wrapping up and next steps
What you need
- ● Heavy-duty planter pots: Minimum 18–24 inches in diameter (scalable for mature trees; larger = better for roots!
- ● Depth: 24+ inches (deeper pots = happier roots 🌱).
- ● Material options: Fiberglass: Lightweight, durable, and UV-resistant (ideal for long-term use).
- ● Resin: Budget-friendly, weatherproof, and easy to move.
- ● Ceramic/Stone: Aesthetic but heavy—use only if anchored securely!
- ● Plastic (HDPE): Affordable and practical for temporary setups.
- ● Drainage solutions: Drainage holes (pre-drilled in most pots) + 1–2 inches of gravel or landscape fabric at the bottom.
- ○ Optional: Drainage mat (for pots without holes).
- ● Soil & amendments: 60% high-quality potting mix (e.g., Miracle-Gro or FoxFarm).
- ● 30% perlite or orchid bark (for aeration).
- ● 10% compost or worm castings (nutrient boost!).
- ● Pot feet or casters: For mobility (especially for resin/fiberglass pots).
- ● Self-watering reservoir: Built-in or add-on trays to reduce manual watering.
- ● Pot stabilizers: Sandbags or weights (if using lightweight pots in windy areas).
- ● Thermometer/hygrometer: Monitor soil temp/moisture for sensitive trees.
- ● Decorative wraps or paint: Customize pots to match your outdoor decor!
Step-by-step guide for choosing and using heavy-duty tree planters
Here's the no-fuss approach to selecting and setting up containers that support big roots and tall growth.
🪴 Step 1: Select the Right Container Size and Material
For mature trees, aim for pots that are at least 12-18 inches in diameter per 12 inches of trunk diameter—this gives roots room to spread without circling. I always choose thick-walled, UV-stabilized plastic or fiberglass for durability, as they resist cracking under weight and weather. Avoid thin ceramic or glazed pots—they can't handle the weight of heavy soil and roots over time.
Check the pot's weight capacity too. A 50-gallon container should comfortably hold a 3-4 inch caliper tree (measure trunk diameter 6 inches above the soil). Look for reinforced ribs or handles to help with moving. I test stability by filling an empty pot with water—if it doesn't wobble when full, it's ready for planting.
🌱 Step 2: Prepare the Pot and Drainage System
Start by drilling 2-4 drainage holes in the bottom if they're not already there—trees hate soggy roots. Cover the holes with landscape fabric to keep soil from washing out while still allowing water to escape. I use a 3-inch layer of clean gravel or broken pottery at the bottom to improve drainage and prevent root rot.
Next, add a 2-inch layer of moisture-retentive material like hydroponic clay pebbles or expanded shale just above the drainage layer. This creates an air pocket at the bottom, preventing anaerobic conditions that suffocate roots. Don't skip this—even heavy-duty pots can trap moisture if drainage isn't perfect.
☀️ Step 3: Fill With the Right Soil Mix for Root Health
Use a well-draining potting mix specifically formulated for trees or shrubs—never garden soil. I blend 50% premium potting mix, 30% compost, and 20% perlite for aeration. Fill the pot 1/3 full, then place the tree's root ball in the center and spread the roots outward gently. The top of the root ball should sit 1-2 inches below the pot's rim to allow for watering.
Backfill with the soil mix, pressing lightly around the roots to eliminate air pockets. Water deeply until it runs out the drainage holes, then let it drain completely. This first watering helps settle the soil and removes any remaining air gaps. If the pot feels light after watering, add more soil to stabilize the tree.
💧 Step 4: Establish a Watering and Fertilizing Routine
Water deeply 2-3 times per week during the first growing season, ensuring the top 6 inches of soil stay moist but not waterlogged. I use a soaker hose or watering wand to deliver moisture evenly without disturbing the soil. Let the pot sit in a saucer for 10-15 minutes after watering to catch runoff, then empty the saucer—standing water encourages root rot.
Fertilize every 6-8 weeks with a slow-release, balanced fertilizer (10-10-10 or 20-20-20). Avoid high-nitrogen fertilizers—they promote leafy growth at the expense of root development. I mix the fertilizer into the top 2 inches of soil and water it in thoroughly. Watch for yellowing leaves or stunted growth—these are signs of over- or under-fertilizing.
⏰ Step 5: Monitor Stability and Adjust as Needed
Trees in pots can become top-heavy, especially in wind or rain. I secure the pot to a non-slip mat or weighted base to prevent tipping. For larger trees, consider staking with 3-4 flexible supports tied loosely to the trunk—this prevents swaying without restricting growth. Check the stakes monthly to ensure they're not digging into the trunk.
Every 2-3 years, repot your tree into a container 2-4 inches larger in diameter to accommodate root growth. This is also a good time to trim any circling roots and refresh the soil mix. If you notice roots growing in circles or soil drying out too quickly, it's time to upgrade the pot size—roots need space to expand outward, not just downward.
Tips & tricks for heavy-duty tree planters
A few simple strategies can make all the difference when selecting and setting up containers for your trees.
Container Stability Check: Before planting, I always test a pot's stability by filling it completely with water. If it wobbles even slightly, it's not ready for your tree—this prevents tipping accidents later. For larger pots, look for reinforced ribs or built-in handles to help with moving. I've seen heavy planters tip over during watering because they weren't properly secured to the ground.
Drainage Layer Secrets: The 3-inch gravel layer at the bottom isn't just about drainage—it's about creating airflow. I've learned that adding a 2-inch layer of moisture-retentive material like hydroponic clay pebbles above the gravel prevents soggy roots while still allowing excess water to escape. This two-layer system is especially important in heavy-duty pots that might trap moisture differently than lighter containers.
Soil Mix Proportion: When blending your 50% premium potting mix, 30% compost, and 20% perlite, I recommend weighing these components rather than measuring by volume. Volume measurements can vary dramatically—just 1 cup of different soils can weigh 8-12 ounces. This ensures your mix stays consistent and provides proper aeration for root growth.
Watering Routine: The 10-15 minute saucer test after watering is crucial—it catches runoff that could otherwise pool around the pot. I've seen cases where people skipped this step and ended up with root rot from standing water. Empty the saucer completely after this time to prevent moisture from seeping back into the pot.
Pro Tips for Large Pots For Trees
- A few simple strategies can make all the difference when selecting and setting up containers for your trees.
- Container Stability Check: Before planting, I always test a pot's stability by filling it completely with water.
- Drainage Layer Secrets: The 3-inch gravel layer at the bottom isn't just about drainage—it's about creating airflow.
Frequently asked questions
Got questions about choosing and using large pots for trees?
You’re not alone! Here are answers to the most common concerns—from drainage to long-term care—so you can plant with confidence.
What size pot is best for a mature tree?
The rule of thumb is at least 3–4 times wider than the tree’s root ball and 12–18 inches deeper than the roots. For example, a 4-inch caliper tree (4" trunk diameter) needs a 16–24-inch pot. Larger pots prevent root binding and improve stability, but avoid over-potting—too much empty space can lead to moisture issues.
How do I ensure my large pot won’t tip over in wind or storms?
Stability is key! Use pots with a wide, flat base (or add a saucer) and fill the bottom third with gravel or broken pottery for weight. For extra security, anchor the pot with stakes or cables to a nearby post or wall. Heavy trees (like oaks or maples) may need concrete blocks or sandbags inside the pot for added heft.
Do large tree pots need special drainage?
Absolutely!
Even big pots require drainage holes to prevent root rot. If your pot is decorative (like fiberglass or ceramic), drill holes or use a drainage layer of 2–3 inches of gravel at the bottom. For containers without feet, elevate them on pot feet or cinder blocks to improve airflow and drainage.
Can I reuse old pots for trees, or should I buy new ones?
Reusing pots is eco-friendly and cost-effective—just clean them thoroughly to remove old soil and pests. Avoid pots with cracks, mold, or chemical residues (like from old paint). For long-term use, opt for durable materials like fiberglass, resin, or heavy-duty plastic, which resist weathering and UV damage better than clay or wood.
How often should I repot a tree in a large container?
Repot every 2–3 years or when roots circle the pot (a sign of root binding). Spring is the best time to repot, as trees enter active growth. Choose a pot only 2–3 inches larger in diameter each time to avoid shocking the tree. If roots are severely bound, trim the circling roots gently before repotting.
What’s the easiest way to move a tree from a large pot to the ground?
Timing and technique matter! Water the tree 24 hours before moving to reduce root stress. Lift the pot carefully, tap the sides to loosen roots, and place the root ball in a hole twice as wide as the pot. Backfill with native soil, tamp gently, and water deeply. For heavy trees, use a wheelbarrow or dolly to avoid injury.
Wrapping up and next steps
Choosing the right large pots for trees is a game-changer for root health, stability, and long-term growth—so you’re already on the right track! 🌳 Whether you’re planting a towering oak or a sprawling magnolia, prioritizing durability, drainage, and size ensures your tree thrives for years.
Now that you’re armed with the best materials, tips, and answers to common questions, it’s time to get your hands dirty and give your tree the spacious home it deserves.
Ready to elevate your gardening game? Measure your space, pick your pot, and plant with confidence! 🌱