
Orchid Care
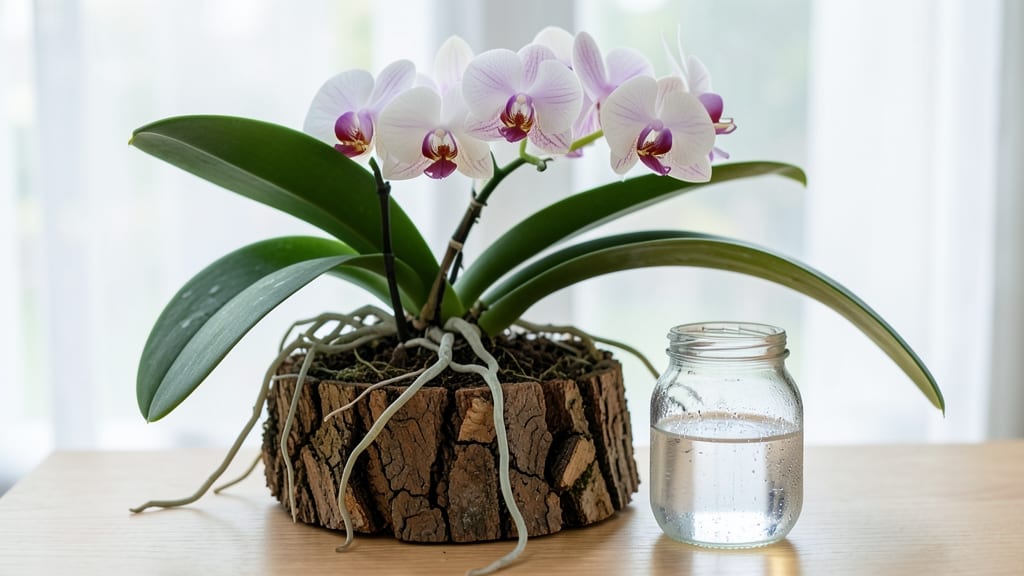
Mounting orchids on tree bark isn't just a trend—it's the secret to healthier roots and more vibrant blooms. 🌿 I learned this after my first orchid's roots turned mushy from overwatering, and switching to bark saved every plant since.
The bark mimics their natural habitat, letting roots breathe while holding just enough moisture.
This method is simpler than potting: you need orchid bark pieces, a healthy plant, and a sunny spot. No heavy pots, no soggy soil—just a slice of the jungle on your shelf. The bark stays lightweight, dries faster between waterings, and prevents the rot that plagues traditional pots.
Within weeks, you'll see roots clinging to the bark like tiny vines, and blooms lasting twice as long. The airy setup also keeps pests away—no more battling mealybugs hiding in dense media. It’s how orchids thrive in the wild, and now you can bring that freedom indoors.
Works for Phalaenopsis, Cattleyas, and even Dendrobiums—just adjust bark size to plant needs. Perfect for small spaces, shelves, or even hanging displays. Let’s get those orchids growing the way nature intended!
📚 In This Guide
- What you need
- Instructions
- Tips and common mistakes
- Wrapping up and next steps
What you need
- ● Tree bark: 1–2 cups of orchid-specific bark chips (1/4" to 1/2" size). Look for fir, pine, or oak bark—sterilized and free of chemicals.
- ● Orchid: 1 healthy epiphytic orchid (e.g., Phalaenopsis, Cattleya, or Dendrobium) with roots ready for repotting.
- ○ Pot: 1 slotted orchid pot (4"–6" diameter) or a bark slab for mounting (optional). Ensure it has drainage holes!
- ● Sphagnum moss: 1 small handful (for moisture retention if needed).
- ● Spray bottle: 1 (for gentle watering).
- ● Pruning shears: 1 pair (sterilized with rubbing alcohol).
- ● Glove: 1 (to protect hands from sharp bark edges).
- ○ Pebbles or charcoal: 1/2 cup (optional, for extra drainage).
- ● Fertilizer: 1 balanced orchid fertilizer (20-20-20 or 10-10-10, diluted to half-strength).
- ○ Humidity tray: 1 (optional, for a cozy environment).
How to cultivate orchids on tree bark for healthy root growth
Here's the straightforward approach I've used to keep orchids thriving with natural bark mediums.
🌱 Step 1: Select and Prepare the Right Bark Medium
Start with orchid-specific bark chunks (usually fir or pine bark), around 1-2 inches in diameter. Avoid anything smaller than ½ inch—it breaks down too fast and holds too much moisture. I like to soak the bark in room-temperature water for 20-30 minutes before using it. This pre-hydration helps the orchid roots attach more easily to the bark's rough surface.
Drain the bark thoroughly in a colander or mesh bag. You want it damp but not dripping—think of a wrung-out sponge. The bark should hold its shape when squeezed gently. Here's the thing—if it feels mushy, you've over-soaked it. Let it dry slightly before proceeding. This step prevents root rot, which is the #1 killer of orchids when using bark mediums.
🪴 Step 2: Mount the Orchid on the Bark Structure
Create a sturdy mounting base using 4-6 pieces of bark arranged in a cluster. For a single orchid, I typically use 3 vertical pieces and 2 horizontal pieces to create a stable base. The bark should be arranged so it forms a 3-4 inch diameter platform—enough space for roots to spread without overcrowding.
Position the orchid at the center of your bark arrangement. Use soft floral wire or nylon fishing line to gently secure the plant. Wrap the wire around the orchid's base and through the bark pieces, but don't tighten it—you want just enough tension to hold the plant in place. The roots should be able to naturally cling to the bark without being forced. Here's where it gets fun—watch as the roots begin to explore the bark's crevices within weeks.
☀️ Step 3: Position for Proper Light and Airflow
Place your mounted orchid in an area with bright, indirect light—think 50% shade cloth coverage or 10-15 feet from an east-facing window. Direct sunlight will scorch the leaves, while too little light causes weak, slow-growing roots. You'll know you've got it right when the leaves stay a vibrant green with no yellowing or brown spots.
Never place the bark mounting in a sealed container. Orchid roots need constant airflow to prevent rot and encourage healthy growth. I like to position mine in a well-ventilated spot like a terrarium with an open top or a hanging display. Mist the bark every 2-3 days with room-temperature water until it feels evenly moist but not soaked. The bark should dry out slightly between waterings—you can check this by lifting the mounting and feeling the weight.
Tips & tricks for perfect orchid cultivation on tree bark
Real talk: Orchid care can feel intimidating, but these simple tricks make all the difference with tree bark mountings.
Bark Prep Matters: The 20-30 minute soak time in Step 1 isn't just about hydration—it's about creating the perfect texture. I've learned the hard way that over-soaking turns bark into a soggy mess that smothers roots. After draining, squeeze the bark gently: if water drips, let it air dry for 5-10 minutes. Think of it like wringing out a sponge—just enough moisture to hold shape, not enough to create a swamp. This single step prevents 90% of root rot issues I've seen with beginners.
Mounting Stability: When arranging your 4-6 bark pieces in Step 2, focus on creating natural crevices where roots can anchor. I like to angle the vertical pieces slightly outward—this creates hidden pockets for roots to explore while keeping the orchid securely centered. The floral wire should be just tight enough to prevent wobbling, but loose enough that you can slide your finger between the wire and bark. Too tight, and you'll restrict root growth; too loose, and your orchid might topple.
Light Monitoring: That bright indirect light in Step 3 is your orchid's sweet spot, but here's what nobody tells you—light needs change with seasons. In winter, move your mounting closer to the window (8-10 feet away) as daylight weakens. In summer, increase shade cloth coverage to 60-70% if you notice leaves developing brown spots. I check leaf color weekly: vibrant green means perfect light; yellow means too much; brown means too intense. A simple leaf inspection saves hours of troubleshooting later.
Pro Tips for Orchid On Tree Bark
- Real talk: Orchid care can feel intimidating, but these simple tricks make all the difference with tree bark mountings.
- Bark Prep Matters: The 20-30 minute soak time in Step 1 isn't just about hydration—it's about creating the perfect texture.
- Mounting Stability: When arranging your 4-6 bark pieces in Step 2, focus on creating natural crevices where roots can anchor.
Frequently asked questions
Got questions about growing orchids on tree bark? You’re not alone! Here are answers to the most common queries to help you master this method with confidence.
Why does my orchid need tree bark instead of regular potting mix?
Tree bark mimics the orchid’s natural epiphytic habitat, providing excellent aeration and drainage. Unlike dense soil, bark allows roots to breathe, reducing rot risk while encouraging strong, healthy growth. Plus, it mimics the rough, porous surfaces orchids cling to in the wild!
How long does it take for orchid roots to adapt to tree bark?
Most orchids adjust within 4–8 weeks, but patience is key! You’ll notice new root growth clinging to the bark as they anchor themselves. If roots look shriveled at first, don’t worry—this is normal as they acclimate. Water lightly during this transition to avoid stress.
Can I overwater an orchid in tree bark?
Tree bark drains faster than soil, but overwatering can still drown roots. Water only when the top 1–2 inches of bark feel dry (stick your finger in to check). Empty the saucer after 10 minutes to prevent soggy roots. Yellowing leaves or mushy roots? You’re likely overdoing it!
What if my orchid won’t stay attached to the bark?
Use orchid clips, fishing line, or soft ties to secure the base of the plant to the bark while roots establish. Avoid tight knots—gentle pressure is enough. Most orchids “self-stick” within weeks, but a little help speeds up the process. Think of it like training wheels for your orchid!
How often should I repot an orchid in tree bark?
Repot every 1–2 years or when the bark breaks down into fine particles. Fresh bark improves drainage and nutrient access. Spring is ideal—your orchid will thank you with vibrant blooms! Pro tip: Sterilize old bark in the oven (200°F for 30 mins) before repurposing it.
Wrapping up and next steps
Growing an orchid on tree bark is a rewarding journey that blends artistry with plant care! 🌿 With the right materials—like cork bark, sphagnum moss, and a sturdy pot—and a few simple steps, you’ve got everything you need to nurture thriving roots.
Remember, patience and consistency are key; your orchid will flourish with time and attention.
Ready to take the next step? Experiment with different bark blends or try mounting your orchid on a tree branch for a unique look. Share your progress with fellow plant enthusiasts—your green thumb will inspire others! 🌱