
Planting
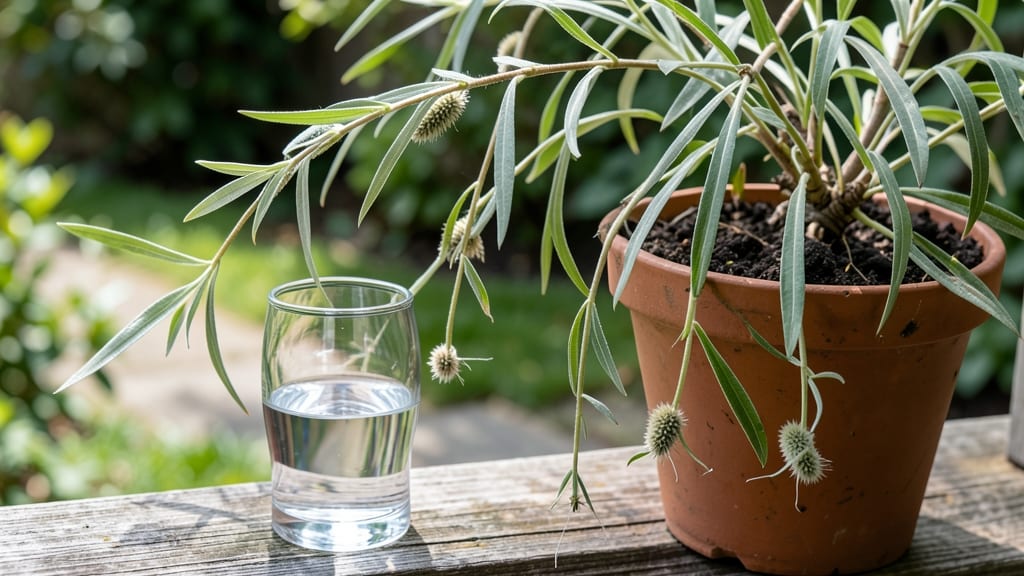
Planting a tree branch turns yard waste into a future shade provider—here's how to grow a thriving tree from cuttings you'd otherwise toss. 🌿 The secret lies in timing, the right cut, and patience; I've rooted willows, maples, and fruit trees this way, and the results are worth the effort.
Start with healthy branches in late winter or early spring when sap rises, and you'll see roots forming in just a few weeks.
You'll need sharp pruners, rooting hormone (optional but helpful), a container with drainage, and a mix of sand and peat moss for moisture control. The process is simpler than it sounds—just dip the cut end, place it in the mix, and keep it humid.
My first attempt with a neighbor's forsythia branch failed because I didn't keep the soil moist enough, but the second try produced a foot-high sapling in under three months.
By summer, you'll have a sturdy young tree ready for transplanting. The foliage stays vibrant, roots spread into the soil, and with proper care, it can outgrow its container in a single season.
The best part? You're growing a tree that fits your yard's style and climate perfectly—no nursery guesswork involved.
Works for most deciduous trees (avoid evergreens), and even urban balconies can host small containers. Just remember: consistency is key, especially with watering. Let's get those cuttings growing!
📚 In This Guide
- What you need
- Instructions
- Tips and common mistakes
- Wrapping up and next steps
What you need
- ● Tree branch: A healthy, non-flowering, pencil-thick cutting (6–12 inches long) from a deciduous tree (e.g., willow, maple, or dogwood). Tip: Harvest in late winter or early spring when the tree is dormant.
- ● Rooting hormone: A powder or gel (e.g., Clonex or Rootone) to boost root growth. Pro tip: Follow package instructions for application!
- ● Well-draining potting mix: A blend of perlite, vermiculite, or sand mixed with peat or coconut coir (avoid garden soil—it’s too dense!).
- ● Small pots or containers: 4–6 inch diameter with drainage holes (yogurt cups or plastic nursery pots work great!).
- ● Spray bottle: For misting cuttings to maintain humidity.
- ● Pruning shears or sharp knife: Sterilized to make clean cuts on the branch.
- ● Plastic bag or humidity dome: To create a mini greenhouse effect (e.g., a clear plastic bag with holes for airflow).
- ● Watering can or spray bottle: For gentle hydration.
- ● Heat mat: To keep cuttings warm (70–75°F ideal for rooting).
- ● Fertilizer (low-dose): A diluted seaweed or fish emulsion fertilizer after roots form (wait 4–6 weeks!).
- ● Label markers: To track tree types and planting dates.
- ● Grow lights: If propagating indoors with low natural light.
Step-by-step instructions for propagating a tree branch
Here's how to turn a single branch into a new, thriving tree.
🌱 Step 1: Select and Prepare the Right Cutting
Choose a healthy branch that's about ¼ to ½ inch thick and 4-6 inches long. The best time is late winter or early spring when the tree is just starting to grow. Look for a branch with at least 2-3 buds—these will become your new growth points.
Use clean, sharp pruners to make a clean cut just below a leaf node (where the leaf meets the stem). Dip the cut end immediately in rooting hormone powder to encourage root development. This step is crucial—skipping it can delay rooting by weeks. I like to work quickly because the longer the cutting sits exposed, the more it dries out.
✂️ Step 2: Remove Lower Leaves and Create a Moist Environment
Strip all but the top 2-3 leaves from the cutting. This reduces water loss while allowing the plant to focus energy on root growth. You'll see the stem looking bare but don't worry—those buds at the top will wake up soon enough.
Fill a small container with sandy, well-draining soil mix (equal parts perlite and potting soil works perfectly). Make a hole with your finger about 2 inches deep and insert the cutting so that at least one bud is below the soil line. Gently press the soil around the stem to secure it without compacting it too tightly.
💧 Step 3: Maintain Humidity and Light for Root Development
Place a clear plastic bag over the cutting to create a humidity dome. Secure it loosely with a rubber band or twist tie—you want airflow but not too much evaporation. Keep the soil consistently moist (not soggy) by misting lightly every 2-3 days or when the surface feels dry to the touch.
Position the cutting in bright, indirect light—think of a spot with morning sun and afternoon shade. Too much direct sun will dry out the cutting, while too little light slows root growth. You'll know it's getting enough light when the leaves stay green but don't wilt. Roots typically form in 4-8 weeks, but some stubborn cuttings take up to 12 weeks.
☀️ Step 4: Transition to Independent Growth
Once you see new growth (about 2-3 inches tall) and feel resistance when gently tugging the cutting, it's time to transplant. This usually happens 6-12 weeks after planting. Gradually remove the plastic bag over 5-7 days to let the cutting adjust to normal humidity levels.
Move the young tree to its permanent spot, keeping it in partial shade for the first week. Water deeply but let the top 1 inch of soil dry out between waterings. This teaches the roots to seek moisture deeper in the soil. Real talk: The first year is critical—don't move it again once planted, as transplant shock can set it back months.
Tips & tricks for planting tree branches
Here's what I've learned after watching cuttings thrive—and fail—over the years.
Timing is Everything: Late winter or early spring is ideal because the tree's natural growth cycle is just kicking off. If you must propagate outside this window, aim for a time when your tree species is actively growing. I've tried summer cuttings, and while they can work, they often struggle with the heat and dryness, requiring extra humidity and shade. The 4-6 inch length recommendation is crucial—too short and it won't establish roots properly, too long and it may rot before roots form.
Rooting Hormone Hack: Don't just dip the cutting—give it a good coating. I like to roll the cut end in the powder so it's completely covered. This creates a better surface for root development. After dipping, plant immediately—don't let the cutting sit exposed. If you need to take a break, wrap the cut end in damp paper towel to keep it moist until you can plant. The rooting hormone works best when fresh, so check the expiration date on your powder.
Soil Mix Matters: That sandy, well-draining mix of perlite and potting soil is non-negotiable. I've tried regular garden soil, and the cuttings either rot or fail to root. The perlite creates air pockets that prevent the cutting from sitting in waterlogged conditions, which is a common killer. When making your hole, use your finger to loosen the soil—don't pack it down. The soil should feel like a damp sponge, not wet cement.
Light Balance: Bright indirect light is key—think of it as morning sun with afternoon shade. I place my cuttings near an east-facing window where they get gentle morning light but avoid the harsh afternoon sun. If you only have south-facing windows, use sheer curtains to diffuse the light. Too much direct sun will cause the leaves to crisp and dry out before roots form. Watch for leaves that stay green but don't wilt—that's your perfect light balance.
Pro Tips for Plant A Tree Branch
- Here's what I've learned after watching cuttings thrive—and fail—over the years.
- Timing is Everything: Late winter or early spring is ideal because the tree's natural growth cycle is just kicking off.
- Rooting Hormone Hack: Don't just dip the cutting—give it a good coating.
Frequently asked questions
Got questions about propagating a tree from a branch? You’re not alone! Here are some of the most common concerns—and straightforward answers—to help you succeed.
What’s the best time of year to plant a tree branch?
The ideal time is late winter to early spring (just before new growth starts) or early fall. Avoid extreme heat or frost, as these can stress the cutting. If you’re in a mild climate, summer propagation is possible with extra care (like daily misting).
How long does it take for a tree branch to root and grow?
Root development typically takes 4–12 weeks, depending on the species, humidity, and care. You’ll notice new leaves or buds in 2–3 months, signaling successful growth. Be patient—some trees (like willows) root faster, while others (like oaks) may take longer.
Can I propagate any tree branch, or are some better than others?
Not all branches propagate easily! Softwood cuttings (from new growth) work best for trees like willow, poplar, or birch. Hardwood cuttings (from dormant branches) suit apple, cherry, or maple. Avoid woody, mature branches—they’re harder to root. When in doubt, research your tree’s propagation needs!
Why isn’t my cutting sprouting leaves or roots?
Common culprits include low humidity (try a plastic bag or propagator), overwatering (roots need air!), or poor light (bright, indirect light is key). Check for rot (mushy stems = too wet) or pests (like aphids). If the cutting feels mushy or smells bad, it’s likely failed—start fresh!
Can I plant a branch directly in the ground instead of water?
Yes! For hardwood cuttings, burying the base 6–12 inches deep in moist soil (like a trench) works well. Keep the soil consistently damp and mulch to retain moisture. Softwood cuttings, however, root better in water or a soilless mix. Experiment to see what works for your tree type!
Wrapping up and next steps
Planting a tree branch is a rewarding way to grow your own thriving tree—just remember, patience and care are key! 🌱 With the right tools, timing, and technique, you can nurture a cutting into a strong, healthy plant.
Whether you're a gardening newbie or a seasoned green thumb, every small effort brings you closer to a lush, leafy future.
Ready to take the next step? Start small—try propagating a few branches this season and watch your garden grow! For extra success, share your progress with fellow plant lovers or explore more propagation tips to expand your green skills. Happy planting! 🌿