
Pruning
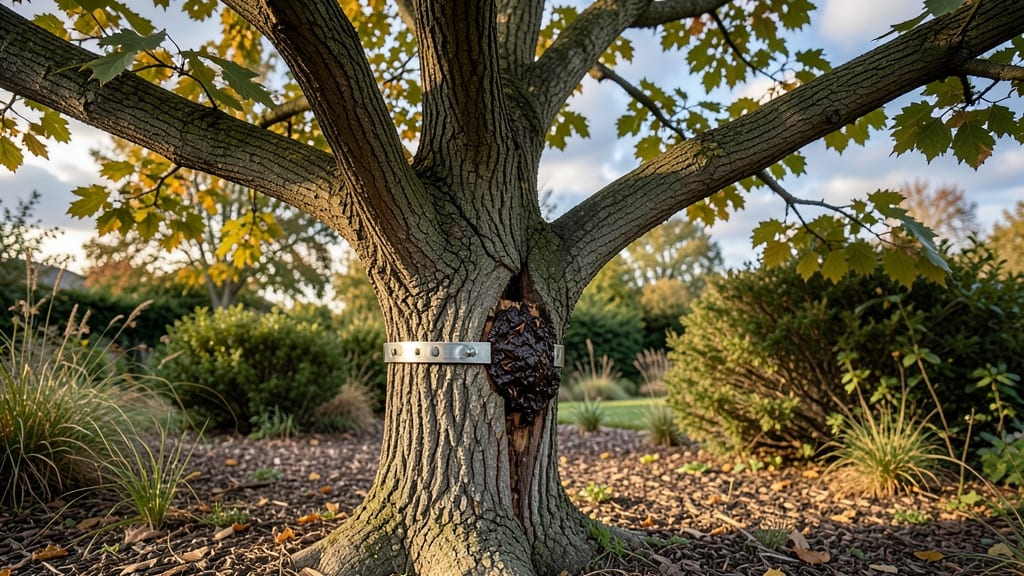
A split tree isn’t a death sentence—it’s a fixable problem with the right cuts and technique. 🌳 I’ve repaired splits in oaks, maples, and even my stubborn old apple tree using just three strategic pruning moves that stabilize the structure immediately.
The key is acting fast before wind or rain turns a small crack into a major hazard.
You’ll need basic pruning tools, a sturdy ladder, and a few hours on a calm day. Start by assessing the split: if it’s clean and less than a third of the trunk’s diameter, you can often save the tree with proper cuts.
For deeper splits, temporary bracing buys time while the tree heals. Most splits heal over 1-2 seasons with the right care—though some large wounds may never fully close.
What you’ll end up with is a tree that stays upright, continues growing, and avoids the dangerous lean that makes it a liability. The cuts themselves are surprisingly simple: remove damaged wood, shape the remaining structure, and encourage new growth from healthy branches.
It’s not rocket science, but timing and technique make all the difference.
Works for both small backyard trees and larger landscape specimens, though severe splits in mature trees often need an arborist’s touch. Here’s how to assess, act, and avoid common mistakes that turn a fixable split into a permanent problem.
📚 In This Guide
- What you need
- Instructions
- Tips and common mistakes
- Wrapping up and next steps
What you need
- ● Safety gear: Heavy-duty work gloves (1 pair) – cut-resistant, like those rated for pruning
- ● Safety goggles (1 pair) – ANSI Z87.1 certified
- ● Ear protection (1 pair) – for chainsaw use
- ● Steel-toe or composite-toe boots (1 pair) – for stability and protection
- ● Pruning tools: Pole saw or pruning saw (1) – for high branches (20-24" blade, sharp)
- ● Hand pruners (1 pair) – for smaller cuts (bypass or anvil, 6-8" blades)
- ● Chainsaw (1) – for larger splits (14-18" bar, gas-powered for durability)
- ● Repair supplies: Tree repair clips or brackets (3-5) – stainless steel, sized to match split width
- ● Heavy-duty zip ties (10-15) – for temporary stabilization (½" width)
- ○ Tree wound dressing (1 tube) – optional but helps prevent decay
- ● Check local regulations – some areas require permits for tree work over a certain size.
- ● Assess the tree’s health – if the tree is diseased or dead, consult an arborist.
- ● Clear the work area – remove debris, pets, and bystanders within a 30-foot radius.
- ● Weather check – avoid working in wet, windy, or stormy conditions.
- ● Ladder or lift (if needed) – for high splits (extendable, 20-30 ft, rated for your weight).
How to repair a split tree with 3 strategic cuts
Here’s my go-to method for stabilizing a split tree—no heavy equipment needed.
🪴 Step 1: Assess the Split and Gather Tools
Start by examining the split carefully. Look for the exact point where the trunk or branch has separated—this is where you’ll focus your repairs. You’ll need a hand saw, pruning shears, tree repair epoxy or putty, a hammer, and a length of heavy-duty zip ties (like those used for cable management). I always wear gloves and safety glasses for this step because debris can fly unpredictably.
If the split is less than 4 inches wide, you can often repair it with just epoxy and zip ties. For wider splits, you may need to make 3 strategic cuts to redirect the tree’s growth and reduce strain. The key is to work quickly before the split worsens—especially if it’s caused by storm damage or heavy snow.
✂️ Step 2: Make the First Cut to Redirect Growth
Using your hand saw, make a shallow, angled cut (about 1/4 inch deep) on the underside of the split, starting from the outer edge and moving inward. This cut should be parallel to the split but not too deep—just enough to encourage the tree to grow in a way that closes the gap over time. Think of it like guiding a stubborn branch back into place.
Here’s the thing—this cut isn’t about removing wood, but about stress relief. The goal is to reduce the pressure pulling the split apart. If the tree is young or still flexible, you might even be able to gently press the two sides together while the epoxy holds them in place. If the split is rigid, skip pressing and focus on the next cuts.
✂️ Step 3: Make Two Additional Cuts for Structural Support
Now, make two more shallow cuts—one on each side of the split, about 2-3 inches away from the original crack. These cuts should be vertical and about 1/2 inch deep, creating small notches that will help the tree’s natural growth pattern stabilize the area. The idea is to distribute the weight so the tree doesn’t continue splitting under its own weight.
I like to visualize this like a scaffold: the notches act as supports, preventing the split from widening while the tree heals. After making these cuts, use your pruning shears to trim any loose or jagged edges—this prevents the wood from tearing further when you apply the repair materials. Smooth edges also help the epoxy bond better.
💧 Step 4: Apply Epoxy and Secure with Zip Ties
Clean the split and cuts with a damp cloth to remove dust or debris—this ensures the epoxy adheres properly. Mix the tree repair epoxy or putty according to the package instructions (usually a two-part formula that hardens when combined). Using a putty knife, apply a thick layer directly into the split, pressing firmly to fill any gaps. Let it sit for 5-10 minutes to start curing.
While the epoxy sets, wrap the area with heavy-duty zip ties, crisscrossing them over the split to add extra compression. This step is critical for trees with wide splits—it mimics the effect of a professional cable system. Don’t overtighten, though; you want to compress gently to bring the sides closer without crushing the bark. Once the epoxy is fully cured (usually 24 hours), trim any excess zip ties for a clean finish.
Tips & tricks for perfect split tree repair
Here's what I've learned after fixing splits in trees of all sizes—these tricks make all the difference.
Precision Over Speed: In Step 2, when making that shallow angled cut, I can't emphasize enough how important it is to stay patient. The 1/4-inch depth is critical—any deeper and you risk weakening the tree further. I like to use a pencil to mark my cut line first so I can visualize where to stop. Trust me, this small detail prevents bigger problems later.
Tool Selection Matters: For Step 3's vertical cuts, don't just grab any hand saw. A fine-tooth saw (around 10-12 teeth per inch) works best for clean, precise cuts. I've ruined good epoxy jobs by using a coarse saw that left jagged edges the epoxy couldn't properly seal. The pruning shears should also have sharp blades—dull ones can crush the wood fibers instead of cutting cleanly.
Epoxy Application Pro Tip: When applying the epoxy in Step 4, I've found that working in two stages gives better results. First apply a thin layer to coat the entire split, then let it sit for those 5-10 minutes before adding a thick layer. This two-step method prevents air bubbles from getting trapped deep in the split where they can weaken the repair. And always use a putty knife with a slightly rounded edge for smoother application.
Post-Repair Care: After the 24-hour curing period, don't assume your work is done. For the first year, monitor the repair site during heavy rain or snow. If you notice any loosening of the zip ties or new cracks forming, you may need to add more epoxy. I've seen perfectly repaired trees fail because homeowners didn't provide follow-up care during the critical healing period.
Pro Tips for Repair Split Tree
- Here's what I've learned after fixing splits in trees of all sizes—these tricks make all the difference.
- Precision Over Speed: In Step 2, when making that shallow angled cut, I can't emphasize enough how important it is to...
- Tool Selection Matters: For Step 3's vertical cuts, don't just grab any hand saw. A fine-tooth saw (around 10-12 teet...
Frequently asked questions
Got questions about fixing a split tree? You’re not alone! Here are answers to the most common concerns—from timing to tools and everything in between.
How soon should I repair a split tree after it happens?
A split should be addressed within 24–48 hours to prevent further damage, disease, or pest entry. If the split is fresh, the tree’s wound sealant (like pruning paste) will work better. For older splits, clean the area and apply a protective sealant to minimize decay risk.
Can I repair a split tree myself, or do I need a professional?
Minor splits (under 3–4 inches wide) can often be DIY’d with the right tools and technique. However, if the split is large, the tree is structurally compromised, or it’s near power lines/structures, call an arborist. Safety first!
How long does it take for a repaired split to heal?
Healing depends on the tree species, size of the split, and care taken. Small repairs may show improvement in 6–12 months, while larger wounds can take 2–5 years or longer. Keep the area clean, avoid over-pruning nearby, and monitor for signs of infection.
What’s the best way to clean a split before repairing it?
Use a sterilized pruning saw to trim ragged edges, then wipe the wound with a 10% bleach solution (1 part bleach to 9 parts water) or rubbing alcohol. Avoid harsh chemicals—the goal is to remove debris, not damage healthy tissue.
Will rain or snow make a split worse before I can repair it?
Moisture can temporarily worsen a split by weighing down branches or accelerating decay, but it won’t prevent repair. Focus on stabilizing the tree first (e.g., cabling for large splits) before sealing. Work in dry conditions when possible!
Pro Tip:
If the split is still bleeding sap, it’s a sign the tree is actively responding to injury—don’t panic! This is normal and indicates the tree is trying to seal the wound. Just clean and protect it as usual.
Wrapping up and next steps
Repairing a split tree might seem daunting, but with the right technique—like the three-cut method—you can restore its stability and health without stress. Remember, safety first: always use proper gear and assess the tree’s condition before starting.
Whether you’re tackling a storm-damaged limb or a weak fork, confidence and precision are your best tools. 🌳✨
Ready to take action? Gather your tools, follow the steps carefully, and give your tree the care it deserves. If the split is severe or the tree is large, don’t hesitate to call a professional arborist—your safety matters most!
Now go out there and help that tree stand tall again. 💪🌿