
Pruning
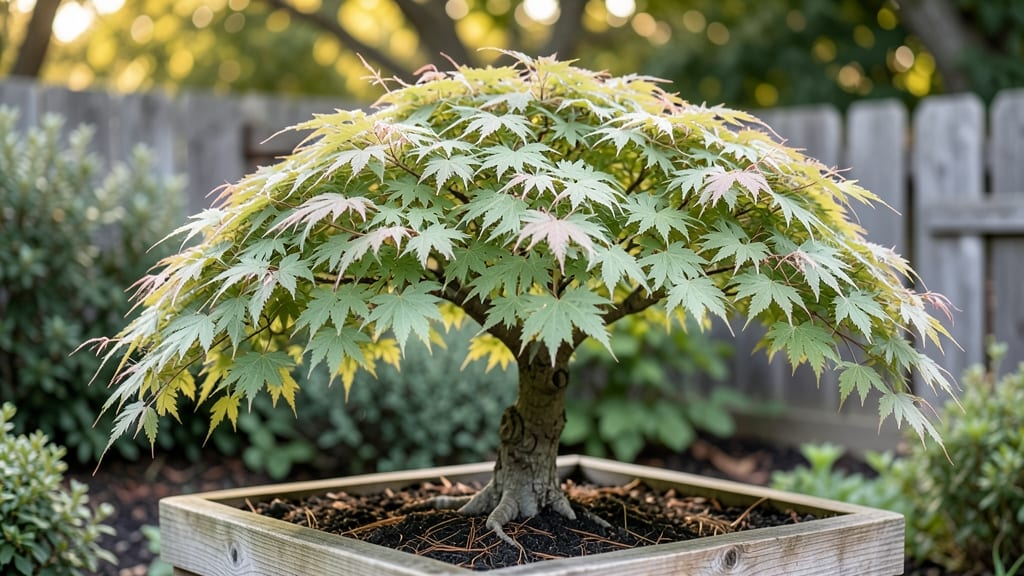
Transforming your garden into a living watercolor with the lace leaf Japanese maple tree starts with understanding its delicate, layered foliage. 🌿 This isn’t just another shade tree—it’s a masterpiece of lace-like leaves that dance in the breeze, casting dappled light like a natural stained-glass window.
The secret to its dramatic display lies in how you shape it, especially those first few pruning sessions that define its future form.
You’ll need well-draining soil, partial shade (morning sun at most), and a spot protected from harsh winds—this tree is all about finesse, not toughness. The pruning itself is less about cutting back and more about sculpting: removing dead wood, thinning crowded branches, and encouraging those signature feathered fronds to spread.
Even beginners can master this with the right tools and a light touch.
What you’ll end up with is a tree that looks like it belongs in a botanical garden, not just your backyard. The foliage turns fiery shades of orange and red in fall, and the layered branches create that coveted "fairy-tale" effect.
With proper care, it can live for decades, becoming the centerpiece of your landscape.
Works beautifully in containers for patios or as a focal point in shaded gardens. Let’s get those shears ready—your future tree’s personality starts with your first cut.
📚 In This Guide
- What you need
- Instructions
- Tips and common mistakes
- Wrapping up and next steps
What you need
- ● Pruning shears: Bypass pruners (sharp, clean, and sterilized with rubbing alcohol to prevent disease). Size: 6–8 inches for small branches.
- ● Loppers: For thicker branches (½–1½ inches in diameter). Quantity: 1 pair.
- ● Hand pruners (felco or equivalent): For precision cuts on delicate lace leaf branches. Quantity: 1 pair.
- ● Pruning saw: For branches >1½ inches thick. Type: Bow saw or curved blade.
- ● Disposable gloves: Nitrile or latex-free (to avoid sap irritation). Quantity: 1–2 pairs.
- ● Rubbing alcohol (70% isopropyl) or bleach solution (1:9 bleach-water ratio): For sterilizing tools between cuts.
- ○ Sealant (optional but recommended): Pruning sealant (e.g., Tanglefoot Tree Wound Pruning Seal) for cuts >½ inch in diameter. Quantity: Small bottle (4–8 oz).
- ● Ladder or step stool: Sturdy and tall enough to reach the tree’s canopy safely. Note: Avoid plastic stools for heavy-duty work.
- ● Bucket or trash bag: For collecting pruned branches. Size: 5-gallon capacity.
- ● Notebook & pencil: To sketch a pruning map of your tree’s structure before cutting.
- ● Extension pole pruners: For high branches (10–15 feet up). Tip: Look for ratcheting models for extra reach!
- ● Tree bandage: Soft fabric wrap (e.g., Tree Tender) for large wounds to protect from pests.
- ● Safety glasses: To shield eyes from debris.
- ● Camera or phone: Capture before/after shots of your progress!
- ● Mulch or compost: To refresh the tree’s base post-pruning.
How to shape a stunning lace leaf Japanese maple canopy
Here's the refined approach I've used to transform wild, sprawling lace leaf maples into sculpted statement trees.
🌿 Step 1: Assess Your Tree's Natural Structure
Start by examining your lace leaf's branching habit during late winter or early spring before new growth begins. Look for the tree's central leader—the strongest vertical stem—and identify the main scaffold branches that form the primary framework. These are your foundation branches and should be spaced 12-24 inches apart along the trunk.
I always sketch a rough diagram of the canopy structure on paper. This helps me visualize which branches to retain and which to remove. Pay special attention to branches that grow at 45-60 degree angles from the trunk—these will provide the best structural support. Weak, crossing, or inward-growing branches should be marked for removal.
Real talk: Don't rush this step. A lace leaf's delicate foliage responds poorly to aggressive pruning, so careful planning prevents unnecessary stress. If you're unsure about a branch's importance, leave it for now—you can always address it later.
✂️ Step 2: Remove Problem Branches First
Begin pruning in early spring, right when buds begin to swell but before leaves emerge. Start with the most obvious structural issues: branches that cross, rub against each other, or grow straight upward. These are called "water sprouts" and compete with the tree for energy.
Use sharp, clean pruning shears to make cuts just outside the branch collar—the swollen area where the branch meets the trunk. For branches larger than ½ inch thick, use a pruning saw for clean cuts. Never leave stubs—they invite disease and weaken the tree. When removing large branches, make the first cut 12-18 inches out from the trunk to control the branch's weight.
Here's the thing—lace leaf maples bleed sap heavily when pruned in spring. To minimize sap loss, apply a thin layer of pruning sealant to cuts larger than ¾ inch. I like to use a tree-specific sealant that contains mycorrhizal fungi to promote faster healing.
🌱 Step 3: Thin the Canopy for Light Penetration
Once you've addressed structural issues, move to selective thinning to improve air circulation and light penetration. Focus on the interior of the canopy where branches grow too densely. Remove about 20-30% of the foliage to open up the tree's structure—this prevents disease and encourages stronger new growth.
Look for clusters of branches where light can't reach the lower leaves. Remove the smallest branch in each cluster, cutting it back to its point of origin. This technique, called "thinning out," maintains the tree's natural shape while improving its overall health. You'll see new shoots emerge from the sides of remaining branches, creating a fuller, more layered appearance.
Don't be tempted to shear the tree into a rounded shape—lace leaf maples have a naturally graceful, layered habit. Instead, focus on creating a balanced silhouette by removing only the most obstructive branches. The goal is to preserve the tree's elegant, lace-like foliage while improving its structural integrity.
☀️ Step 4: Refine the Silhouette for Seasonal Impact
After thinning, step back and evaluate the tree's overall shape from multiple angles. In late summer or early fall, make final adjustments to enhance the tree's seasonal appeal. This is when lace leaf maples develop their stunning autumn colors, so pruning now ensures the best possible display.
Look for branches that disrupt the tree's natural taper or create an unbalanced appearance. Remove any branches that grow directly upward or outward too aggressively. These cuts should be made just above a lateral bud that faces the direction you want the branch to grow. For example, if a branch grows straight up, cut it just above a bud that points outward.
I always prune lace leaf maples in layers—starting with the largest structural changes in early spring and making finer adjustments in late summer. This gradual approach allows the tree to recover between pruning sessions and prevents shock. The result is a tree that maintains its delicate, airy foliage while developing a strong, balanced structure.
⏰ Step 5: Post-Pruning Care for Recovery
After pruning, water the tree deeply to help it recover from the stress of cutting. Apply 2-3 inches of organic mulch around the base, keeping it 6 inches away from the trunk to prevent rot. This mulch layer helps retain moisture and regulates soil temperature, which is especially important for lace leaf maples that prefer consistently moist, well-drained soil.
Monitor the tree closely for the first 2-3 weeks after pruning. Look for signs of stress, such as wilting leaves or excessive sap bleeding. If you notice any problems, reduce watering slightly and avoid fertilizing until the tree shows signs of new growth. Healthy lace leaf maples will produce fresh, vibrant foliage within 4-6 weeks of pruning.
This is the moment that matters: Patience pays off with lace leaf maples. While other trees might bounce back quickly, these beauties take their time. Resist the urge to make additional cuts during the growing season—let the tree focus on healing and producing new growth. You'll be rewarded with a stunning, layered canopy that's the envy of the neighborhood.
Tips & tricks for perfect lace leaf Japanese maple pruning
Transforming a lace leaf maple into a graceful architectural masterpiece takes precision—and these pro tips will help you avoid common pitfalls while achieving that coveted layered silhouette.
Timing Secret: The late winter to early spring window is non-negotiable for lace leaf maples. Pruning at this precise time (when buds swell but leaves haven't emerged) triggers optimal healing while minimizing stress. I've learned this the hard way—pruning too early can shock the tree, while waiting too late risks removing next year's growth. For northern climates, aim for February-March; southern regions can extend to April.
Branch Angle Intelligence: Pay close attention to those 45-60 degree angles mentioned in Step 1—they're not arbitrary! Branches growing at these angles distribute weight efficiently and create the tree's natural layered look. When evaluating branches, hold a small mirror at trunk level to check angles you can't see directly. This simple trick reveals hidden structural issues that could compromise the canopy's integrity over time.
Sap Management Strategy: Lace leaf maples bleed profusely when cut in spring, but you can minimize this mess. Before making any cut larger than ¾ inch, apply a thin layer of tree-specific sealant containing mycorrhizal fungi. I've found that applying sealant immediately after cutting (not pre-emptively) creates a better seal. For extra protection, wrap larger cuts with a strip of tree tape after sealing—this prevents sap from dripping onto the trunk below, which can attract pests.
Seasonal Layering Technique: The two-stage approach in Steps 2 and 4 works wonders, but here's the pro move: Mark your calendar for late summer (around August) to make those final silhouette adjustments. This timing ensures you're shaping the tree just before its autumn color peak. I always carry a small notebook to jot down branch locations I want to address—trust me, you'll forget half of them by summer!
Pro Tips for Lace Leaf Japanese Maple Tree
- Transforming a lace leaf maple into a graceful architectural masterpiece takes precision—and these pro tips will help you avoid common pitfalls while achieving that coveted layered silhouette.
- Timing Secret: The late winter to early spring window is non-negotiable for lace leaf maples.
- Branch Angle Intelligence: Pay close attention to those 45-60 degree angles mentioned in Step 1—they're not arbitrary!
Frequently asked questions
Got questions about keeping your lace leaf Japanese maple tree stunning with strategic pruning? Here are some common concerns—and expert answers—to help you care for this showstopper!
How often should I prune my lace leaf Japanese maple?
Prune your lace leaf Japanese maple once a year, ideally in late winter or early spring (before new growth begins). Light shaping cuts can also be done in summer after flowering, but avoid heavy pruning then—it stresses the tree. For dramatic canopy layers, focus on structural cuts in late winter and maintenance trims in summer.
Can I prune a lace leaf Japanese maple in fall?
Fall pruning is not recommended for lace leaf Japanese maples. Pruning in fall (especially late fall) can stimulate new growth that won’t harden off before winter, making the tree vulnerable to cold damage. If you must prune, do so early fall (September) for minor adjustments, but skip heavy cuts entirely.
What’s the best way to prune for a layered canopy effect?
To create stunning layers, start by removing crossing or rubbing branches at the base. Then, thin out 10–20% of the interior branches to improve airflow and light penetration. Focus on selective cuts—remove branches that grow straight up or outward to encourage a natural, tiered silhouette. Use hand pruners for small branches and loppers for thicker stems.
Why are my lace leaf Japanese maple leaves turning brown after pruning?
Brown leaves after pruning usually mean stress or over-pruning. If it’s widespread, you likely removed too much foliage at once. Japanese maples are sensitive—never cut more than 25% of the canopy in a single session. For spotty browning, check for pests (like spider mites) or fungal issues (e.g., powdery mildew). Water deeply post-pruning and avoid pruning during extreme heat.
Are there alternatives to lace leaf Japanese maple for small gardens?
Yes! If space or maintenance is a concern, consider these low-maintenance, small-tree alternatives:
For a maple-like vibe, opt for dwarf sugar maples or Japanese maple cultivars like ‘Bloodgood’ or ‘Shishigashira’, which are hardier and slightly easier to maintain.
Wrapping up and next steps
The lace leaf Japanese maple is a stunning addition to any garden, and with the right pruning techniques, you can enhance its natural beauty while ensuring its health. By understanding the when, how, and why behind strategic cuts, you’ll create a dramatic, layered canopy that thrives for years.
Now that you’re armed with expert tips, grab your pruners and get ready to transform your tree into a breathtaking focal point!
🌿 Next step: Schedule your first pruning session in early spring—your lace leaf Japanese maple will thank you with vibrant, cascading foliage! 🌸