
Pruning
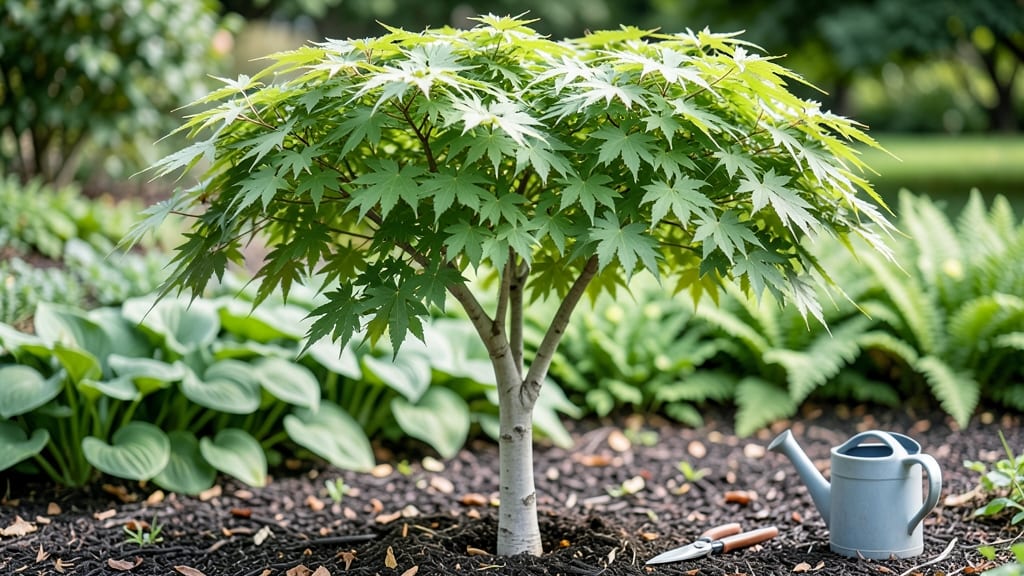
The green leaf maple tree transforms any garden into a living painting with its vibrant, lacy foliage and graceful branches.
I’ve grown mine for five years, and every winter pruning session reveals just how much stronger the tree becomes—its sap flows more freely, and new growth emerges even more lush the following spring.
This tree thrives in partial shade to full sun and tolerates a variety of soils, though it prefers well-draining earth. Plant it in early spring or fall, spacing saplings 15-20 feet apart to give roots room to establish.
The key to keeping it healthy lies in dormant-season pruning, which encourages vigorous growth and prevents disease by removing dead or crossing branches.
By late winter, you’ll see the difference: fresh, bright green leaves unfurling earlier than ever, and a canopy that stays dense and full. The tree’s ornamental value skyrockets when pruned correctly—think of it as sculpting a living work of art.
Just avoid heavy pruning in summer, or you’ll stress the tree when it needs energy for new growth.
Whether you’re shaping it as a standalone specimen or using it to frame a garden path, this maple delivers year-round interest. Start with the basics, and you’ll have a tree that’s both a joy to maintain and the envy of the neighborhood. Let’s get those pruners ready!
📚 In This Guide
- What you need
- Instructions
- Tips and common mistakes
- Wrapping up and next steps
What you need
- ● Pruning shears: Bypass pruners (for cuts up to ½ inch in diameter) – 1 pair (sharp, high-quality, like Felco or Fiskars).
- ● Loppers: For thicker branches (½ to 1½ inches) – 1 pair (with a long handle for reach).
- ● Pruning saw: For branches over 1½ inches – 1 saw (bow or pruning saw with a fine-tooth blade).
- ● Gloves: Heavy-duty gardening gloves (cut-resistant, like Mechanix or Dr. McGill’s) – 1 pair.
- ● Disinfectant: 70% isopropyl alcohol or a pruning sealant (like Tanglefoot Tree Wound Pruning Seal) – small bottle.
- ● Ladder: Sturdy extension ladder (if tree is over 6 feet tall) – 1 ladder (with non-slip feet).
- ● Heavy-duty trash bags: For collecting debris – 2-3 bags.
- ○ Sharpie or marker: For labeling cuts (optional but helpful) – 1 marker.
- ● Safety goggles: To protect eyes from debris.
- ● Pole saw: For high branches (if you don’t want to climb).
- ● Tree wound paint: Controversial but some swear by it for large cuts.
- ● Work apron: To keep tools and debris contained.
- ● First-aid kit: Just in case (pruning can be tricky!).
Step-by-Step guide to dormant season pruning for green leaf maples
Here's how I prepare my maples for spring—clean cuts and strategic shaping make all the difference.
Choose the Right Time and Tools
Prune your green leaf maple during dormant season, ideally between late fall and early spring when the tree isn’t actively growing. This timing minimizes stress and reduces disease risk. I always use sharp, clean pruning shears—dull blades tear bark and invite infections. For branches thicker than ½ inch, I switch to a pruning saw to avoid crushing the wood.
Gather your tools the night before to avoid rushing. A ladder (if needed) and gloves are essential. I also keep a disinfectant spray handy to clean tools between cuts—this prevents spreading fungal spores from one branch to another. Work on a dry day when temperatures are above 40°F to avoid sap freezing in the cuts.
Identify and Remove Dead or Diseased Branches
Start by scanning the tree for dead, broken, or diseased branches. These are easy to spot—they’ll be brown, brittle, or missing leaves, and they often have peeling bark or fungal growth. Remove these first, cutting just outside the branch collar (the swollen area where the branch meets the trunk). This ensures the tree can seal the wound properly.
If a branch is diseased, bag and dispose of it immediately—don’t leave it on the ground near the tree. I like to make my cuts at a 45-degree angle for branches thicker than 1 inch, which helps water shed away from the wound. For smaller branches, a straight cut works fine. Always prune back to a healthy bud or lateral branch to encourage proper regrowth.
Thin the Canopy for Better Airflow and Light
Next, focus on thinning the canopy to improve airflow and sunlight penetration. Look for branches that cross or rub against each other—these will eventually damage each other and create entry points for pests. I aim to remove no more than 20-25% of the tree’s foliage in one season to avoid overstressing it. For every branch I remove, I check if it’s vital for the tree’s structure or if it’s just adding density.
When thinning, I prioritize removing smaller branches first to open up the canopy gradually. This prevents sudden shock to the tree. If you’re unsure whether a branch is necessary, I recommend waiting a year and reassessing—sometimes trees adjust better than we expect. Always make cuts just outside a lateral branch or bud to encourage new growth in the right direction.
Shape for Balance and Structure
Now, it’s time to shape the tree for a balanced, natural look. Green leaf maples have a v-shaped growth habit, so I focus on maintaining that form while removing any suckers or water sprouts (fast-growing, vertical shoots that weaken the tree). Use your hand as a guide—if a branch is growing straight up or outward, it might need trimming to encourage a more open, spreading shape.
For larger branches, I use the three-cut method to avoid tearing the bark: First, make an undercut about 12-18 inches out from the trunk, then a top cut just beyond that, and finally remove the branch by twisting it outward. This prevents the weight of the branch from splitting the trunk. Step back often to check the tree’s balance—you want a symmetrical, open canopy that lets light reach the lower branches.
Clean Up and Monitor for Recovery
After pruning, remove all debris from the ground around the tree to prevent pests and diseases from taking hold. I also disinfect my tools again to ensure no pathogens remain. Water the base of the tree deeply to help it recover, especially if the pruning was extensive. Over the next few weeks, keep an eye out for new growth—this is a sign the tree is healing well.
If you notice yellowing leaves, oozing sap, or excessive wilting, the tree might be struggling. In this case, reduce watering slightly and monitor for pests. Most maples bounce back quickly, but if you’re unsure, a light application of fungicide can help prevent infections. By next spring, your tree should be stronger, with better sap flow and healthier foliage—that’s the reward of a job well done.
Tips & tricks for perfect green leaf maple pruning
Common pitfalls—and how to sidestep every one—when preparing your green leaf maple for spring growth.
Tool Prep Matters: I can't stress enough how important it is to sharpen your pruning shears before you start. Dull blades don't just make cutting harder—they tear bark and create jagged wounds that take longer to heal. For branches thicker than ½ inch, invest in a good pruning saw with a fine-tooth blade to avoid crushing the wood. I like to test my tools by cutting through a small branch—if it feels like you're pushing through wet paper, it's time to sharpen.
Branch Angle Secrets: That 45-degree angle for branches thicker than 1 inch isn't just random—it helps water shed away from the wound, reducing the risk of rot. For smaller branches, a straight cut works better because it creates a cleaner seal. Here's what I do: I use a small notched stick to mark my angle before making the cut. This ensures consistency every time, especially when you're working high up in the tree.
Canopy Thinning Strategy: When you're thinning the canopy in Step 3, remember that 20-25% limit is your safety net. Removing too much at once stresses the tree and can lead to poor sap flow next season. I like to think of it like giving my tree a haircut—you wouldn't shave someone's head bald in one visit! Start with the smaller branches on the outer edges first, then work your way inward. This gradual approach lets the tree adjust better.
Recovery Monitoring: After pruning, keep an eye out for those first signs of new growth—it's your best indicator that everything's healing properly. I've learned that yellowing leaves in the first few weeks aren't always cause for alarm, especially if the rest of the tree looks healthy. The key is to watch for patterns: if you see consistent yellowing across multiple branches, that's when you should investigate further. Most importantly, don't overwater during this recovery period—green leaf maples are surprisingly drought-tolerant once established.
Pro Tips for Green Leaf Maple Tree
- Common pitfalls—and how to sidestep every one—when preparing your green leaf maple for spring growth.
- Tool Prep Matters: I can't stress enough how important it is to sharpen your pruning shears before you start.
- Branch Angle Secrets: That 45-degree angle for branches thicker than 1 inch isn't just random—it helps water shed away from the wound, reducing the risk of rot.
Frequently asked questions
Got questions about nurturing your green leaf maple tree during dormant season pruning? You’re not alone! Here are answers to the most common queries—so you can prune with confidence and keep your tree thriving.
When is the best time to prune a green leaf maple?
The ideal window is late winter to early spring (before buds swell) or late fall (after leaves drop). Pruning during dormancy minimizes stress and prevents disease entry. Avoid pruning during extreme cold or heat—aim for temperatures between 30°F and 50°F for optimal healing.
How much can I trim off without harming the tree?
Remove no more than 25% of the tree’s canopy in a single pruning session. Focus on dead, diseased, or crossing branches first. For young trees, light pruning (5–10%) encourages strong growth. Over-pruning weakens sap flow—patience is key!
What if my cuts bleed sap heavily?
Sap bleeding is normal but can attract pests. Seal cuts larger than ½-inch with pruning sealant (like Tanglefoot Tree Wound Pruning Seal) to reduce moisture loss. For small cuts, let them air-dry—they’ll heal faster. Avoid painting healthy bark, as it traps moisture and promotes rot.
Can I prune a green leaf maple in summer?
Summer pruning is possible but riskier. If you must, do it in early summer (June) and limit cuts to 10% of the canopy. Heavy summer pruning stresses the tree, weakens sap flow, and invites pests. Save major work for dormancy—your tree will thank you!
What should I do if my tree’s leaves turn yellow after pruning?
Yellowing leaves post-pruning often signal stress, but it’s usually temporary. Ensure the tree gets consistent watering (1–2 inches per week) and monitor for pests. If yellowing persists or spreads, check for fungal issues (like verticillium wilt) and adjust care accordingly.
Wrapping up and next steps
The green leaf maple tree thrives with the right dormant-season pruning care—removing dead branches, shaping growth, and boosting sap flow for vibrant foliage.
By following these steps, you’ll ensure a healthier tree that stands strong for seasons to come. Now’s your chance to roll up your sleeves and give your maple the love it deserves!
🌱 Next Steps:
- Mark your calendar for late winter/early spring (just before buds swell) to prune.
- Grab your tools and review the checklist—you’ve got this!
- Share your progress with fellow gardeners or tag us in your photos! 📸