
Trees
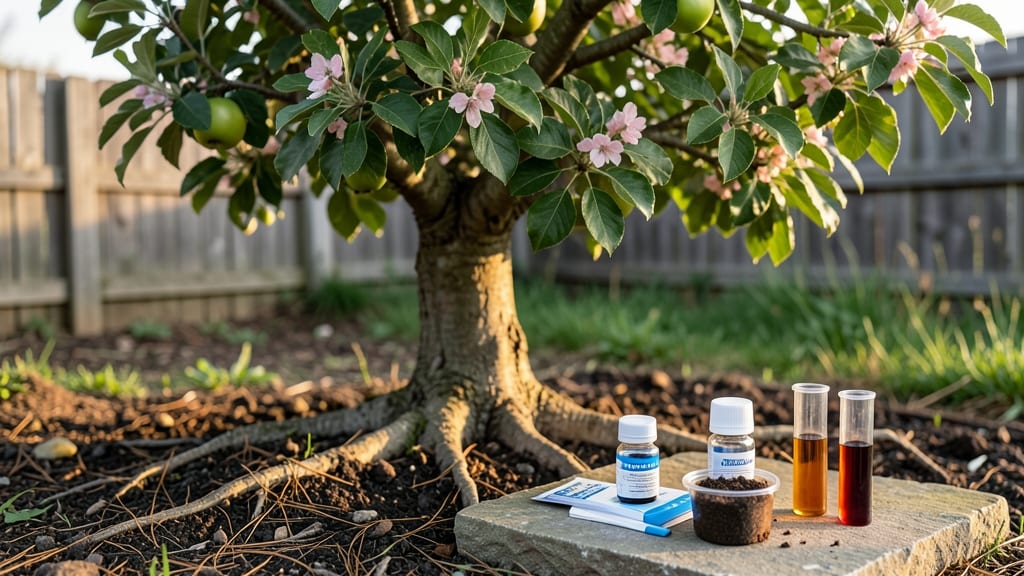
Soil testing for fruit trees isn’t just smart—it’s the difference between a thriving orchard and a struggling one that never produces. 🌳 I learned this the hard way when my peach tree’s leaves turned yellow despite regular watering, only to discover the soil was locked in iron deficiency—a problem invisible until tested.
The good news? You don’t need a fancy lab to start. A basic DIY soil test kit (around $20) reveals pH and major nutrients like nitrogen, phosphorus, and potassium in 24 hours, while lab tests (about $50) give deeper insights into micronutrients and organic matter.
Both methods are worth it—especially since fruit trees demand specific soil conditions to bear fruit reliably.
Once you get results, you’ll know exactly what to amend: lime for high-acid soils, compost for organic matter, or sulfur to lower pH. My apple trees, for example, now produce twice as many blossoms after adjusting pH from 5.8 to 6.5—proof that small tweaks make a huge difference.
The best time to test? Early spring, before planting or fertilizing.
Common pitfalls? Testing too late in the season or ignoring texture and drainage. Sandy soil drains too fast; clay holds water like a sponge. Both need organic matter to support root health. With the right adjustments, your fruit trees won’t just survive—they’ll flourish.
📚 In This Guide
- What you need
- Instructions
- Tips and common mistakes
- Wrapping up and next steps
What you need
- ● Soil testing kit: A DIY home test kit (e.g., Luster Leaf or MySoil) or a professional lab kit (like those from University Extension Services). Quantity: 1 kit per test (or bulk if testing multiple spots).
- ● Sampling tools: A clean trowel or soil probe (6–12 inches long).
- ● A sterilized bucket (5-gallon, plastic) for soil collection.
- ● Gloves: Nitrile or rubber gloves (to keep hands clean and safe). Quantity: 1–2 pairs.
- ● Labeling supplies: Permanent markers or waterproof tags (to mark samples).
- ● Small bags or containers (for individual samples if not using the kit’s packaging).
- ○ pH testing kit (optional): A separate pH meter or strips for quick checks before full testing. Quantity: 1.
- ● 💡 Know your fruit tree’s needs: Research ideal pH (e.g., blueberries love 4.5–5.5, while peaches thrive at 6.0–7.0) and nutrient preferences.
- ● ✨ Test timing: Conduct tests in early spring or fall (avoid testing right after fertilizing or heavy rain).
- ● 📏 Sample depth: Collect soil from 6–12 inches deep (where roots actively grow).
- ● 🌡️ Weather prep: Test on a dry, non-frosty day—wet soil skews results!
Step-by-Step guide to testing soil for fruit tree planting
Here's how to uncover what your soil really needs before fruit trees go in.
🌱 Step 1: Collect Representative Soil Samples
Use a clean trowel or auger to collect samples from 6-8 inches deep—this is where roots will grow. Take at least 10-15 samples across your planting area, spacing them 10-15 feet apart in a grid pattern. Avoid areas with fresh compost, mulch, or surface debris, as these can skew results. Mix all samples together in a clean bucket to create a composite sample.
Here's the thing—surface soil often shows different pH and nutrient levels than deeper layers. If you only test the top inch, you might miss critical deficiencies that will stunt root growth. I like to collect samples on a dry day when the soil isn't too wet, as moisture can affect how easily you can take clean cores.
💧 Step 2: Prepare and Send Samples to a Lab
Air-dry your composite sample for 2-3 days in a well-ventilated area, then break it into small pieces with your hands or a mortar and pestle. Remove any remaining rocks, roots, or debris—these can interfere with testing accuracy. Most reputable labs require about 1-2 cups of dried soil per test.
When selecting a lab, look for one accredited by the American Society of Agronomy. They'll test for pH, organic matter, nitrogen, phosphorus, potassium, calcium, magnesium, and micronutrients like iron and zinc. Some labs offer extended tests for salinity or heavy metals if your area has known contamination. Fill out the lab form carefully—note your intended use (fruit trees) and any specific concerns, like poor drainage or past plant failures.
☀️ Step 3: Interpret Results and Amend Soil Accordingly
Your report will show current pH and nutrient levels alongside recommended ranges for fruit trees. For most fruit trees, the ideal pH is between 6.0-7.0. If your soil tests below 5.5, you'll need to raise the pH with lime; above 7.5, sulfur will help lower it. For nutrients, focus first on phosphorus and potassium—these are often the first to run low in fruit tree soils.
Don't panic if results show deficiencies. For example, low magnesium might mean adding Epsom salt (magnesium sulfate) at 1 pound per 100 square feet, while low nitrogen could be addressed with compost or a slow-release fertilizer. I always make amendments 3-4 months before planting to let them fully integrate into the soil profile.
⏰ Step 4: Monitor and Retest After Amendments
After applying amendments, wait 2-3 months before planting. This gives soil microbes time to break down organic matter and redistribute nutrients. Retest soil in the planting zone just before you set your fruit trees. This second test confirms whether your amendments worked or if further adjustments are needed.
Real talk: I've seen cases where soil tests showed "perfect" levels, but trees still struggled because nutrients weren't available in the root zone. That's why I always dig a small hole, add a handful of compost, and mix it with the native soil during planting—it creates a nutrient-rich zone right where the roots will grow.
Tips & tricks for perfect soil testing for fruit trees
These tried-and-true strategies will help you get the most accurate soil analysis possible for your future fruit orchard.
Sampling Depth Matters: The 6-8 inch depth specified in Step 1 is critical because that's where most fruit tree roots will establish themselves. If you collect shallower samples, you might miss deeper nutrient deficiencies that could become problematic later. I've seen cases where surface tests showed adequate phosphorus, but deeper layers revealed severe depletion—this would have caused poor root development if unnoticed. Use a clean auger or trowel to ensure you're getting consistent depth throughout your sample collection.
Composite Sample Technique: Creating a composite sample by mixing 10-15 individual samples across your planting area gives you a true representation of your soil's overall health. Don't just grab soil from one spot—variations in moisture, organic matter, and compaction can create false readings. After collecting, spread the mixed sample on a clean tarp to air-dry naturally. This prevents clumping that can interfere with lab accuracy, and the 2-3 day drying period ensures consistent results across all samples.
Lab Selection Wisdom: When choosing a lab accredited by the American Society of Agronomy, ask specifically about their testing protocols for fruit tree soils. Some labs use different extraction methods that may not accurately reflect nutrient availability to tree roots. I always request the Mehlich-3 test for phosphorus and potassium—it's the gold standard for horticultural crops. Also specify that you're testing for fruit trees, not vegetables or lawns, as nutrient requirements differ significantly.
Interpretation Insight: The ideal pH range of 6.0-7.0 for fruit trees might seem broad, but don't get complacent if your soil tests at 6.5. Even small deviations can affect nutrient uptake. For example, at pH 6.0, phosphorus becomes less available, while at pH 7.0, iron and manganese may become deficient. Always cross-reference your pH results with the specific nutrient levels—some trees like blueberries thrive at lower pH, while most stone fruits prefer the neutral range. The 3-4 month amendment window before planting gives you time to adjust pH and incorporate organic matter properly.
Pro Tips for Soil Testing For Fruit Trees
- These tried-and-true strategies will help you get the most accurate soil analysis possible for your future fruit orchard.
- Sampling Depth Matters: The 6-8 inch depth specified in Step 1 is critical because that's where most fruit tree roots will establish themselves.
- Composite Sample Technique: Creating a composite sample by mixing 10-15 individual samples across your planting area gives you a true representation of your soil's overall health.
Frequently asked questions
Got questions about soil testing for your fruit trees? You’re not alone! Here are some of the most common concerns—and straightforward answers—to help you get started with confidence.
How often should I test my soil for fruit trees?
Test your soil every 2–3 years for established trees, or right before planting new ones. Young fruit trees (under 5 years) may need testing annually if the soil looks depleted or growth is stunted. Seasonal changes (like heavy rains or drought) can also disrupt nutrient balance, so don’t hesitate to retest if you notice yellowing leaves or poor fruit production.
Can I skip soil testing and just use generic fertilizer?
While generic fertilizers can help, they’re not a substitute for testing. Soil pH and nutrient levels vary wildly—what works for one tree might harm another. For example, blueberries need acidic soil (pH 4.5–5.5), while peaches thrive in slightly alkaline conditions (pH 6.0–6.5). Testing ensures you’re addressing specific deficiencies (like potassium or magnesium) without overdoing it.
What’s the best time of year to test soil for fruit trees?
Test in early spring (March–April) or early fall (September–October), when the ground is workable but not frozen. Avoid testing after heavy rain or right before a drought—moisture levels can skew results. Pro tip: Test before planting if you’re introducing new trees, as soil amendments (like lime or compost) take time to integrate.
My soil test shows “normal” levels, but my fruit tree still looks unhealthy. What’s wrong?
“Normal” doesn’t always mean optimal for fruit trees! Check for:
- Micronutrient imbalances: Even trace elements (like zinc or iron) can cause leaf discoloration.
- Soil compaction: Roots may struggle to absorb nutrients if the soil is too dense.
- pH issues: A “normal” pH of 6.5 might be too high for blueberries or blackberries.
- Pests or disease: Galls, borers, or fungal infections can mimic nutrient deficiencies.
What’s a quick DIY alternative if I can’t send a sample to a lab?
For a low-cost, no-lab check, try these:
- pH strips: Dip strips in moist soil, then compare to the color chart (aim for 6.0–7.0 for most fruit trees).
- Visual soil texture test: Grab a handful—if it crumbles easily, it’s likely sandy (drainage-heavy); if it sticks, it’s clay (waterlogged).
- Leaf analysis: Send a recently matured leaf (not new growth) to a lab for nutrient breakdown.
Wrapping up and next steps
Soil testing for fruit trees isn’t just a step—it’s your secret weapon for thriving harvests! 🌱 By understanding your soil’s pH, nutrients, and texture, you’ll avoid costly mistakes and give your trees the perfect foundation to grow strong. Now’s the time to act: grab that sample, send it off, and use the results to plan your planting like a pro!
Next up: Dive into interpreting your soil report or explore organic amendments to boost your fruit tree’s success. Your future orchard starts with one simple test—don’t wait!