
Pruning
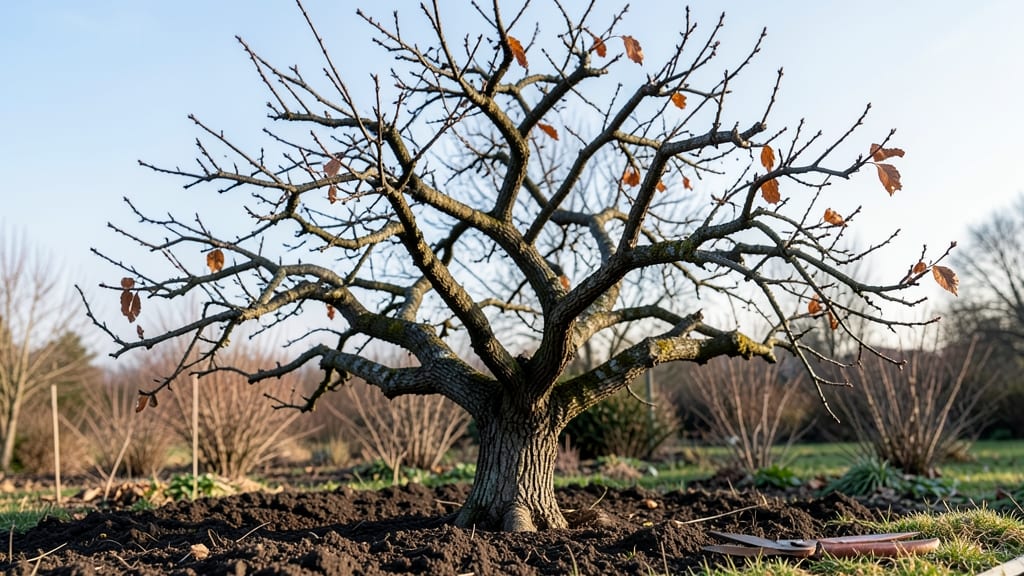
Winter is the perfect time to prune apple trees for a spring fruit explosion—when branches are bare, you can see the tree’s structure like never before. 🌳 I’ve pruned dozens of apple trees, and the difference between a well-pruned tree and one left to its own devices is night and day.
A single winter session sets the stage for stronger growth, better airflow, and more fruit next season.
The key is making just three strategic cuts: removing dead or crossing branches, thinning out crowded limbs, and shaping the tree for sunlight access. You’ll need sharp pruners, rubbing alcohol for sterilizing cuts, and a clear day when temps are above freezing.
It takes about 30 minutes per tree, and the payoff is a canopy that produces fruit efficiently instead of struggling with overcrowding.
What you end up with is a tree that wakes up in spring ready to burst with new leaves and blossoms. The fruit that follows is larger, sweeter, and more abundant because the tree isn’t wasting energy on weak growth.
Plus, proper pruning now reduces the risk of disease and pests taking hold when the tree is most vulnerable.
Works for young trees, mature orchards, and even container-grown apple varieties. The same principles apply whether you’re trimming a single branch or reshaping the whole tree. Let’s get those pruners sharp and make this winter’s cuts count!
📚 In This Guide
- What you need
- Instructions
- Tips and common mistakes
- Wrapping up and next steps
What you need
- ● Pruning shears: Bypass pruners (for cuts up to ¾ inch in diameter) – look for sharp, rust-resistant blades.
- ● Loppers: For thicker branches (1–2 inches) – choose bypass loppers for cleaner cuts.
- ● Pruning saw: For branches over 2 inches – a curved-tooth saw prevents tearing.
- ● Gloves: Heavy-duty, cut-resistant gloves (e.g., leather or synthetic mesh).
- ○ Disinfectant: 70% isopropyl alcohol or a pruning sealant (optional but recommended to prevent disease spread).
- ● Tarp or drop cloth: To collect debris (1–2 large sheets).
- ● Ladder: Extendable or sturdy step ladder (if tree is over 6 feet tall).
- ● Notebook & pen: To sketch your pruning plan or jot down notes.
- ● Pruning paint/sealant: For large wounds (to reduce sap loss and disease risk).
- ● Tree wound dressing: Skip this! Modern research shows it’s unnecessary—just clean cuts heal best.
- ● Work gloves with grip: For extra comfort on slippery branches.
- ● Safety goggles: To protect against debris (especially if sawing).
- ● Pruning rope: For temporary support if removing large branches.
How to prune an apple tree in winter for a bountiful spring
Winter's the perfect time to shape your apple tree—here's how to make clean cuts that set up next year's harvest.
✂️ Step 1: Remove Dead, Diseased, or Crossing Branches First
Start by scanning the tree for branches that are completely dead (no green bark when scratched), diseased (mushrooms at base, oozing sap), or crossing (rubbing against others). These are your top priority—they won't produce fruit and can spread problems. Grab your pruning saw for anything thicker than your wrist and loppers for medium branches.
Make your cuts just outside the branch collar (that swollen area where the branch meets the trunk). Don't leave stubs—this invites rot. If a branch is diseased, sterilize your tools with rubbing alcohol between cuts. You'll know you're doing it right when the tree looks instantly lighter and more open to sunlight.
✂️ Step 2: Thin the Canopy to Improve Airflow and Light
Now focus on thinning—removing branches that are growing inward or too close together. Aim to let light reach the center of the tree where fruit forms. I like to step back and visualize the tree as an open umbrella. Remove about 20% of the smaller branches first, working from the outside in. This prevents over-pruning, which stresses the tree.
Look for branches that are growing straight up from the trunk—these compete with the main scaffold branches and should come out. You'll see a difference immediately as you create that classic apple tree shape with a strong central leader and well-spaced branches. The goal is sunlight reaching all the way to the center where next year's blossoms will form.
✂️ Step 3: Shape the Tree for Optimal Fruit Production
Now it's time for structural shaping. Focus on maintaining that open center by removing branches that grow directly upward from the main trunk (called "water sprouts"). These steal energy from fruit production. Also look for branches that form narrow V-shaped crotches with other branches—these are weak points that can split under fruit weight.
Make your final cuts just above an outward-facing bud. You'll know you've done it right when the tree's framework looks strong and balanced. The outer branches should form a gradual slope, not a sharp angle. This shape catches sunlight and rain efficiently while keeping the center open for airflow—critical for preventing fungal diseases like apple scab.
⏰ Step 4: Clean Up and Protect Your Tree
After pruning, gather all the debris and remove it from the area. Leaving branches on the ground creates hiding spots for pests and disease spores. Now's also the time to apply a fresh layer of mulch (about 2-3 inches deep) around the base, keeping it several inches away from the trunk. This protects roots from freezing and retains moisture.
Give the pruned tree a final check for any remaining dead wood or weak spots. If you see any severe damage, consider applying a thin layer of tree wound dressing (like horticultural sealant) to larger cuts over 2 inches in diameter. This helps prevent disease entry points. Your tree will thank you with vigorous new growth come spring.
Tips & tricks for perfect apple tree pruning in winter
Winter pruning sets the stage for next year's harvest—here's how to avoid common mistakes and maximize fruit production.
Tool Selection Tip: The right tools make all the difference. For branches thicker than your wrist, use a pruning saw—it gives you clean cuts without tearing the bark. For medium branches, loppers work best, but make sure they're sharp. I learned this the hard way after struggling with dull tools that crushed branches instead of making clean cuts. Always sterilize your tools with rubbing alcohol between cuts on diseased branches to prevent spreading pathogens.
Branch Collar Technique: In Step 1, when making cuts just outside the branch collar, think of it as creating a natural bandage. The collar is that swollen area where the branch meets the trunk, and it's packed with healing cells. Cutting too close leaves a stub that collects moisture and invites rot. If you accidentally cut too far, don't worry—just make another cut in the right place. The tree will thank you with faster healing and better fruit production next season.
Visual Pruning Strategy: Step back and visualize your tree as an open umbrella during Step 2. This helps you see where light needs to reach the center. Remove about 20% of smaller branches first—this prevents over-pruning while still improving airflow. I like to start with the branches growing straight up from the trunk (water sprouts) since they compete with fruit-bearing branches. The goal is sunlight reaching all the way to the center where next year's blossoms will form.
Mulching Depth: When applying that 2-3 inch layer of mulch in Step 4, keep it several inches away from the trunk. This prevents moisture buildup that can cause rot. I've seen people pile mulch right against the trunk, thinking it's helping, but it actually creates the perfect conditions for disease. Think of it like creating a donut shape around the base—wide enough to protect roots but with an open center for airflow.
Pro Tips for Apple Tree In Winter
- Winter pruning sets the stage for next year's harvest—here's how to avoid common mistakes and maximize fruit production.
- Tool Selection Tip: The right tools make all the difference.
- Branch Collar Technique: In Step 1, when making cuts just outside the branch collar, think of it as creating a natural bandage.
Frequently asked questions
Why should I prune my apple tree in winter instead of other seasons?
Winter is the ideal time because the tree is dormant, making it easier to see the branch structure and identify dead, diseased, or crossing branches. Plus, fewer pests and milder temperatures reduce stress on the tree. Pruning in late winter (just before bud break) ensures your cuts heal faster come spring.
What’s the best time of winter to prune my apple tree?
Aim for late winter—typically February or early March—when temperatures are above freezing but buds haven’t swollen yet. This timing balances safety (avoiding frost damage) and preparation for spring’s growth surge. Check your local frost dates for precision!
How do I know which branches to cut? What are the “3 key cuts”?
The three critical cuts are:
- Dead or diseased branches: Remove these first—they drain energy and risk spreading illness.
- Crossing/rubbing branches: Trim branches that intersect to prevent wounds and improve airflow.
- Suckers and water sprouts: Cut these fast-growing, vertical shoots to redirect energy to fruit production.
Pro tip: Look for branches growing inward or downward—they’re often candidates for removal.
What if I accidentally cut too much? Can I fix it?
Don’t panic! Apple trees are resilient, but avoid removing more than 25% of the canopy in one year. If you over-prune, focus on light maintenance the next season and fertilize to boost recovery. Young trees handle pruning better—go easy if your tree is under 5 years old!
Can I prune an apple tree in winter if it’s in a cold climate (e.g., Zone 4 or lower)?
Yes! Cold climates actually benefit from winter pruning—just wait until after the worst frost (usually late February or March). Use sharp tools to make clean cuts, and seal larger wounds with pruning sealant if needed. Never prune in extreme cold or during a thaw/freeze cycle.
Do I need special tools for winter pruning?
Basic tools suffice: a sharp bypass pruner (for small branches), loppers (for medium-sized cuts), and a pruning saw (for thick branches). Sterilize tools with rubbing alcohol between cuts to prevent disease spread. Pro tip: Wear gloves—apple tree branches can be spiky!
Wrapping up and next steps
Winter is the perfect time to shape your apple tree’s future! By mastering just three key cuts—opening the center, thinning crowded branches, and removing deadwood—you’ll set the stage for a bountiful spring harvest 🌱.
Remember, sharp tools, clean cuts, and a patient hand are your best allies. Now that you’re armed with the know-how, grab your pruners and give your tree the TLC it deserves.
💡 Next step: Schedule your pruning on a dry, calm day and take before-and-after photos to track your tree’s progress. Happy pruning—your future orchard awaits! 🍏✨