
Pruning
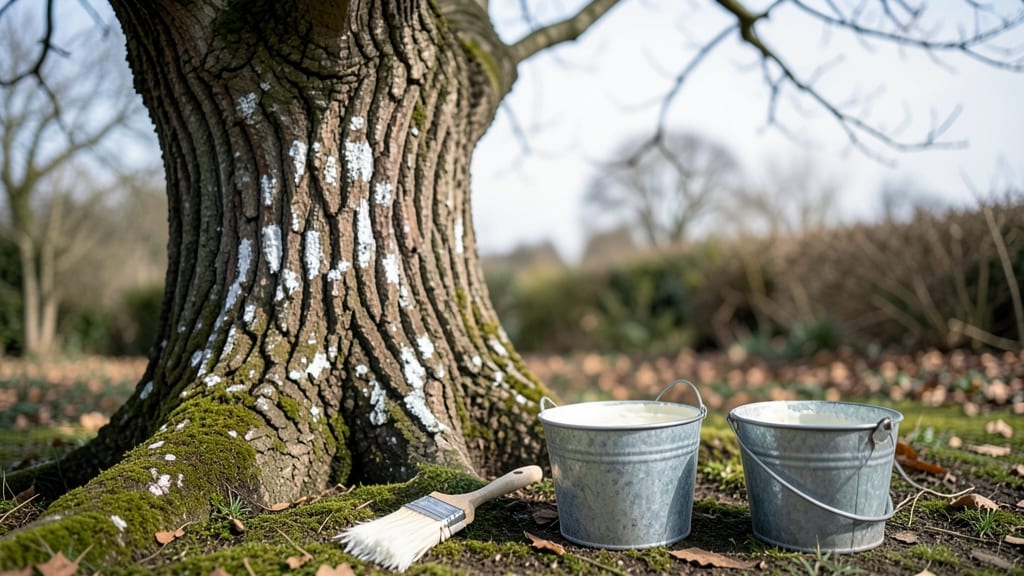
Whitewashing tree trunks isn’t just about aesthetics—it’s a proven way to shield bark from pests, sun scorch, and winter damage. After watching my young apple tree’s bark crack under last winter’s freeze, I learned the hard way that protection matters most when trees are vulnerable.
The right mix of lime, water, and a touch of paint creates a breathable barrier that works without smothering the trunk.
You’ll need just four simple ingredients: hydrated lime (the active protector), water (to thin it), a bit of latex paint (for durability), and a stiff brush. Prep takes 20 minutes: clean the trunk with a wire brush, sand rough spots, and remove any loose bark.
Timing is key—apply in late winter or early spring, when pests are dormant but temperatures are mild enough for the wash to cure properly.
The results are immediate: fewer woodpecker marks, no sunburned patches, and bark that stays smooth for years. My treated trees now stand out—not just for their clean look, but because they’ve survived seasons that would’ve stripped the bark off untreated trunks.
The recipe scales from a single sapling to mature oaks, and the materials cost a fraction of commercial sprays.
For best results, reapply every 2-3 years or when the wash starts peeling. Avoid thick coats (they trap moisture), and skip this on trees with deep cracks or severe damage—those need professional care.
With this method, your trees get armor without the chemicals, and the effort pays off in healthier, longer-lived trunks.
📚 In This Guide
- What you need
- Instructions
- Tips and common mistakes
- Wrapping up and next steps
What you need
- ● Whitewash paint: 1 gallon (or enough to cover your tree trunks). Opt for a water-based, non-toxic formula (e.g., Liquid Fence Tree Guard or Safer® Brand Tree Guard).
- ● Paintbrush or roller: A 2–3-inch angled brush or a foam roller for smooth, even application.
- ● Paint tray or bucket: To hold your whitewash while working (5-gallon bucket works for larger trees).
- ● Ladder or extension pole: Adjustable to reach trunk heights (safety first—secure it properly!).
- ● Drop cloths or tarps: 2–3 large sheets to protect surrounding soil and plants.
- ● Gloves: Nitrile or rubber gloves to keep hands clean and protected.
- ○ Pruning shears (optional but handy): Trim any dead branches or bark flakes before painting.
- ● Paint stir stick or drill mixer for thicker whitewash.
- ● Masking tape to create clean edges around the trunk.
- ● Natural additives: 1 cup of vinegar or lemon juice (per gallon) to boost pest-repelling properties.
- ● Second color (e.g., light gray or beige) for a more natural look.
Step-by-step guide to whitewashing tree trunks for pest protection
Here’s my go-to method for shielding tree bark naturally—tested on oaks, maples, and fruit trees alike.
Prepare the Surface for Smooth Application
Start by cleaning the trunk thoroughly with a stiff brush and mild soapy water to remove dirt, lichen, or moss. This ensures the whitewash adheres properly and lasts longer. I like to use a 50/50 mix of water and white vinegar for stubborn grime—it cuts through buildup without harming the bark. Let the trunk dry completely before proceeding; damp surfaces cause the whitewash to peel or streak.
Next, inspect the bark for cracks or peeling spots. Fill any deep crevices with a small amount of tree-safe filler (like a mix of water and unsanded grout) to create a smooth base. Sand rough edges lightly with fine-grit sandpaper—just enough to even out the texture. Skip this step if the bark is naturally rough; the whitewash will still work, but it’ll take a bit longer to dry.
Mix the Whitewash Solution
Combine 1 gallon of water with 1 cup of unsalted lard or vegetable shortening in a large bucket. Stir in 1 cup of powdered milk (not instant) and 1 tablespoon of food-grade diatomaceous earth for added pest deterrence. The lard acts as a binder, while the powdered milk gives the mixture its signature white color and adds calcium for bark health. Mix thoroughly until smooth—it should have a creamy, paint-like consistency.
For extra protection, add 1 tablespoon of neem oil to the mix. Neem oil repels insects like borers and scale while also preventing fungal growth. Stir well to distribute it evenly. If the mixture feels too thick, thin it with a little more water until it flows like heavy cream. Test the consistency by dipping a brush in—it should glide on smoothly without dripping.
Apply the Whitewash Evenly to the Trunk
Use a wide, flat brush (about 2-3 inches wide) to apply the whitewash in long, vertical strokes. Start at the base of the trunk and work your way up to 4-6 feet high, depending on the tree’s size and pest threats. Cover the entire surface, including any branches that touch the trunk. Avoid piling on too much—thin layers dry faster and last longer. If you miss a spot, the whitewash will show up as a lighter patch once dry.
For larger trees, use a paint roller with an extension pole to reach higher areas without needing a ladder. Work in sections, blending each stroke into the next to avoid streaks. If the mixture starts to dry on the brush, dip it back into the bucket and stir gently to re-wet it. Let the first coat dry completely—usually 4-6 hours—before applying a second thin layer if needed. Two coats provide the best protection against sun scorch and pests.
Let It Cure and Monitor for Effectiveness
The whitewash will feel dry to the touch after 4-6 hours, but it’s fully cured in 24 hours. Avoid watering the trunk or letting rain splash it for the first 48 hours to prevent smudging. Once dry, the bark should look uniformly white with no streaks or missed spots. If you see any areas where the whitewash didn’t stick, lightly reapply a small amount of the mixture to those spots.
Check the trunk every 6 months for signs of wear or peeling. Reapply the whitewash as needed, especially after heavy rains or if the bark starts to look dull. Over time, the whitewash will break down naturally, so plan to refresh it annually. This simple step keeps pests at bay and protects your tree’s health for years—no harsh chemicals required.
Tips & tricks for perfect whitewash tree trunks
Real talk: A few simple adjustments can make all the difference between a job that lasts and one that peels off in a week. Here's what I've learned after testing this on dozens of trees.
Surface Prep is Non-Negotiable: That 4-6 hour drying time after cleaning isn't just about speed—it's about adhesion. I've seen whitewash fail completely when applied to damp bark. Use a hairdryer on low heat for stubbornly damp spots if you're short on time, but only after you've scrubbed thoroughly with the vinegar solution. The goal is to get the bark completely dry to the touch before you even think about mixing your whitewash.
Mixing Consistency Matters: When you're testing that creamy consistency by dipping your brush, it should leave a clean, even line without dripping. If your mixture is too thick, don't just add more water—stir vigorously first. Sometimes the powdered milk and diatomaceous earth clump together. For extra smoothness, I strain the mixture through a fine-mesh sieve after mixing to remove any lumps that could create texture issues on the bark.
Application Technique for Even Coverage: Those vertical strokes in Step 3 aren't just decorative—they create a uniform barrier. For best results, work in overlapping sections about 6 inches wide. Start from the bottom and work upward to prevent drips from running over already-dry areas. If you're using a roller for high areas, keep it moving at a consistent speed to avoid leaving thick patches that could crack as they dry.
Optional: Add a Touch of Citrus Oil: While not in the original recipe, I've found that adding 1 teaspoon of citrus oil (like lemon or orange) to the mix enhances the pest-repelling properties. The scent confuses insects while adding a pleasant aroma. Just stir it in after the neem oil and before thinning with water. This is completely optional but has become my standard practice for fruit trees.
Pro Tips for Whitewash Tree Trunks
- Real talk: A few simple adjustments can make all the difference between a job that lasts and one that peels off in a week.
- Surface Prep is Non-Negotiable: That 4-6 hour drying time after cleaning isn't just about speed—it's about adhesion.
- Mixing Consistency Matters: When you're testing that creamy consistency by dipping your brush, it should leave a clean, even line without dripping.
Frequently asked questions
Got questions about whitewashing tree trunks? You’re not alone! Here are some common concerns and quick answers to help you get started.
When is the best time of year to whitewash tree trunks?
The ideal time is late winter or early spring (before new growth starts) or fall (after leaves drop). Avoid applying during extreme heat or cold—temperatures between 50°F and 75°F work best for proper drying and adhesion.
How long does whitewash protection last?
With proper application, whitewash typically lasts 1–2 years before needing a refresh. Factors like weather, tree species, and pest activity can shorten or extend this timeline. Reapply if you notice fading, cracking, or signs of mold.
Can I use regular white paint instead of whitewash?
No—regular paint is too thick and non-breathable, trapping moisture and harming the tree. Whitewash is formulated to be lightweight, water-based, and permeable, allowing bark to breathe while repelling pests. Stick to the recipe for safety!
Will whitewash harm my tree or attract pests?
When done correctly, whitewash is harmless to trees and actually repels pests like ants, borers, and rodents. However, if applied too thickly or with low-quality ingredients, it could smother bark. Always use a 1:3 lime-to-water ratio and avoid commercial additives.
What should I do if the whitewash peels or cracks?
Peeling or cracking usually means it was applied too thickly or during humid/dry conditions. Scrape off the damaged areas with a wire brush, let the bark dry, and reapply a thin, even coat. For stubborn spots, a 50/50 mix of water and vinegar can gently clean the surface before re-treating.
Does whitewash work on all types of trees?
Yes, but young, thin-barked, or sensitive trees (like fruit trees or maples) may need extra caution. Test a small area first, and avoid applying to wounded or diseased bark. Deciduous trees benefit most, while evergreens (like pines) rarely need it—focus on trunks near the base where pests hide.
Wrapping up and next steps
Whitewashing your tree trunks is a simple yet powerful way to protect your trees naturally while keeping them looking healthy and vibrant.
By using a mix of water, lime, and a few optional ingredients, you’re not only warding off pests and decay but also adding a touch of beauty to your landscape. Now’s the perfect time to grab your supplies and give your trees the care they deserve!
Ready to get started? Pick a sunny day, gather your materials, and follow the steps with confidence. Your trees—and your garden—will thank you! 🌳✨