
Trees
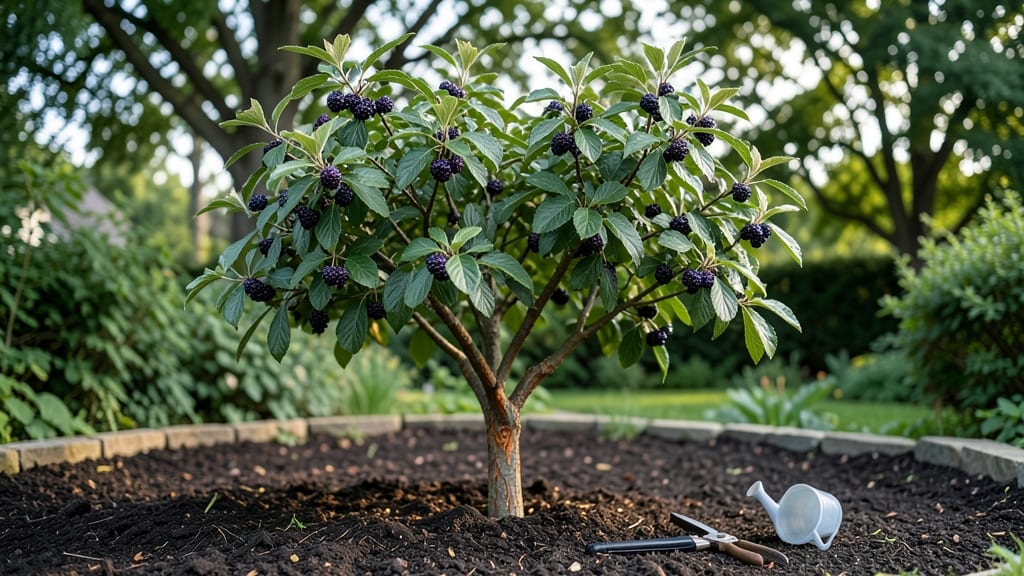
The serviceberry tree delivers four-season beauty and edible berries that outlast most fruit trees in harsh climates. 🌿 I planted mine in Zone 5 after watching it thrive in a neighbor's yard through two winters—no damage, no fuss.
These trees are the unsung heroes of cold-hardy landscapes, offering white spring blossoms, brilliant fall foliage, and tart-sweet berries that birds and humans love alike.
What makes them so reliable? Serviceberries tolerate poor soil better than most fruit trees, handle drought once established, and produce berries even in Zone 3's brutal winters. You'll need full sun to partial shade and well-drained soil—though they adapt better than many trees to rocky or sandy conditions.
The key to success lies in proper spacing (15-25 feet apart) and understanding their slow-but-steady growth habit.
By late summer, you'll harvest clusters of dark purple berries that taste like a cross between blueberries and almonds—perfect for jams, pies, or fresh snacking. The trees also serve as pollinator magnets, with early spring flowers feeding bees before most other plants bloom.
Prune in late winter to shape and remove dead wood, and watch as your tree becomes both a food source and a landscape centerpiece.
Whether you're restoring a native woodland edge or simply want a low-maintenance fruit tree, serviceberries deliver year after year. Their resilience makes them ideal for urban lots, farm borders, or any spot where other fruit trees struggle. Let's get yours planted for a harvest that keeps giving.
📚 In This Guide
- What you need
- Instructions
- Tips and common mistakes
- Wrapping up and next steps
What you need
- ● Service berry tree: 1–3 cold-hardy varieties (e.g., Amelanchier lamarckii or Amelanchier alnifolia)
- ● Choose bare-root saplings (fall/winter) or container-grown (spring/fall)
- ● Ensure disease-resistant stock (ask your nursery!)
- ● Soil amendments: 2–3 gallons of compost or well-rotted manure
- ● 1 cup bone meal (for phosphorus-rich roots)
- ○ Optional: Mycorrhizal fungi (boosts root health)
- ● Mulch: 3–4 inches of wood chips or straw (preserves moisture)
- ● Digging tools: 1 shovel (for planting)
- ● 1 trowel (for delicate root handling)
- ● 1 pruning saw (if transplanting mature trees)
- ● Safety gear: 1 pair gloves (gardening-grade)
- ● 1 watering can or hose with nozzle
- ○ Optional (but helpful): Soil pH test kit (ideal range: 5.0–6.5)
- ● Tree stakes & ties (if planting in windy areas)
- ● Organic fertilizer (balanced NPK, e.g., 10-10-10)
- ● Location: Full sun to partial shade (6+ hours of sunlight)
- ● Well-draining soil (avoid waterlogged areas)
- ● Spacing: 15–20 feet between trees (for airflow and growth)
- ● Timing: Plant bare-root saplings in late fall/winter (dormant season)
- ● Container-grown trees: spring or fall (avoid extreme heat)
How to plant and care for serviceberry trees for reliable harvests
Here's the straightforward method I've used to grow cold-hardy serviceberries in zones 3-7.
🌱 Step 1: Choose the Right Location and Soil
Serviceberries thrive in full sun to partial shade, but they tolerate light shade better than many fruit trees. Pick a spot with at least 6 hours of sunlight daily—morning sun with afternoon shade works best in hotter zones. The tree handles clay soil, but it grows fastest in well-draining, slightly acidic soil (pH 5.0-6.5).
I always test my soil before planting—serviceberries hate soggy roots. If your soil is heavy clay, mix in 2-3 inches of compost into the top 12 inches of soil. Avoid low-lying areas where water pools after rain. The tree's shallow roots need good airflow to prevent fungal issues.
🪴 Step 2: Plant at the Correct Depth and Spacing
Dig a hole twice as wide as the root ball but only as deep as the container. Serviceberries resent being buried too deep—plant the root flare (where roots meet trunk) 1-2 inches above ground level. This prevents water from pooling around the trunk.
Space trees 15-20 feet apart for proper airflow and sunlight penetration. If planting near a fence or building, leave 10 feet of clearance—serviceberries grow 15-25 feet tall at maturity. Backfill the hole with native soil (no amendments) and water deeply to settle it around the roots.
☀️ Step 3: Water Deeply and Mulch Properly
Water deeply once a week during the first growing season, aiming for 1-1.5 inches of water per week. You'll know it's enough when water reaches 12-18 inches deep in the soil. Let the top 2 inches dry between waterings to prevent fungal diseases.
Spread 3 inches of organic mulch (like wood chips) in a 3-foot diameter circle around the trunk, keeping it 6 inches away from the base. Mulch conserves moisture and regulates soil temperature. Refresh the mulch annually—it breaks down faster than you'd think.
✂️ Step 4: Prune for Shape and Fruit Production
Prune in late winter or early spring before buds swell. Remove dead, diseased, or crossing branches first—serviceberries handle pruning well but don't overdo it. Thin out 10-15% of the canopy to improve airflow and sunlight penetration to inner branches.
Shape the tree into an open vase form by selectively pruning to encourage fruit production. The best fruit develops on 2-4 year old wood, so avoid heavy pruning of older branches. You'll see white spring blossoms followed by purple berries in late summer—both are edible and attract wildlife.
🌿 Step 5: Fertilize and Monitor for Pests
Serviceberries don't need much fertilizer. In the first year, apply a balanced 10-10-10 fertilizer at ½ the recommended rate in early spring. After that, only fertilize if the tree shows signs of deficiency—yellowing leaves or stunted growth. Too much nitrogen encourages leafy growth at the expense of fruit.
Watch for Japanese beetles and aphids—they occasionally target serviceberries. A strong spray of water usually knocks them off. If you see cankers (sunken, dead areas on branches), prune them out and sterilize your tools with rubbing alcohol to prevent spread.
Tips & tricks for perfect serviceberry tree planting and care
These practical tips will help you avoid common mistakes and maximize your serviceberry tree's fruit production.
Location is Everything: In Step 1, when choosing your spot, prioritize morning sun exposure—this is when serviceberries need the most light for fruit development. I've noticed that trees in afternoon shade still produce berries, but yields are noticeably lower. If your yard has limited sun, consider planting near a south-facing wall that reflects light.
Soil Prep Secret: The instructions mention testing soil pH, but I always go one step further by adding 1-2 pounds of sulfur per 100 square feet if my test shows pH above 6.5. Serviceberries prefer that slightly acidic range, and this adjustment prevents future pH problems. Work the sulfur into the top 6 inches of soil before planting.
Planting Depth Check: In Step 2, use a level tool to verify the root flare sits exactly 1-2 inches above ground level. I've seen many gardeners bury the flare too deep, which causes water to pool around the trunk and leads to root rot. The flare should be the highest point after planting—this is your visual guide.
Watering Strategy: For Step 3's weekly watering, I recommend using a rain gauge to measure exactly 1-1.5 inches of water. A simple tuna can buried in the soil works perfectly—when it fills to 1.5 inches, you've hit your target. This prevents both underwatering and overwatering, both of which stress serviceberry trees.
Pro Tips for Service Berries Tree
- These practical tips will help you avoid common mistakes and maximize your serviceberry tree's fruit production.
- Location is Everything: In Step 1, when choosing your spot, prioritize morning sun exposure—this is when serviceberries need the most light for fruit development.
- Soil Prep Secret: The instructions mention testing soil pH, but I always go one step further by adding 1-2 pounds of sulfur per 100 square feet if my test shows pH above 6.5.
Frequently asked questions
Got questions about growing and harvesting service berries? You’re not alone! Here are the most common queries—plus straightforward answers—to help you cultivate a thriving tree in your yard.
What’s the best time to plant a service berry tree?
Plant your service berry tree in early spring (as soon as the ground thaws) or early fall (4-6 weeks before frost). This gives roots time to establish before extreme temperatures hit. Avoid planting in summer heat or winter, when dormancy can delay growth.
How long does it take for a service berry tree to bear fruit?
Patience is key! Most service berry trees take 3–5 years to produce fruit, though some varieties may take up to 7 years. Young trees focus on root and branch growth first. Mulch well and water consistently to speed up fruiting.
Can service berries survive harsh winters in Zones 3–7?
Service berries are cold-hardy champions, thriving in Zones 3–7 with minimal care. Just ensure they’re planted in full sun and well-drained soil. Young trees may need winter mulch (3–4 inches of straw or leaves) to protect roots from freeze-thaw cycles.
Do service berries attract pests or wildlife?
While service berries are low-maintenance, they do attract birds, squirrels, and bees—especially during harvest. To deter overzealous wildlife, use bird netting over ripe clusters. Deer and rabbits usually leave them alone, but a fence can offer extra peace of mind.
What can I do if my service berry tree isn’t fruiting?
Check these fixes:
- Age: It may still be too young (see question above).
- Pollination: Service berries are self-fertile, but cross-pollination can boost yields. Plant 2–3 trees nearby.
- Pruning: Over-pruning or poor timing (prune in late winter) can reduce fruit production.
- Nutrients: Test soil pH (ideal: 6.0–7.0) and amend with compost if needed.
Wrapping up and next steps
Growing a service berries tree in Zones 3-7 is a fantastic way to enjoy a resilient, low-maintenance harvest year after year. These cold-hardy varieties thrive with minimal fuss, offering delicious fruit for wildlife, jams, or fresh eating—making them a must-have for any homestead or garden.
Whether you're a beginner or a seasoned gardener, planting one is a rewarding step toward self-sufficiency and sustainable living.
Ready to take the next step? Research your local climate, pick the right variety, and get planting! Your future harvest—and happy birds—will thank you. 🌱🍒