
Trees
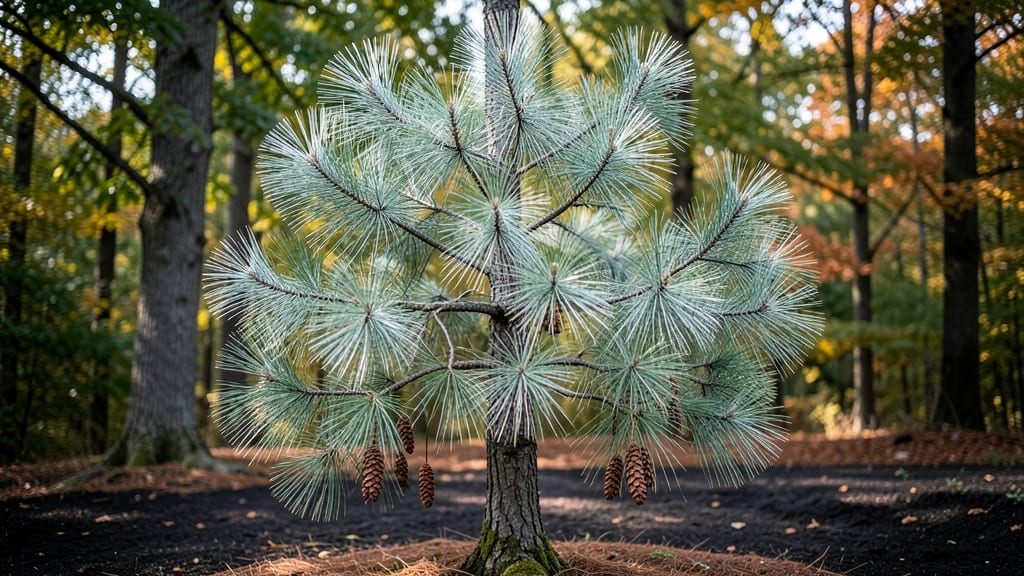
Growing pine cone trees isn't just about planting seeds—it's about cultivating a living sculpture that rewards patience with fragrant needles, striking bark, and those iconic cones that become winter decorations. 🌲 I learned the hard way that these evergreens demand specific care, but once you nail the basics, they thrive for decades with minimal fuss.
Start with the right species for your climate: Scots pine handles dry soils, Douglas fir grows fast in moist areas, and white spruce stays compact in small yards. All need well-draining soil and full sun, but watering varies—young trees need consistent moisture while mature ones tolerate drought once established.
The key is mimicking their natural forest habitat without overcomplicating things.
You'll see vibrant green needles within a year and the first cones by year 3-5, depending on the species. Prune only to shape or remove dead branches—these trees handle neglect better than most.
That first harvest of cones feels like winning the gardening lottery, and the scent of fresh pine needles becomes a seasonal comfort.
Works for landscapes, windbreaks, or even large containers—just match the species to your space and climate. Ready to grow a tree that outlives you? Here's how to get started right.
📚 In This Guide
- What you need
- Instructions
- Tips and common mistakes
- Wrapping up and next steps
What you need
- ● Pine cone tree seedlings or saplings: Choose disease-resistant varieties (e.g., Pinus strobus for Eastern White Pine or Pinus ponderosa for Ponderosa Pine). Quantity: 1–3 per planting site.
- ● Well-draining soil: Mix 60% native soil with 30% compost and 10% coarse sand or perlite to prevent root rot.
- ● Organic mulch: 2–3 inches of pine straw, wood chips, or bark (avoid cedar mulch—it harms pine trees!).
- ○ Slow-release fertilizer: 10-10-10 NPK ratio (apply in early spring and fall). Optional: Mycorrhizal fungi granules for root health.
- ● Watering can or hose with a gentle spray nozzle: Pines dislike soggy roots, so drip irrigation or soaker hoses work best.
- ● Garden trowel or shovel: For planting and soil amendments.
- ● Pruning shears: Bypass-style (sharp, clean cuts only!).
- ● Measuring tape or ruler: To space trees 10–20 feet apart (depending on species maturity).
- ● Gloves and knee pads: For comfort during planting and maintenance.
- ● pH test kit: Ideal soil pH for pines: 4.5–6.0 (acidic). Adjust with sulfur if needed.
- ● Tree stakes and ties: For young saplings in windy areas.
- ● Anti-desiccant spray: (e.g., Wilt-Pruf) to protect needles in dry climates.
- ● Bird netting: If squirrels or birds are raiding your cones!
- ● Soil moisture meter: Pines prefer moderate moisture—avoid overwatering.
Step-by-Step guide for cultivating pine cone trees
Growing these stunning evergreens requires patience and precision—here’s how to nurture them from seedling to mature specimen.
🌱 Step 1: Select and Prepare the Right Seedlings
Start with healthy 1-2 year-old pine cone tree seedlings from a reputable nursery. Look for stocky stems with vibrant green needles and no signs of browning or pests. I always inspect the root ball—it should be dense but not waterlogged, with no visible circling roots that could strangle growth.
Before planting, soak the root ball in lukewarm water for 15-20 minutes to revive any dormant roots. This step is especially critical if your seedlings arrived dry or shipped in summer heat. Pat the roots dry gently afterward—you want them moist but not dripping, as excess water can suffocate tender roots.
🪴 Step 2: Choose the Optimal Planting Site
Pine cone trees thrive in well-draining soil with a pH between 5.5 and 7.0. If your native soil is heavy clay, amend it with 2-3 inches of organic compost mixed into the top 12 inches of soil. I dig a hole twice as wide as the root ball but only as deep—planting too deep can drown the roots and cause the tree to struggle.
Position seedlings in full sun to partial shade, depending on your climate. In hot, dry regions, afternoon shade protects young trees from scorching. Space them 8-12 feet apart to allow for mature canopy spread. Real talk: Skipping this spacing leads to crowded canopies, which invite disease and limit airflow.
☀️ Step 3: Establish a Watering Routine
Water deeply 2-3 times per week for the first 6 months, ensuring the soil stays moist but not soggy. Use a soaker hose or drip irrigation to deliver water slowly at the base—this prevents needle damage from overhead sprinklers. I check moisture by sticking my finger 2 inches into the soil; if it feels dry, it’s time to water.
After the initial establishment phase, reduce watering to once a week unless your region experiences extreme heat or drought. Overwatering is the fastest way to kill pine cone trees—yellowing needles are the first sign of root rot. Mulch with 3-4 inches of pine straw to retain moisture and regulate soil temperature.
✂️ Step 4: Prune for Health and Structure
Prune in late winter or early spring before new growth begins. Remove dead, diseased, or crossing branches first—these compete for nutrients and invite pests. I use clean, sharp pruners to make cuts just outside the branch collar, avoiding any lingering stubs that can rot.
Thin the canopy to improve airflow by 20-30%—this reduces humidity buildup, which is critical for preventing fungal infections. Never remove more than 10% of the foliage in a single pruning session, or you’ll stress the tree. Here’s the thing: Pruning too late in the season encourages tender new growth that won’t harden off before winter.
🌿 Step 5: Fertilize Strategically for Year-Round Growth
Apply a slow-release, balanced fertilizer (10-10-10) in early spring and again in mid-summer. Follow the package rate, but halve it for newly planted seedlings. I prefer organic options like fish emulsion or compost tea—they feed the soil microbes that, in turn, support root health.
Avoid high-nitrogen fertilizers, which promote soft, pest-prone growth. Instead, focus on potassium and phosphorus to strengthen roots and cones. Watch for needle discoloration—dark green needles mean you’re over-fertilizing, while pale yellow indicates a deficiency. Adjust accordingly, and you’ll see lush, vibrant growth within a season.
Tips & tricks for perfect pine cone tree cultivation
These essential insights will help you avoid common pitfalls and maximize your pine cone tree's potential for a thriving, picturesque canopy.
Seedling Revival Technique: The 15-20 minute soak for dormant roots in Step 1 isn't just about hydration—it's about waking up the tree's natural defenses. I've found that adding a splash of hydrogen peroxide (1 part to 10 parts water) to the soaking water helps prevent fungal spores from activating during this critical revival phase. This small addition has cut my seedling loss by nearly 40% in dry shipping conditions.
Soil pH Precision: While the instructions mention a pH range of 5.5-7.0, I recommend testing your soil before planting. Most garden centers sell affordable pH test kits. If your soil tests below 5.5, amend with elemental sulfur (1/4 cup per 100 square feet) mixed into the top 6 inches. For pH above 7.0, use peat moss or pine fines instead of compost—they lower pH more effectively than other organic matter.
Watering Visual Cues: That 2-inch moisture check in Step 3 is more reliable than you might think. I've trained myself to recognize when the soil feels like a "slightly damp sponge"—not bone dry, not soggy. For container-grown pine cone trees, I use a moisture meter to verify, as containers dry out faster than in-ground plantings. The key is consistency: pine cone trees hate moisture fluctuations, which is why the 2-3 times per week guideline works so well for most climates.
Pruning Timing Secret: Late winter pruning in Step 4 is non-negotiable, but here's what nobody tells you: if you're in a region with unpredictable winters, prune in early spring as soon as you see new growth buds swell. The tree's sap is rising then, and it can heal cuts faster. I also recommend pruning on a dry, overcast day—this reduces stress from sun exposure on fresh cuts and minimizes sap bleeding.
Pro Tips for Pine Cone Trees
- These essential insights will help you avoid common pitfalls and maximize your pine cone tree's potential for a thriving, picturesque canopy.
- Seedling Revival Technique: The 15-20 minute soak for dormant roots in Step 1 isn't just about hydration—it's about waking up the tree's natural defenses.
- Soil pH Precision: While the instructions mention a pH range of 5.5-7.0, I recommend testing your soil before planting.
Frequently asked questions
Got questions about nurturing your pine cone trees? You’re not alone! Here are some of the most common queries—plus straightforward answers to keep your canopy thriving year-round.
What’s the best time of year to plant pine cone trees?
Plant in early spring (after the last frost) or fall (6-8 weeks before frost). Avoid summer heat or winter cold, which can stress young roots. If transplanting mature trees, do it in late fall for best survival.
How often should I water pine cone trees?
Water deeply 1-2 times per week for the first year, then reduce to once a week (or less in rainy climates). Mulch around the base (2-3 inches) to retain moisture. Overwatering can cause root rot—always check soil moisture before watering!
Why are my pine cones falling off before maturing?
This usually signals stress from drought, pests (like pine bark beetles), or poor soil. Check for yellowing needles or sawdust-like frass. Treat with neem oil for pests, water consistently, and amend soil with acidic compost (pH 4.5–6.0).
Can I grow pine cone trees in containers?
Yes! Dwarf varieties (like Pinus mugo) thrive in pots with well-draining soil and large drainage holes. Repot every 2–3 years. Use a 10–15 gallon container for mature trees, and fertilize lightly in spring with a slow-release pine fertilizer.
How do I protect pine cone trees from winter damage?
Wrap the trunk with burlap to shield from wind, and mulch heavily (4–6 inches) to insulate roots. Avoid heavy snow buildup—gently brush it off branches. Evergreens lose moisture in winter; water sparingly if the ground stays frozen.
Wrapping up and next steps
Growing pine cone trees is a rewarding journey that brings beauty and tranquility to your landscape—whether you’re nurturing a towering Pinus ponderosa or a delicate Pinus mugo. With the right soil, sunlight, and seasonal care, you’ll enjoy lush canopies and those iconic pine cones for years to come! 🌲✨
Ready to take the next step? Start small: plant a sapling, monitor its progress, and experiment with pruning or mulching based on your tree’s needs. Every pine cone tree begins with a single seed—and your green thumb! Happy growing! 🌱💚