
Pruning
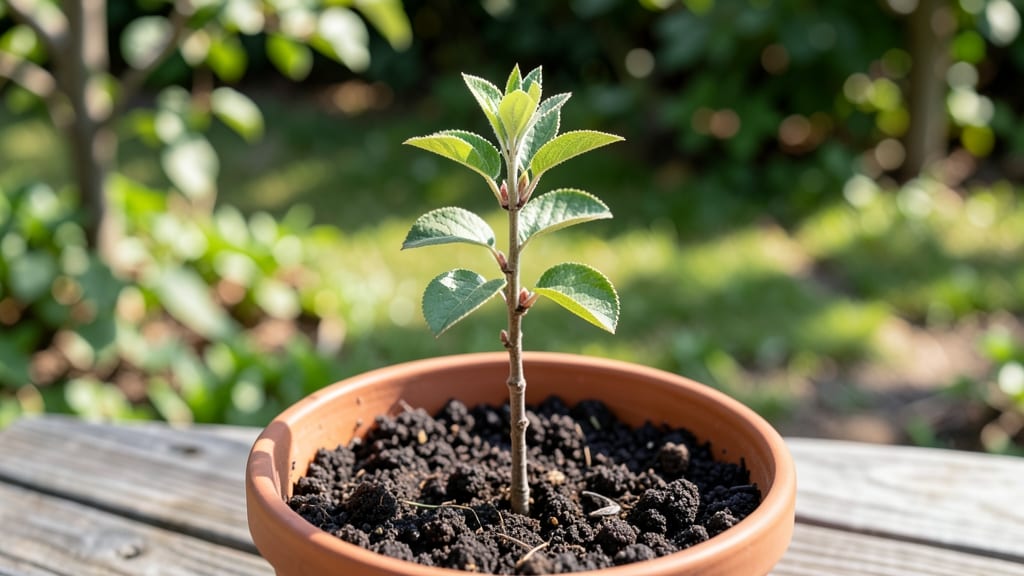
That first apple tree sprout you spot in early spring could become the backbone of your orchard—if you trim it right during dormancy. 🌱 I learned the hard way that skipping winter pruning means a tangled mess of branches fighting for sunlight, not a strong, open canopy that bears fruit well.
The key is shaping the young tree while it's still dormant, before spring growth begins.
You'll only need a few tools: sharp pruning shears, rubbing alcohol to sterilize cuts, and a sturdy ladder if your sprout is already taller than you. The goal is simple—remove dead wood, thin crowded branches, and open the center to let light reach all the way down.
Even a small sprout benefits from this early structure, setting it up for years of healthy growth.
What you end up with is a tree that grows stronger, faster, and produces better-quality fruit. The branches spread evenly, sunlight hits every leaf, and you avoid the heart rot that comes from overcrowded centers.
By next summer, you'll see the difference in lush, green foliage and sturdy new shoots ready for next winter's shaping.
Works for both seed-grown sprouts and grafted cuttings, though grafted trees need slightly more precision. Here's how to do it without over-thinking—just focus on opening that center and keeping the structure simple. Let's get those branches in shape!
📚 In This Guide
- What you need
- Instructions
- Tips and common mistakes
- Wrapping up and next steps
What you need
- ● Pruning shears: Bypass pruners (sharp, 6-8" blades) for small branches (1/4"–3/4" diameter). Pro tip: Clean blades with rubbing alcohol to prevent disease spread! 💡
- ● Loppers: 8-10" bypass loppers for medium branches (3/4"–2" diameter). Look for ratcheting models for extra leverage. 🔧
- ● Pruning saw: Curved-tooth saw (10-12") for thick branches (2"+ diameter). Warning: Avoid cheap saws—they dull quickly! ⚠️
- ● Gloves: Heavy-duty, cut-resistant gloves (e.g., Mechanix or Filson). Protect your hands from thorns and rough bark! 🛡️
- ● Ladder or step stool: Sturdy, extension ladder (16–24 ft) or a 3–4 ft step stool for dwarf trees. Safety first: Secure the ladder to the tree or a stable anchor. 🔒
- ● Disinfectant: 70% isopropyl alcohol or a 10% bleach solution (1 part bleach to 9 parts water) to sterilize tools between cuts. 🧼
- ○ Sealing wax or pruning paint: Optional but helpful for sealing large cuts (>2" diameter) to prevent disease. 🎨
- ● Weather: Trim on a dry, calm day when temps are above freezing (ideal: 40–60°F). Avoid rainy or windy conditions. ☀️🌧️
- ● Safety gear: Safety glasses (to shield from debris) and long sleeves/pants (to protect from thorns). 👓
- ● Tree health check: Inspect the tree for signs of disease (e.g., cankers, oozing sap) or pests before pruning. 🐛🚫
- ● Plan your cuts: Sketch a rough map of the tree’s canopy to visualize your pruning goals (e.g., removing deadwood, thinning out crowded branches). 📝
- ● Pruning rope or zip ties: To temporarily secure large branches during heavy pruning. 🧵
- ● Work gloves with grip: For extra comfort on long pruning sessions. 🤲
- ● Tree wound dressing: Alternative to sealing wax (e.g., Tanglefoot Tree Wound Pruning Sealer). 🌿
- ● Disposable pruning bags: To collect debris and reduce cleanup time. 🗑️
Step-by-step guide for pruning apple tree sprouts in dormancy
Here's how to shape young trees for a sturdy, productive framework—no fancy tools required.
✂️ Step 1: Identify and Mark Key Branches
Start by examining the tree's structure while it's completely dormant. Look for the central leader—the strongest, upright stem that should form the tree's main trunk. This is your guidepost. I mark it with a small piece of colored tape so I don't accidentally trim it later.
Next, identify suckers—those aggressive shoots growing from the base or along the trunk. These compete with the canopy for energy and should be removed entirely at the base. Use your pruning shears to cut them flush with the trunk, but don't leave stubs.
Finally, spot water sprouts—those vertical, pencil-thin branches shooting straight up from the scaffold branches. These are energy vampires that never produce fruit. I like to make a mental note of where they're clustered so I can address them all at once.
✂️ Step 2: Remove Dead, Diseased, or Crossing Branches
Now it's time for the cleanup. Grab your sterilized pruning shears and start by cutting out any branches that are dead, diseased, or broken. You'll know a branch is dead if it's brittle, snaps easily, or has no green tissue inside when you cut it open. Remove these completely—no half-measures.
Next, look for branches that are rubbing against each other. When two branches grow too close, they'll eventually scar and create entry points for pests and diseases. Cut the weaker of the two branches at its base. If they're roughly equal in size, remove the one that's growing inward toward the center of the tree.
Here's the thing—don't worry about making perfect cuts right now. The goal is to open up the canopy so light and air can circulate. You'll refine the shape in the next step. Just focus on removing anything that's clearly problematic.
✂️ Step 3: Shape the Canopy for Light and Airflow
With the deadwood and problem branches out of the way, it's time to shape the tree's framework. Step back and visualize the ideal open-center shape—a wide, rounded canopy that lets sunlight reach all branches. I aim for a 45-degree angle between scaffold branches and the trunk.
Start by thinning out branches that are growing too closely together. Remove every other branch if they're competing for space. For the branches you keep, cut them back to a bud that faces outward—this encourages growth in the right direction. You'll see these buds as little bumps along the branch.
Don't be afraid to make bold cuts. Young apple trees are resilient, and removing up to 25% of the canopy in one session is perfectly safe during dormancy. The key is to leave a strong framework of scaffold branches that can support future fruit production.
⏰ Step 4: Clean Up and Protect the Tree
Once you've finished pruning, it's time to clean up. Collect all the cuttings and dispose of them properly—either in the trash or by burning them if you're concerned about disease spread. Never leave pruned material on the ground near the tree.
Next, sterilize your pruning tools again with rubbing alcohol or a 10% bleach solution to prevent spreading any pathogens. I like to wipe down the blades and handles thoroughly, then let them air dry before storing them.
Finally, apply a dormant oil spray to the tree if you're dealing with pests like scale or mites. This is the perfect time to treat for overwintering insects before they become active in spring. Water the base of the tree deeply to help it recover from the pruning stress.
Tips & tricks for pruning apple tree sprouts in dormancy
These practical insights will help you trim with confidence and set your young apple tree up for a strong, fruitful future.
Visualize the Final Shape: Before making any cuts in Step 3, step back and mentally trace the ideal open-center shape you're aiming for. I sketch a rough outline on a piece of paper first—this helps me stay focused on the big picture rather than getting bogged down in individual branches. The goal is to create a balanced, rounded canopy that lets sunlight penetrate to the center, which is where most fruit develops.
Bud Orientation Matters: When you're cutting branches back to a bud in Step 3, always choose the bud that faces outward from the center of the tree. This simple trick ensures new growth will extend outward rather than inward, creating a more open and productive framework. You can test this by holding the branch and looking at the buds—pick the one pointing away from the trunk.
Sterilization is Non-Negotiable: In Step 4, don't skip the tool sterilization—this is your best defense against spreading disease between cuts. I keep a small bottle of rubbing alcohol in my pruning kit and wipe down my shears after every 3-4 cuts, especially when moving between different parts of the tree. A 10% bleach solution works too, but always rinse and dry tools thoroughly afterward to prevent corrosion.
Seasonal Timing Secret: The dormant season (late winter to early spring) is your perfect window for this pruning—it's when trees are most resilient and less likely to suffer stress. I aim to finish by late February in most climates, just before buds begin to swell. This timing gives the tree plenty of growing season to recover before summer heat arrives.
Pro Tips for Apple Tree Sprout
- These practical insights will help you trim with confidence and set your young apple tree up for a strong, fruitful f...
- Visualize the Final Shape: Before making any cuts in Step 3, step back and mentally trace the ideal open-center shape...
- Bud Orientation Matters: When you're cutting branches back to a bud in Step 3, always choose the bud that faces outwa...
Frequently asked questions
Got questions about apple tree sprouts and dormant-season pruning? You’re not alone! Here are answers to the most common concerns—so you can trim with confidence and set your tree up for a bountiful harvest.
When is the best time to trim apple tree sprouts?
The ideal window is late winter or early spring, before buds swell but after the worst cold snaps. This timing promotes faster healing and minimizes disease risk. Avoid pruning in fall—it invites pests and fungal infections. Pro tip: Aim for temps between 40–50°F for optimal results!
Should I remove all water sprouts from my apple tree?
Not necessarily! Water sprouts (fast-growing vertical shoots) compete for energy. Remove 70–80% of them—especially thick, upright ones—to redirect nutrients to fruit production. Leave a few thin sprouts if they’re below the main canopy to encourage branching. Think of it as sculpting: balance is key!
What’s the difference between a sucker and a water sprout?
Both are unwanted shoots, but they grow from different places:
- Suckers: Emerge from the base of the tree or roots (genetically identical to the parent tree).
- Water sprouts: Grow from branches or the trunk (often after pruning or damage).
Cut suckers at ground level; prune water sprouts back to a lateral branch or bud. Use a sharp bypass pruner for clean cuts!
My apple tree is bleeding sap after pruning—is this normal?
Yes! Apple trees ooze sap when cut in cold weather (a sign of healthy, dormant growth). To minimize mess:
- Prune on warmer, sunny days (50°F+).
- Seal larger cuts (>½ inch) with pruning sealant (optional for small trees).
- Avoid pruning if temps drop below freezing within 24 hours.
Sap will stop in 1–2 weeks—it’s just your tree’s way of saying, “I’m healing!”
Can I prune apple tree sprouts in summer instead?
Summer pruning is possible but riskier. If you must, do it after harvest (July–August) to avoid stressing the tree. Focus on:
- Thinning overcrowded branches to improve airflow.
- Removing dead or diseased wood immediately.
- Avoid heavy pruning—stick to 20% or less of the canopy.
Dormant-season pruning is still the gold standard for long-term health!
Wrapping up and next steps
Watching your apple tree sprout new life in spring is one of the most rewarding parts of gardening! By mastering dormant-season trimming, you’ve set the stage for a healthier, fruit-bearing canopy and fewer pests or diseases.
Remember, patience and precision are key—your tree will thank you with vibrant blooms and delicious harvests in years to come. 🍏✨
Ready to put your new skills to work? Grab your pruners and schedule your next trimming session during the next dormant period. And if you’re feeling ambitious, why not journal your progress? Track growth, note any surprises, and celebrate every step of your tree’s journey!