
Pruning
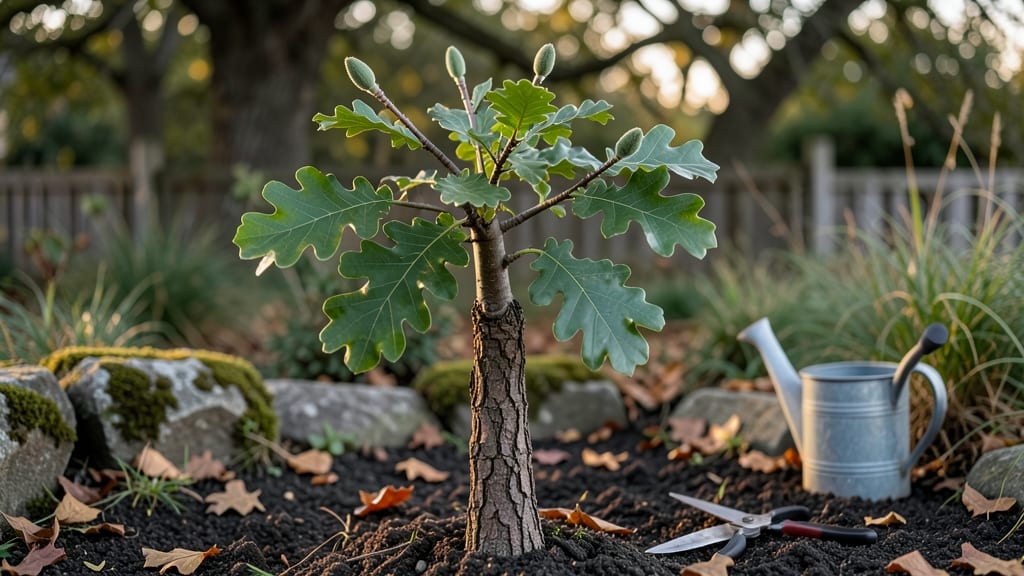
Mastering tree sapling identification by leaf shape and bark patterns saves you from costly planting mistakes—here’s how to nail it in three simple steps. 🌱 A single wrong guess can mean invasive species crowding out natives or pruning strategies that stump growth instead of shaping it.
Start with the basics: deciduous trees shed leaves annually, while evergreens keep theirs year-round. Then examine leaf edges (lobed like oak or smooth like maple) and bark (smooth on young birch or ridged on mature hickory).
A simple magnifying glass or phone camera helps spot details like vein patterns or tiny hairs that reveal the species. Regional field guides narrow it down further—what grows wild in your area is your best bet for matching saplings.
Once you’ve nailed the ID, you’ll prune correctly, choose the right spot, and avoid pests that target specific trees. My white oak saplings now thrive because I learned to recognize their lobed leaves and ridged bark early.
The payoff? A landscape that grows stronger, not just prettier. Let’s get those details right from the start.
This works for backyard plantings, urban forests, or even container-grown saplings. The same principles apply whether you’re restoring a native ecosystem or just picking the perfect shade tree. Grab a notebook and we’ll break it down step by step.
📚 In This Guide
- What you need
- Instructions
- Tips and common mistakes
- Wrapping up and next steps
What you need
- ● Field Guide or App: A printed tree identification guide (e.g., National Audubon Society Field Guide to Trees) or
- ● A smartphone with a tree ID app (e.g., LeafSnap, PictureThis, or iNaturalist).
- ● Notebook & Pen: 1 spiral-bound notebook (50+ pages) or a digital note-taking app (e.g., Google Keep).
- ● Magnifying Glass: 1 handheld magnifier (3x–10x magnification) for examining fine details like bark texture or leaf veins.
- ● Measuring Tape: 1 retractable tape (6–10 ft) to measure sapling height, trunk circumference, and leaf dimensions.
- ○ Camera or Smartphone: With a macro lens attachment (optional but helpful for close-ups of leaves/bark).
- ● Pruning Shears (Sterilized): 1 pair of bypass pruners (for safely collecting small leaf/bark samples if needed).
- ● Plastic Bags or Ziploc Bags: 2–3 resealable bags (quart-sized) to store leaf/bark samples temporarily.
- ● Ruler: 1 metal ruler (12-inch) for measuring leaf length/width.
- ● Gloves (nitrile or leather) – for handling thorns or rough bark.
- ● GPS device or offline maps – to log sapling locations.
- ● Field magnifying loupe with built-in light – for low-light conditions.
- ● Tree seedling identification chart – for comparing juvenile vs. mature traits.
- ● Portable UV light (blacklight) – to reveal hidden leaf patterns in some species.
How to identify tree saplings using leaf shape and bark patterns
Mastering these two visual clues turns guesswork into confident matching.
🌿 Step 1: Examine Leaf Shape and Arrangement
Start by inspecting the leaf shape—this is your first major clue. Hold the leaf between your thumb and forefinger to feel its texture while observing its outline. Maple leaves, for example, typically have lobed edges with pointed tips, while oak leaves often feature deep sinuses that create distinct sections. Count the leaflets if it's a compound leaf: walnut saplings have 7-9 leaflets arranged alternately along a central stem.
Pay attention to how leaves attach to the stem. Alternate leaf arrangement (one leaf per node, alternating sides) is common in hickory and walnut, while opposite arrangement (pairs at each node) often indicates dogwood or ash. I always check the leaf underside too—some, like sycamore, have fuzzy white hairs that stand out clearly when held up to light.
🌱 Step 2: Study Bark Texture and Color
Sapling bark is often smoother than mature trees, but its pattern still holds key clues. Run your fingers gently over the bark to feel its texture. Young oak bark might feel rough with shallow ridges, while birch saplings typically have peeling, papery layers that flake away easily. Color matters too: red maple saplings often show reddish-purple bark, while beech bark remains a consistent smooth gray even as they age.
Look for distinctive markings. White ash saplings sometimes have diamond-shaped patterns in their bark, while hickory bark develops long, intersecting ridges that create a net-like appearance. I keep a small magnifying glass handy—some bark details, like the fine horizontal lines on young black cherry bark, are easier to spot when magnified.
☀️ Step 3: Compare with Seasonal Variations
Timing affects what you see. In spring, new leaves emerge with a fuzzy coating on many species (like willow), while summer leaves are fully developed. I've found that autumn is the best time to identify saplings because leaf colors become more distinct—maple leaves turn brilliant red, while oak leaves develop rich browns. Winter reveals bark patterns more clearly since there are no leaves to obscure them.
Take note of any unusual features. Some saplings develop thorns (like hawthorn) or spines (like honey locust), which can be identifying traits. I always check for these when I'm unsure—thorns are a dead giveaway for certain species. Keep a small notebook nearby to jot down observations like "smooth gray bark with white lenticels" or "compound leaves with serrated edges" for later comparison.
✂️ Step 4: Verify with Multiple Clues
Never rely on just one characteristic. Combine leaf shape, bark texture, and any other visible features like buds or fruit. For example, a sapling with lobed leaves and smooth gray bark is likely a beech, but if it also has pointed buds, that confirms it. I cross-reference with field guides or apps, but I always verify with at least two matching traits before making a final ID.
Watch for growth patterns too. Some saplings grow in clusters (like sycamore), while others stand alone. The way branches emerge—whether upright, spreading, or weeping—can also help narrow it down. I've made mistakes by focusing only on leaves, so I always take a step back and look at the whole picture before deciding.
Tips & tricks for perfect tree sapling identification
Real talk: I've spent years misidentifying saplings by focusing on just one clue. Here's what actually works.
Leaf Texture Matters: Beyond just looking at leaf shape, pay attention to how they feel. Rubbing your thumb along the leaf edge can reveal tiny serrations (like on hickory) or smooth curves (like on beech). I've caught myself overlooking this detail—it's often the difference between a "maybe" and a "definitely." In Step 1, when you're examining leaf shape, take an extra 10 seconds to feel the edges and underside.
Bark Magnification Game-Changer: That magnifying glass I mentioned in Step 2 isn't just for show. I keep one in my field kit specifically for bark details. The fine horizontal lines on black cherry bark or the diamond patterns on white ash become much clearer under magnification. Pro tip: Use natural light—it reveals more details than artificial light.
Seasonal Shortcuts: Autumn is your best friend for identification, but don't dismiss other seasons entirely. In spring, look for new leaves with fuzzy coatings (like willow) that disappear as they mature. I've had students overlook these temporary features because they weren't expecting them. When you're in Step 3 comparing seasonal variations, make notes about any temporary features you observe—they're often the most distinctive clues.
Cross-Reference with Growth Habits: The way a sapling grows tells you just as much as its leaves or bark. Notice if branches are upright (like young oaks) or weeping (like willows). I once thought I had a dogwood sapling because of the opposite leaf arrangement, but the weeping branches gave it away as a willow. In Step 4, when verifying with multiple clues, don't forget to observe the overall growth pattern—it's often the final piece of the puzzle.
Pro Tips for Tree Sapling Identification
- Real talk: I've spent years misidentifying saplings by focusing on just one clue. Here's what actually works.
- Leaf Texture Matters: Beyond just looking at leaf shape, pay attention to how they feel.
- Bark Magnification Game-Changer: That magnifying glass I mentioned in Step 2 isn't just for show.
Frequently asked questions
Got questions about identifying tree saplings? You’re not alone! Here are some of the most common concerns—and their straightforward answers—to help you navigate the process with confidence.
How young do saplings need to be for accurate identification?
Saplings as young as 1–3 years old can often be identified by leaf shape, bark texture, and growth patterns. Younger saplings may lack mature features, but comparing them to seedling stages of known species (via guides or apps) helps. Focus on leaf arrangement (alternate vs. opposite) and stem color—these traits are consistent early on!
What if my sapling’s leaves look different from the pictures in identification guides?
Leaf shape can vary based on light exposure, soil nutrients, or seasonal changes—especially in young trees. Compare multiple leaves (not just one!) and check for vein patterns, edges (lobed/smooth), and underside color. If unsure, note bark texture (smooth vs. ridged) or branch structure for a clearer match.
Is there a best time of year to identify saplings?
Spring and early summer (when leaves are fully formed) are ideal for identification. Avoid winter (bare branches) or fall (some leaves may brown). Morning light is best—leaves hold their natural shape, making patterns easier to spot. Pro tip: Take photos in natural light for later comparison!
Can I use an app instead of a field guide for sapling ID?
Apps like PictureThis, LeafSnap, or iNaturalist use AI to analyze leaf/bark images for instant matches. For best results: Include multiple angles, zoom in on key details (e.g., leaf veins), and note your location. Apps are great for beginners, but cross-check with a field guide to confirm tricky species.
What if I can’t identify my sapling at all?
Don’t stress—even experts sometimes hit a wall! Try these steps:
- Check local nursery catalogs for common regional species.
- Post photos to gardening forums (e.g., Reddit’s r/whatsthisplant).
- Contact a local arborist or university extension office—they often offer free ID services.
Remember: Some native species are rare, and that’s okay! Focus on care (water, sunlight) while you troubleshoot.
Wrapping up and next steps
Identifying tree saplings doesn’t have to be a guessing game—with the right tools and a keen eye, you can confidently match leaves and bark to the perfect species! 🌱 Whether you’re a gardener, landscaper, or nature enthusiast, mastering these skills unlocks a world of greener, healthier growth.
Ready to put your knowledge into action?
🌿 Next Steps:
- Start small: Grab a magnifying glass and study the saplings in your yard or a local park.
- Join a community: Share your finds with local gardening groups or plant forums for feedback.
- Plant with purpose: Once you’re confident, choose the perfect saplings for your space!