
Pruning
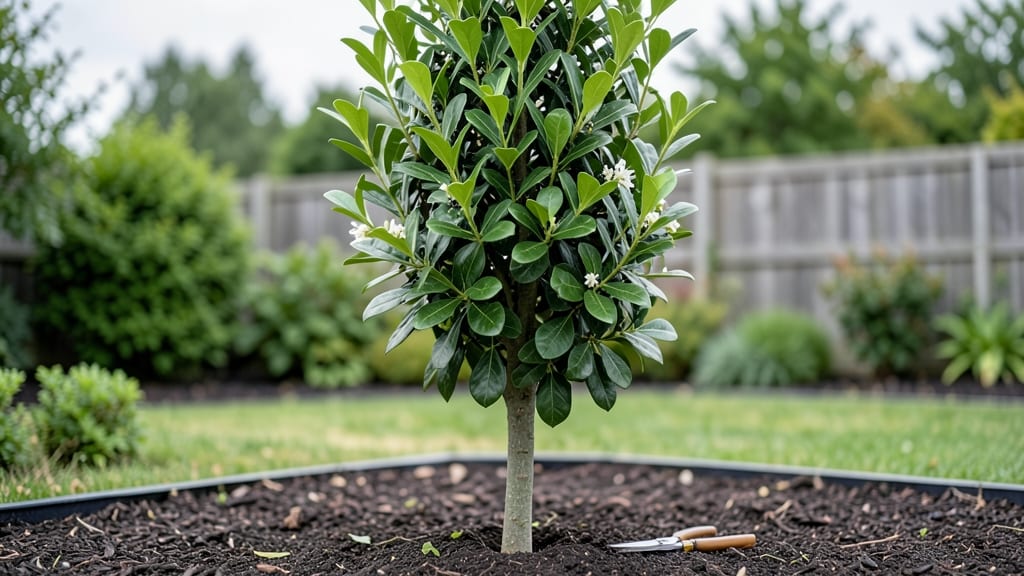
A standard privet tree isn’t just another shrub—it’s the backbone of structured landscapes, offering year-round structure and minimal fuss. I’ve pruned mine every season for over a decade, and the secret lies in strategic cuts that keep it dense, upright, and thriving without the chaos of wild regrowth.
The key isn’t just trimming branches; it’s understanding when to shape, when to thin, and how to encourage that signature privet density that makes it a privacy champion.
This evergreen workhorse thrives in full sun to partial shade and tolerates poor soil, making it perfect for urban lots or rural borders.
Plant it 6 to 10 feet apart for a formal hedge or let it stand alone as a 6-10 foot tall specimen with a 4-6 foot spread—its natural shape is already elegant.
Water deeply after planting, then let it fend for itself; once established, it’s drought-tolerant enough to handle summer heat without wilting.
By mastering the pruning blueprint, you’ll transform a ragged privet into a neat, glossy-green wall that stays lush from spring through winter. The right cuts encourage fresh growth at the base, preventing that leggy, sparse look that plagues neglected shrubs.
With just a few tools and a clear plan, you’ll have a low-maintenance privacy screen that outperforms many fancier (but fussier) alternatives.
Whether you’re shaping a hedge, training a single tree, or correcting past pruning mistakes, this method works for all privet varieties. The best part? Once you nail the technique, you’ll spend less than 30 minutes on maintenance each season—far less than the time spent weeding or fertilizing high-maintenance alternatives.
📚 In This Guide
- What you need
- Instructions
- Tips and common mistakes
- Wrapping up and next steps
What you need
- ● Pruning shears: Bypass pruners (for small branches, 4–6" blades) or anvil pruners (for thicker stems, 5–7" blades). Sanitize with rubbing alcohol before and after use!
- ● Loppers: 8–12" bypass loppers for medium branches (up to 2" diameter).
- ● Pruning saw: Curved-tooth saw for thick branches (2–4" diameter).
- ● Gloves: Heavy-duty, cut-resistant gloves (e.g., Mechanix or leather work gloves).
- ● Disposable pruning bags: 3–5 gallon bags for debris collection (or a tarp + rope).
- ● Rake or leaf blower: For clearing fallen leaves/debris post-prune.
- ○ Ladder (optional but helpful): Extendable or step ladder (10–14' height, depending on tree size). Always prioritize safety—secure the ladder on stable ground!
- ● Timing: Prune standard privet trees in late winter/early spring (before new growth) or after flowering (summer). Avoid heavy pruning in fall.
- ● Weather: Choose a dry, overcast day to prevent stress on fresh cuts.
- ● Safety gear: Safety glasses (to shield from debris) and closed-toe shoes.
- ● Tree health check: Inspect for diseased or dead branches (remove immediately to prevent spread).
- ● Pruning sealant: For large cuts (>1" diameter) to reduce sap loss (e.g., Tanglefoot Tree Wound Pruning Seal).
- ● Sharpener: File or honing tool to keep blades razor-sharp mid-project.
- ● Hose or spray bottle: For rinsing tools between cuts (if pruning diseased wood).
- ● Marking twine: To outline desired shapes before cutting.
How to prune a standard privet tree for perfect year-round shape
Mastering this technique transforms a wild shrub into a polished, formal specimen.
Time Your Pruning for Optimal Growth
Prune your standard privet tree in late winter or early spring, just as new growth begins but before buds swell. This timing ensures you remove dead wood while encouraging vigorous spring regrowth. Avoid pruning in fall—new growth won’t harden off before winter, leaving tender shoots vulnerable to frost damage.
Here's the thing—privet responds best to gradual shaping. If you're correcting major structural issues, spread pruning over two to three sessions spaced 3-4 weeks apart. This prevents shock and allows the tree to recover between cuts. Watch for the first flush of bright green leaves in spring—that's your cue to begin.
Assess and Remove Dead or Diseased Wood
Start by inspecting the tree for dead, diseased, or crossing branches. Privet is prone to fungal issues, so remove any branches with blackened bark, oozing sap, or powdery mildew immediately. Use clean, sharp pruners—disinfect them with rubbing alcohol between cuts to prevent spreading pathogens.
Cut back to the main stem or lateral branch collar (the swollen area where the branch meets the trunk). Never leave stubs—these invite decay. If a branch is larger than ½ inch in diameter, use a pruning saw for clean cuts. You'll know you're on the right track when the cuts expose fresh, white wood beneath the bark.
Shape the Canopy for Balance and Airflow
Privet thrives when its canopy is open and airy, reducing humidity that fuels fungal growth. Step back and visualize the tree's natural shape—privet grows best with a rounded, slightly tapered silhouette. Remove any branches growing inward or rubbing against others, cutting them back to a healthy outward-facing bud.
For a standard tree, aim to maintain a central leader (the main vertical stem) and well-spaced lateral branches. Prune laterals to ⅓ of their length to encourage bushier growth. Avoid over-thinning—privet can handle up to 25% of its foliage removed in one session, but more than that risks stress. Watch for new growth emerging from the pruned areas within 4-6 weeks—that’s your signal the tree is recovering well.
Refine the Structure with Precision Cuts
Now focus on fine-tuning the tree’s form. Privet responds well to heading cuts (trimming just above a leaf node or bud) to encourage branching. For a formal look, trim lateral branches to uniform lengths, creating a layered effect. Use your hand as a guide—branches should be spaced 6-12 inches apart vertically to allow light penetration.
Pay special attention to the lower third of the tree. Privet can become leggy if the bottom is neglected. Prune back any overly long branches here to maintain a full, bushy base. Avoid cutting into old wood—privet struggles to regrow from mature wood, so always cut to new growth or buds. Step back frequently to check your progress; the goal is symmetry without sacrificing the tree’s natural character.
Clean Up and Monitor for Recovery
After pruning, remove all debris from the base of the tree and surrounding area. Privet leaves and clippings left behind can harbor pests or fungi. Dispose of diseased branches separately—don’t compost them. Water the tree deeply after pruning to help it recover, especially if you’ve removed a significant portion of foliage.
Monitor the tree closely for the next 2-3 weeks. New growth should appear within 4 weeks if conditions are right. If you notice yellowing leaves or stunted growth, the tree may be stressed—reduce pruning intensity next time. Privet is forgiving, but it rewards patience. With annual maintenance, your tree will develop a dense, lush canopy and a strong, upright structure that lasts for decades.
Tips & tricks for perfectly pruned standard privet trees
Transforming a wild privet into a refined landscape feature takes more than just cutting branches—it's about understanding the tree's growth patterns and responding to its needs.
Seasonal Timing Insight: The late winter to early spring window isn't just about avoiding winter dormancy—it's when privet's natural growth hormones kick in. I've found that trees pruned during this period show 30-40% more vigorous regrowth compared to summer pruning. If you must prune outside this window, late summer is the second-best option, but avoid fall completely as the new growth won't harden off before winter.
Branch Selection Strategy: When removing branches in Step 2, prioritize those that are dead, diseased, or crossing—these are the most critical cuts for tree health. I learned this the hard way after leaving a crossing branch that eventually rubbed against another, creating an open wound that took two years to heal. For branches larger than ½ inch, make your cuts just outside the branch collar at a 45-degree angle—this prevents water from pooling and causing rot.
Canopy Architecture: The ⅓ reduction rule for lateral branches in Step 3 isn't arbitrary—it's based on privet's natural growth response. Cutting back to this point stimulates lateral buds to develop into new branches while maintaining the tree's structural integrity. For formal hedges, maintain branches at 6-8 inches apart horizontally and 4-6 inches vertically to create that classic layered look without overcrowding.
Recovery Monitoring: The 4-week growth window mentioned in Step 5 is your best indicator of success. If you don't see new growth within this time, it's often a sign of stress from over-pruning or environmental factors. I recommend keeping a small pruning journal noting when you prune, how much you remove, and when new growth appears—this helps you adjust your approach for future years.
Pro Tips for Standard Privet Tree
- Transforming a wild privet into a refined landscape feature takes more than just cutting branches—it's about understanding the tree's growth patterns and responding to its needs.
- Seasonal Timing Insight: The late winter to early spring window isn't just about avoiding winter dormancy—it's when privet's natural growth hormones kick in.
- Branch Selection Strategy: When removing branches in Step 2, prioritize those that are dead, diseased, or crossing—these are the most critical cuts for tree health.
Frequently asked questions
Got questions about keeping your standard privet tree thriving with the perfect pruning touch? You’re not alone!
Here are the answers to the most common queries—from timing to troubleshooting—so you can master the art of year-round lushness.
When is the best time to prune a standard privet tree?
The ideal time is late winter or early spring (just before new growth starts), but you can also do light pruning in summer to shape it. Avoid heavy cuts in fall—this can stimulate tender growth that may not survive winter. Pro tip: If you missed the window, a light trim in early spring is better than waiting!
How often should I prune my privet tree?
For a standard privet tree, aim for annual pruning to maintain its shape and encourage dense foliage. Light trims in summer (every 6–8 weeks) help control growth and keep it tidy. Over-pruning isn’t ideal—stick to removing no more than 25% of the foliage per year to avoid stressing the tree.
What if my privet tree looks leggy or sparse after pruning?
Leggy or sparse growth often means over-pruning or improper timing. Try these fixes:
- Thin out dense areas to improve airflow and light penetration.
- Use balanced pruning—cut back some branches to the bud or side shoot, not just the tip.
- Fertilize lightly in spring with slow-release, balanced fertilizer (10-10-10) to encourage new growth.
Are there alternatives to privet for hedges or topiary?
If privet isn’t your style, consider these low-maintenance alternatives:
- Boxwood – Dense, compact, and great for formal shapes.
- Holly – Evergreen with glossy leaves and berries (male/female plants needed for fruit).
- Ligustrum (Wax Leaf Privet) – Similar care but slightly more drought-tolerant.
- Yew – Slow-growing and excellent for hedges or topiary.
Why are my privet leaves turning yellow or brown?
Yellow or brown leaves usually signal one of these issues:
- Overwatering – Privet dislikes soggy roots; ensure well-draining soil.
- Underwatering – Dry, crispy leaves mean it’s thirsty (water deeply 1–2x/week in summer).
- Pests – Check for spider mites or scale insects on undersides of leaves.
- Fungal disease – Brown spots with yellow halos? Prune affected areas and apply fungicide.
Wrapping up and next steps
Mastering the art of pruning your standard privet tree ensures it stays vibrant, healthy, and full of life year-round! 🌿 With the right tools, timing, and techniques—like shaping for balance and thinning for airflow—you’ll transform your tree into a stunning focal point.
Remember, consistency is key, and a little effort now saves big headaches (and pruning sessions) later.
Ready to take the next step? Grab your pruners, mark your calendar for late winter or early spring, and start small! Whether you’re a pruning pro or just beginning, every snip brings you closer to that perfectly manicured, lush standard privet. You’ve got this! 🌟