
Pruning
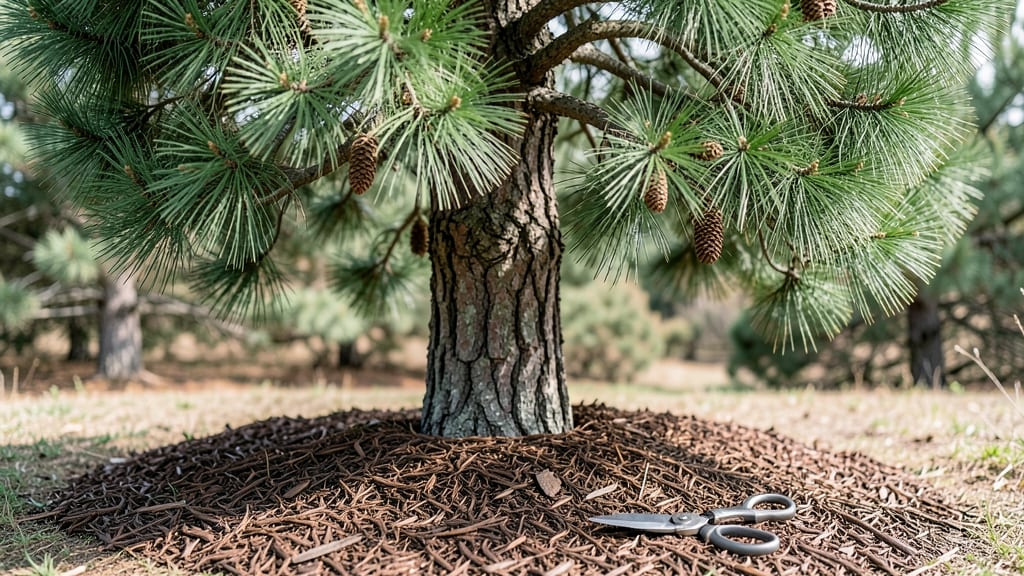
Pruning evergreen trees is the secret to keeping them healthy and looking their best year after year—without turning them into a tangled mess. 🌲 I’ve pruned everything from towering pines to delicate boxwoods, and the right cuts make all the difference between a thriving tree and one that struggles to recover.
The best time to prune depends on the type of evergreen: dormant season (late winter) works for most, while spring is ideal for flowering varieties. You’ll need sharp bypass pruners, a sturdy ladder, and a clear plan—whether you’re thinning out crowded branches or shaping for a polished look.
Avoid cutting more than 25% of the foliage at once, or you’ll stress the tree.
With the right technique, your evergreens will reward you with denser growth, fewer brown patches, and a shape that lasts all season. We’ll cover species-specific tips (like how conifers differ from broadleaf evergreens) and how to spot cuts that heal cleanly. Let’s get those branches looking intentional!
Safety first: wear gloves, check for nests or pests before cutting, and never remove large branches in one go. A little patience now means a strong, beautiful tree for years to come. Ready to transform your evergreens?
📚 In This Guide
- What you need
- Instructions
- Tips and common mistakes
- Wrapping up and next steps
What you need
- ● Pruning shears: Bypass pruners (for small branches, ¼" to ¾" diameter) or anvil pruners (for thicker branches, up to 1" diameter). Sharpness is key!
- ● Loppers: For medium branches (¾" to 2" diameter). Look for bypass-style to avoid crushing.
- ● Pruning saw: For thick branches (over 2" diameter). A curved-tooth saw works best for evergreens.
- ● Extension pole: A 3–6 ft telescoping pole with a saw or shears attachment for high branches.
- ● Work gloves: Heavy-duty, cut-resistant gloves to protect your hands.
- ● Safety glasses: To shield your eyes from debris.
- ○ Disinfectant (optional but recommended): 70% rubbing alcohol or a pruning sealant to prevent disease spread.
- ● Ladder: A sturdy, stable ladder (or spike-free step stool) for taller trees.
- ● Tarps or drop cloths: To collect fallen needles and debris.
- ● Marking twine or flags: For labeling branches to remove (great for complex pruning plans!).
- ● First-aid kit: Just in case of minor cuts or scrapes.
- ● Water spray bottle: To keep tools clean and dust-free during work.
Step-by-step guide for pruning evergreen trees
Healthy evergreens start with the right cuts—here’s how to shape them properly year-round.
✂️ Step 1: Assess the Tree and Plan Your Cuts
Start by examining the tree for dead, crossing, or overcrowded branches. Evergreens grow slowly, so remove no more than 25% of the foliage in a single session to avoid stressing the plant. I like to mark branches with a bright-colored ribbon before cutting—this helps me visualize the final shape and avoid over-pruning.
Look for branches that grow inward or rub against others. These are prime candidates for removal, as they compete for sunlight and nutrients. Also check for yellowing needles or sparse foliage, which often signals dying branches. Evergreens like arborvitae or juniper will show new growth at the tips, so focus cuts just above these healthy sections.
✂️ Step 2: Use the Right Tools and Technique
Sharp, clean tools are non-negotiable. A bypass pruner works best for branches up to ½ inch thick, while a pruning saw handles thicker stems. Disinfect your tools with rubbing alcohol between cuts to prevent spreading disease. I always make cuts just outside the branch collar—the swollen area where the branch meets the trunk—to promote faster healing.
For larger branches, use the three-cut method: First, make an undercut about 1-2 feet from the trunk, then a top cut slightly outside that, and finally remove the branch by cutting just outside the collar. This prevents tearing the bark. Avoid leaving stubs—evergreens heal poorly from improper cuts, leading to decay.
☀️ Step 3: Prune for Shape and Light Penetration
Evergreens thrive when their inner branches receive light. Thin out dense areas by removing every other branch in crowded spots, starting from the bottom. This encourages airflow and reduces pest risks. I aim for a pyramidal or rounded shape for most evergreens, but let the tree’s natural form guide you—forced shapes often look unnatural and stress the plant.
New growth appears at the tips of branches, so focus cuts just above these areas. For broadleaf evergreens like holly, prune after flowering to avoid removing next year’s blooms. Avoid heavy pruning in late summer or fall, as new growth won’t harden off before winter. Spring or early summer is ideal for most species.
⏰ Step 4: Maintain Year-Round with Seasonal Checks
Light pruning can happen anytime, but major shaping should wait until late winter or early spring before new growth begins. Check for winter burn (brown needle tips) in early spring—this is a sign of over-pruning or drought stress. Water deeply if the soil feels dry, and avoid heavy cuts until the tree recovers.
Evergreens like pine or spruce produce cones—never prune these off, as they’re part of the tree’s natural growth cycle. Instead, focus on removing dead branches or those growing at odd angles. A light touch keeps the tree healthy without sacrificing its natural beauty. I revisit my evergreens every 2-3 years for maintenance, adjusting shape as needed.
Tips & tricks for perfect evergreen pruning
Common pitfalls—and how to sidestep every one—when shaping evergreens for lasting health.
Branch Selection Strategy: In Step 1, when identifying branches to remove, prioritize those with yellowing needles or sparse foliage—they’re already compromised. For healthy branches, focus on inward-growing or crossing branches—these compete for sunlight and nutrients. I’ve learned the hard way that removing too many healthy branches at once can shock the tree, so stick to the 25% rule mentioned in the instructions. If you’re unsure, snap off a small twig—if it snaps cleanly, the branch is healthy; if it bends or breaks, it’s time to remove it.
Tool Maintenance Secret: The instructions emphasize using sharp tools, but here’s what nobody tells you—sterilize your pruners between each cut when dealing with multiple trees. I keep a small bottle of rubbing alcohol in my tool belt and wipe blades after every 3-4 cuts, especially when moving between trees. This prevents spreading fungal diseases that can devastate evergreens. For larger branches in Step 2, the three-cut method is non-negotiable—evergreens heal poorly from improper cuts, and stubs create entry points for pests.
Seasonal Timing Insight: While the instructions recommend late winter or early spring for major shaping, I’ve found that broadleaf evergreens like holly require special attention. For these varieties, prune immediately after flowering—this ensures you don’t accidentally remove next year’s blooms. The 2-3 year maintenance schedule mentioned for most evergreens works beautifully, but I adjust for fast-growing species like arborvitae, which I prune annually to maintain their shape without over-stressing them.
Visual Shape Guide: When aiming for that pyramidal or rounded shape in Step 3, think about the tree’s natural growth pattern. For conical evergreens like pine, start thinning from the bottom up—this opens the center for light penetration while maintaining the tree’s natural silhouette. For rounded varieties, remove branches that disrupt the symmetry. I like to step back every few cuts and visualize the tree’s final form, adjusting as I go. The goal is to enhance the tree’s natural beauty, not force an unnatural shape.
Pro Tips for Prune Evergreen Trees
- Common pitfalls—and how to sidestep every one—when shaping evergreens for lasting health.
- Branch Selection Strategy: In Step 1, when identifying branches to remove, prioritize those with yellowing needles or sparse foliage—they’re already compromised.
- Tool Maintenance Secret: The instructions emphasize using sharp tools, but here’s what nobody tells you—sterilize your pruners between each cut when dealing with multiple trees.
Frequently asked questions
Got questions about pruning evergreen trees? You’re not alone! Here are some of the most common concerns—plus expert answers to keep your trees thriving.
When is the best time to prune evergreen trees?
The ideal time depends on your goal: late winter or early spring (before new growth) is best for shaping, while summer pruning (after 6-8 weeks of growth) helps control size. Avoid heavy pruning in fall—it can stress trees before winter. For conifers like pines or spruces, prune only when necessary (e.g., to remove dead branches), as over-pruning can harm their growth.
How much can I trim an evergreen tree without harming it?
Never remove more than 25% of the foliage in a single pruning session—this rule protects the tree’s health. For large evergreens, spread pruning over 2-3 years to avoid shock. Thin out interior branches (those growing inward) first to improve airflow and light penetration. If you’re unsure, start small and monitor the tree’s response.
What if my evergreen tree looks sad after pruning?
Yellowing needles, sparse growth, or wilting can signal stress—but don’t panic! Water deeply after pruning, and avoid fertilizing for 4-6 weeks. If the tree is severely damaged (e.g., large limbs removed), apply a wound sealant (for broadleaf evergreens like arborvitae) to prevent disease. Most evergreens recover within a season if given time and proper care.
Can I prune evergreen trees in winter?
Yes, but with caution! Light pruning (removing dead or broken branches) is safe in winter when trees are dormant. Avoid heavy shaping—cold temperatures can slow healing. For broadleaf evergreens (like holly or magnolia), winter pruning is fine, but needle-bearing evergreens (pines, firs, spruces) are best pruned in early spring to minimize stress.
What’s the difference between pruning and shearing evergreen hedges?
Pruning is selective: you remove specific branches to improve shape, health, or structure. Shearing (using hedge trimmers) is uniform cutting for a manicured look. For evergreens, prune first to thin out dense areas, then shear lightly for a polished finish. Over-shearing can create a "brown layer" (dead growth) on the surface—always leave some texture to encourage new growth.
Wrapping up and next steps
Pruning evergreen trees is all about patience, precision, and purpose—whether you're shaping them for beauty, health, or safety. 🌿 By following seasonal guidelines, using the right tools, and avoiding common mistakes, you’ll keep your trees thriving for years.
Now that you’re armed with the know-how, take action! Grab your pruners, step outside, and give your evergreens the care they deserve—one careful cut at a time.
Next step: Pick a sunny day, mark your cuts, and start small. Your future lush, well-shaped evergreens will thank you! 🌟