
Pruning
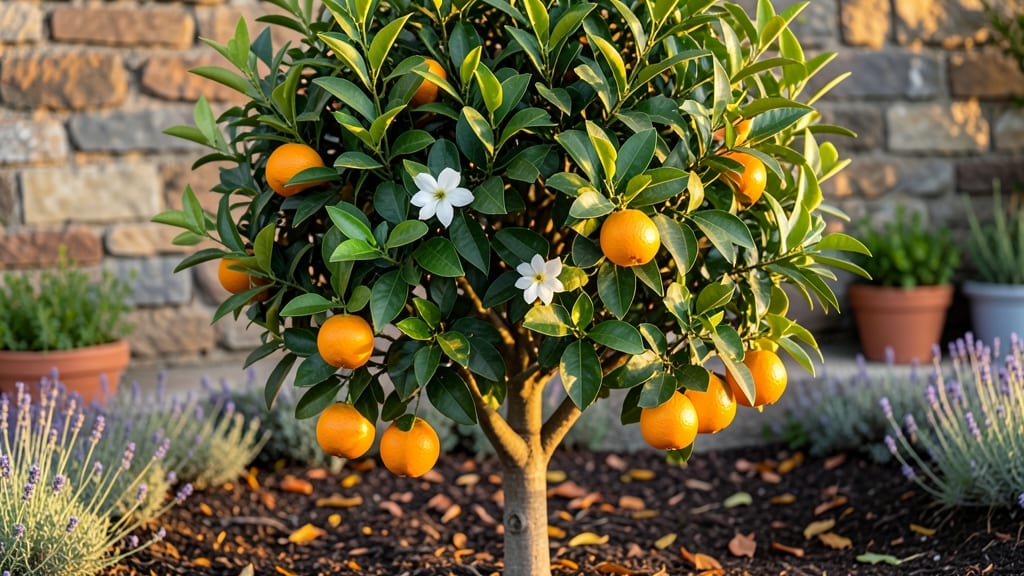
Growing a small orange tree that actually bears fruit requires patience, but the first sweet-smelling blossoms in spring make every winter prune worth it. 🌱 I learned this the hard way with my first Calamondin—over-pruning led to weak branches and tiny, bitter fruit.
The secret isn't just cutting back, but doing it at the right time and in the right way.
Dormant season pruning—right after harvest and before new growth—strengthens the tree's structure while setting it up for a heavier fruit load next year. You'll need sharp pruners, rubbing alcohol for sterilization, and a clear day to assess the tree's shape.
Even experienced gardeners can overdo it, so focus on removing dead wood and thinning crowded branches to improve airflow.
What you'll end up with is a tree that looks like a mature citrus specimen in just a few years, with branches sturdy enough to hold fruit and a canopy that lets sunlight reach every leaf.
The first harvest might be small, but each year after that, you'll see more blossoms and sweeter oranges—if you follow the pruning rules I've perfected after years of trial and error.
Whether you're growing in a sunny California backyard or a bright indoor pot, the same principles apply. The key is consistency—prune the same way every year, and your small orange tree will reward you with years of fruit production. Let's get those branches in shape for next season's harvest.
📚 In This Guide
- What you need
- Instructions
- Tips and common mistakes
- Wrapping up and next steps
What you need
- ● Pruning shears: Bypass pruners (sharp, clean, and sterilized with rubbing alcohol to prevent disease). Choose a pair with 5-inch blades for precision.
- ● Loppers: For thicker branches (up to 1.5-inch diameter), opt for bypass loppers with a 10-inch handle for leverage.
- ● Hand saw: A curved-tooth pruning saw for branches 1.5+ inches thick—avoid cheap saws that splinter wood.
- ● Rubbing alcohol (70%+ isopropyl): A small bottle for sterilizing tools between cuts.
- ○ Pruning sealant (optional but recommended): A latex-based sealant (like Tanglefoot Pruning Seal) to coat cuts larger than ½-inch.
- ● Gloves: Heavy-duty gardening gloves (nitrile-coated for grip) to protect against thorns and sap.
- ● Disposable bags or bucket: For collecting pruned debris (aim for 5+ gallon capacity).
- ● Ladder (if needed): A stable, extendable ladder (e.g., 12–16 feet) with non-slip feet for taller trees.
- ● Sharpener: A file or honing tool to keep blades razor-sharp mid-pruning.
- ● Spray bottle with water: To dampen cuts and reduce sap splatter.
- ● Notebook & pencil: For sketching your tree’s branch structure before pruning.
- ● Tree growth regulator (if needed): Products like Dormant Oil Spray to protect against pests during dormancy.
Step-by-step instructions for pruning your small orange tree
Here's how I transform a tangled orange tree into a sturdy, fruiting powerhouse every winter.
✂️ Step 1: Time Your Pruning Perfectly
Wait until your tree has shed all its leaves and before new growth begins—typically late winter to early spring when temperatures stay above 30°F. Cold snaps can stress fresh cuts, so avoid pruning when frost is forecast. I test by gently bending a small branch; if it snaps crisply, it's ready.
Never prune in fall, as new growth won't harden off before winter. The goal is to stimulate strong spring growth while maintaining the tree's natural shape. If your tree is young (under 5 years), you can do light pruning in summer too, but dormant season is best for major shaping.
🌿 Step 2: Remove Dead, Diseased, or Crossing Branches
Start by cutting out any dead wood—it's easy to spot as dry, brittle branches that snap when bent. Next, remove branches with mushroom-like growths or peeling bark, as these indicate disease. Use clean, sharp pruners to make 45-degree cuts just above outward-facing buds.
Look for branches growing directly toward the center of the tree—these create weak crotches and invite rot. Cut these at the base, then step back to check your work. The tree should now have an open vase shape with sunlight reaching all branches. I always prune from the inside out to avoid leaving stubs.
🌱 Step 3: Thin Out Excess Growth for Airflow
Select 3-5 main scaffold branches (the largest, sturdiest limbs) and remove any smaller branches growing from their base. These "water sprouts" steal energy from fruit production. Aim to reduce total branch density by 20-30%—this improves airflow and prevents fungal diseases.
For each branch you keep, look for 3-4 strong lateral branches and prune back any weaker growth. Cut just above a leaf bud that faces outward. If you're unsure which bud to target, make your cut at a slight upward angle to encourage upward growth. Real talk: I used to over-prune here, but now I stop when I see evenly spaced branches with room between them.
☀️ Step 4: Shape for Sunlight and Fruit Access
Step back and visualize your tree's canopy. The goal is a rounded shape that lets sunlight reach all branches. Prune any upward-growing branches that block light from lower limbs. For horizontal branches, trim back the tips slightly to encourage bushier growth.
If your tree has suckers (shoots growing from the base), remove these immediately—they drain energy from fruit production. I also check for overly long branches that could break under fruit weight and prune them back by one-third. After shaping, your tree should look balanced, with no single branch dominating the structure.
💧 Step 5: Clean Up and Protect Your Tree
Dispose of all pruned branches in a sealed bag—never leave them on the ground, as they can harbor pests. Sterilize your pruners with rubbing alcohol between cuts to prevent disease spread. After pruning, apply a dormant oil spray (available at garden centers) to smother overwintering pests like scale.
Water deeply after pruning to help the tree recover. I give mine 1 gallon per inch of trunk diameter—so a 2-inch trunk gets 2 gallons. Avoid fertilizing right after pruning, as new growth needs time to establish before winter stress returns. Your tree will thank you with stronger branches and more fruit next season.
Tips & tricks for pruning small orange trees
Common pitfalls—and how to sidestep every one when pruning your citrus tree.
Timing is Everything: The late winter to early spring window (when temperatures stay above 30°F) is your sweet spot for pruning. I learned this the hard way after pruning too early one year—my tree struggled to recover before new growth began. If you're unsure, do the "branch snap test": gently bend a small branch. If it snaps crisply, your tree is ready. If it bends without breaking, wait a few more weeks.
Branch Selection Strategy: When thinning branches in Step 3, focus on creating that 20-30% reduction in density—this isn't about aggressive cutting, but strategic selection. I always prioritize removing branches that grow inward or cross others, as these create weak attachment points. Remember: you want sunlight to reach all parts of the canopy, not just the outer branches. After each cut, step back and visualize how sunlight will penetrate.
Cutting Technique Matters: Those 45-degree cuts above outward-facing buds aren't just decorative—they're essential for proper healing. I used to make straight cuts, which left ugly stubs and increased disease risk. The angled cut helps water run off, and positioning it just above a bud encourages new growth in the right direction. For thicker branches, make a second cut about 1/4 inch away from the first to prevent tearing.
Post-Pruning Care: After your work is done, don't forget the 1 gallon per inch of trunk diameter watering rule. This might seem like a lot, but it's crucial for recovery. I also recommend applying a thin layer of mulch around the base (but not touching the trunk) to retain moisture and regulate soil temperature. This simple step can make a huge difference in your tree's ability to bounce back from pruning.
Pro Tips for Small Orange Tree
- Common pitfalls—and how to sidestep every one when pruning your citrus tree.
- Timing is Everything: The late winter to early spring window (when temperatures stay above 30°F) is your sweet spot for pruning.
- Branch Selection Strategy: When thinning branches in Step 3, focus on creating that 20-30% reduction in density—this isn't about aggressive cutting, but strategic selection.
Frequently asked questions
Got questions about nurturing your small orange tree during dormancy? Here are answers to the most common concerns—so you can prune with confidence and set the stage for a fruit-filled future!
When is the best time to prune a small orange tree?
The ideal time is late winter or early spring, before new growth begins. This aligns with the tree’s dormant season (typically January–February in most climates). Pruning then encourages stronger branches and better fruit production. Avoid pruning in fall—it can stimulate late growth vulnerable to frost damage.
How much should I trim off a young orange tree?
For young trees (under 3 years old), remove no more than 20–25% of the total foliage. Focus on:
- Dead, diseased, or crossing branches
- Suckers at the base
- Overcrowded growth to improve airflow
What if my orange tree’s branches are weak or brittle?
Weak branches often signal over-pruning, nutrient deficiency, or pest stress. Troubleshoot with:
- Fertilize with citrus-specific food (high in nitrogen early in the season)
- Water deeply but avoid soggy soil
- Support branches with stakes if needed
- Check for aphids or scale insects—treat with neem oil if present
Can I prune a potted orange tree the same way?
Yes! Potted trees follow the same rules, but with extra attention to root space. Prune to maintain the tree’s natural shape and prevent it from becoming root-bound. Pro tip: After pruning, repot if roots circle the container—use a well-draining mix and a pot just 2–3 inches larger in diameter.
Will pruning now affect next year’s fruit?
Pruning during dormancy improves fruit production by redirecting energy to healthy growth. However, avoid heavy cuts if your tree is already bearing fruit—focus on shaping and removing only dead wood. Key: Balance pruning with regular feeding (like citrus micronutrients) to support fruit development.
Wrapping up and next steps
Growing a small orange tree is a rewarding journey that combines patience, care, and a little know-how—especially when it comes to dormant-season pruning. By following the right techniques, you’ll strengthen its structure, boost fruit production, and keep your tree thriving for years to come. 🌱✨
Now that you’re armed with the essentials, roll up your sleeves and get pruning! Start with a clean workspace, sharp tools, and confidence—your orange tree will thank you with vibrant growth and delicious harvests. Happy pruning, and may your citrus dreams bloom bright!