
Trees
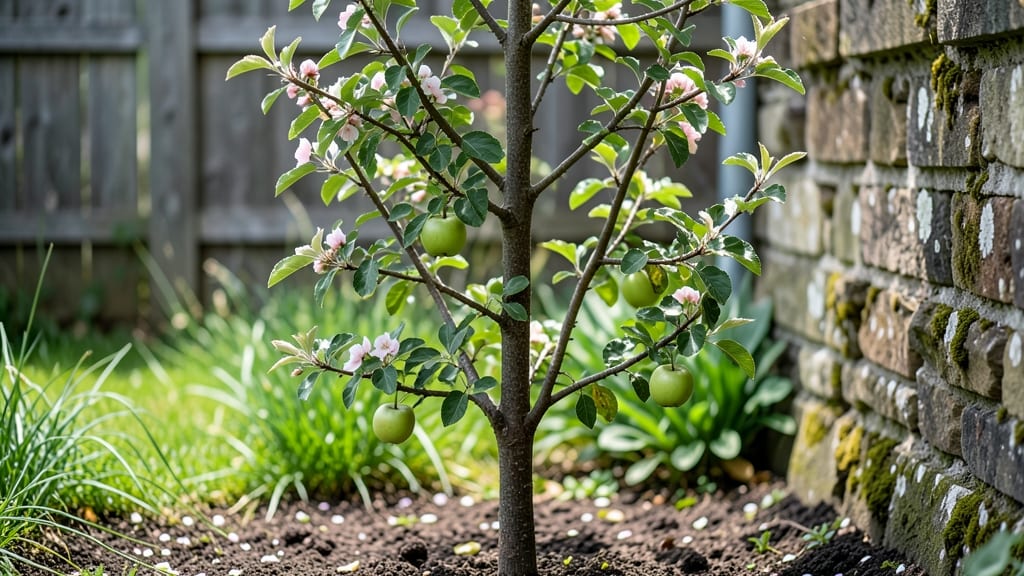
Shaped apple trees turn your yard into a living work of art—where fruit meets form in a way that makes neighbors pause and ask questions. 🌿 I’ve trained my own espaliered apples along my fence, and the way they arch like calligraphy against the sky never fails to impress.
The best part? These aren’t just pretty—they’re productive, too, saving space while giving you that satisfying crunch of homegrown fruit year-round.
The magic happens with pruning, timing, and a little creativity. You don’t need fancy tools—just sharp shears, a sturdy trellis or wall, and patience (though I’ll admit, my first attempt looked more like a tangled mess than art).
The key is shaping during dormancy, when branches are easier to guide, and training them gradually so they don’t snap under their own weight. Even small gardens can fit a three-foot-tall espalier or a fan-shaped topiary that blooms with white spring flowers.
By summer, your trees will reward you with glossy green leaves, delicate blossoms, and actual apples—all within arm’s reach. Picture picking fruit while sipping tea on your patio, or gifting neighbors branches heavy with fruit.
The designs range from geometric espaliers to weeping standards, so you can match your style to your space. Ready to turn fruit trees into garden statements?
Works for urban balconies, cottage gardens, or formal landscapes—just adjust the scale. The only limit is your imagination (and how much you’re willing to prune). Let’s get those branches bending into beauty!
📚 In This Guide
- What you need
- Instructions
- Tips and common mistakes
- Wrapping up and next steps
What you need
- ● Apple tree saplings or young trees: Choose disease-resistant varieties (e.g., Honeycrisp, Fuji, or Granny Smith) with flexible branches. 1–3 trees (depending on your design).
- ● Pruning tools: Bypass pruners (for clean cuts) – 1 pair
- ● Loppers (for thicker branches) – 1 pair
- ● Hand saw (for stubborn limbs) – 1
- ● Support structures: Trellis (for espalier) – 1–2 per tree, 6–8 ft tall
- ● Stakes & twine (for topiary) – 3–5 stakes per tree, 20–30 ft twine
- ● Wire or fishing line (for guiding branches) – 50–100 ft
- ○ Pruning sealant: (Optional but recommended) – 1 small bottle (e.g., Tanglefoot Tree Wound Pruning Seal).
- ● Gloves & safety gear: Heavy-duty gardening gloves (1 pair) and eye protection (1 pair).
- ● Knowledge: Basic pruning skills (or a willingness to learn! Watch tutorials or consult a local arborist).
- ● Timing: Best to shape trees in late winter or early spring (dormant season) or summer after harvest.
- ○ Optional but helpful: Spray paint (for marking cuts) – 1 small can
- ● Plant ties (for securing branches) – 5–10
- ● Fertilizer (balanced 10-10-10) – 1 bag (for post-pruning recovery).
Step-by-Step guide to designing artisan apple tree canopies
Transform your orchard into a living work of art with these shaping techniques.
🪴 Step 1: Choose the Right Tools and Timing
Select sharp, clean pruning shears for clean cuts—dull blades tear bark and invite disease. I always sterilize my tools with rubbing alcohol before starting. The best time to shape apple trees is during their dormant season in late winter or early spring, just before buds swell. This ensures minimal stress on the tree and maximum healing potential.
For young trees, you can shape canopies anytime between early spring and early summer, but avoid heavy pruning in fall. Watch for the first flush of new growth—this signals the tree is waking up and ready for structural work. If you're shaping an established tree, do it gradually over several years to avoid shocking the tree.
☀️ Step 2: Establish Your Design Framework
Start by visualizing your ideal canopy shape—whether it's a classic espalier, open vase, or rounded central leader. I sketch a rough outline on paper first to map out my cuts. For a balanced look, divide your tree into four quadrants and aim for even distribution of branches. Apple trees naturally grow with a central leader, but many varieties benefit from an open center that allows light penetration.
Look for the main scaffold branches—these are the sturdy limbs that will form the backbone of your design. They should be spaced about 12-18 inches apart along the trunk. Remove any competing branches that grow too close together or cross each other. These will compete for nutrients and create weak points where disease can enter.
✂️ Step 3: Prune for Structure and Form
Begin by removing any dead, diseased, or damaged wood first—these are easy targets. Next, cut back any branches that grow inward toward the center of the tree. You want an open canopy that lets sunlight reach all parts of the tree, which improves fruit production and air circulation. Make your cuts just outside a bud or branch collar to encourage proper healing.
For shaping, I focus on creating a natural taper by shortening branches on the lower part of the tree and leaving longer branches higher up. This creates a graceful, balanced silhouette. If you're aiming for a formal shape like espalier, use stakes and ties to gently train branches into position. Remember, apple trees grow about 12-24 inches per year, so your design will evolve over time.
🌿 Step 4: Refine and Maintain Year-Round
After your initial shaping, monitor the tree's growth throughout the season. In early summer, you can do light pruning to redirect growth or remove water sprouts—those fast-growing vertical shoots that steal energy from fruit production. Summer pruning should be minimal, focusing only on shaping and removing suckers that grow from the base.
In late summer or early fall, do a final check for any branches that need adjustment. This is also the time to fertilize if your tree shows signs of stress, like yellowing leaves or stunted growth. Mulch around the base with 2-3 inches of organic mulch to retain moisture and regulate soil temperature. The key is patience—your tree's shape will develop gradually, and each year you'll get closer to your vision.
Tips & tricks for perfect artisan apple tree canopies
Your apple tree's silhouette can become a stunning focal point—here's how to turn it into a masterpiece without stressing the tree.
Timing Secret: The dormant season timing in Step 1 is non-negotiable for young trees—those late winter/early spring windows give the tree maximum healing time. For established trees, I've learned to split shaping over multiple years, focusing on one quadrant each season. This gradual approach prevents shock while still achieving that elegant, balanced look over time.
Design Framework: When sketching your design in Step 2, I always draw to scale using a tape measure. That 12-18 inch spacing for scaffold branches becomes much clearer when you mark it on paper. Pro tip: Use colored pencils to mark branches you'll keep (green) versus remove (red)—it makes your cuts much clearer when you're standing under the tree.
Pruning Precision: In Step 3, those cuts just outside the branch collar aren't just technical—they're crucial for healing. I've seen too many trees develop cankers from improper cuts. Use a sharp knife to make a small notch above your cut line, then make your clean cut just outside that notch. This creates a natural seal that prevents disease entry.
Year-Round Maintenance: The 2-3 inches of organic mulch mentioned in Step 4 is your secret weapon for moisture retention. I like to use shredded hardwood mulch because it breaks down slowly and improves soil structure over time. Just remember to keep it 2-3 inches away from the trunk to prevent rot—this is where many gardeners make the critical mistake.
Pro Tips for Shaped Apple Trees
- Your apple tree's silhouette can become a stunning focal point—here's how to turn it into a masterpiece without stressing the tree.
- Timing Secret: The dormant season timing in Step 1 is non-negotiable for young trees—those late winter/early spring windows give the tree maximum healing time.
- Design Framework: When sketching your design in Step 2, I always draw to scale using a tape measure.
Frequently asked questions
Got questions about shaping your apple trees into stunning canopies? You’re not alone! Here are answers to the most common queries—from timing to troubleshooting—so you can create your dream orchard with confidence.
How often should I prune shaped apple trees to maintain their form?
Prune shaped apple trees 2–3 times a year for best results: late winter (dormant season) to define structure, early summer to encourage fruiting spurs, and light touch-ups in fall if needed. Avoid heavy pruning in late summer—it can stress the tree and delay next year’s bloom.
When is the best time to start shaping a young apple tree?
Begin shaping apple trees as soon as they’re planted (1–2 years old) while they’re still flexible. Young branches respond best to training, making it easier to establish your desired shape (e.g., espalier, candelabra, or vase). Wait too long, and the tree may develop stubborn growth patterns. Patience pays off!
Can I shape an already mature apple tree, or is it too late?
It’s never too late to reshape a mature tree, but expect a slower process. Focus on gradual adjustments: remove dead/diseased wood, thin crowded branches, and redirect growth with strategic cuts. Avoid drastic changes—this can shock the tree. For large trees, consult an arborist to avoid structural damage.
Will shaping my apple tree reduce fruit production?
Not if done correctly! Proper shaping improves airflow and sunlight exposure, which can increase fruit quality and yield. However, aggressive pruning (especially in fruiting seasons) may temporarily reduce harvests. Balance form and function—prioritize fruit-bearing branches (spurs) while refining the canopy.
What’s the easiest shape for beginners to try with apple trees?
Start with a candelabra shape—a central leader with 3–5 evenly spaced scaffold branches. It’s simple, functional, and mimics natural growth. For a more dramatic look, try espalier (flat against a wall) or vase-shaped trees, but these require more patience. Use stakes and ties for support!
My shaped apple tree’s branches are splitting—what went wrong?
Splitting branches often happen from over-pruning, improper cuts, or sudden weight (like heavy fruit). Fix it by thinning crowded branches (don’t top them!) and using proper pruning techniques (cut at a 45° angle, just outside the branch collar). For large splits, consult an arborist to avoid disease entry.
Wrapping up and next steps
Transforming your apple trees into living works of art isn’t just possible—it’s rewarding! With the right tools, patience, and a touch of creativity, you can enjoy year-round beauty while harvesting delicious fruit.
Whether you’re shaping a classic espalier or experimenting with topiary, the process connects you deeper to nature and elevates your garden’s charm.
Ready to take the next step? Start small—pick one tree and practice your techniques. Over time, your skills (and your garden’s artistry!) will flourish. Happy shaping! 🌿✨