
Pruning
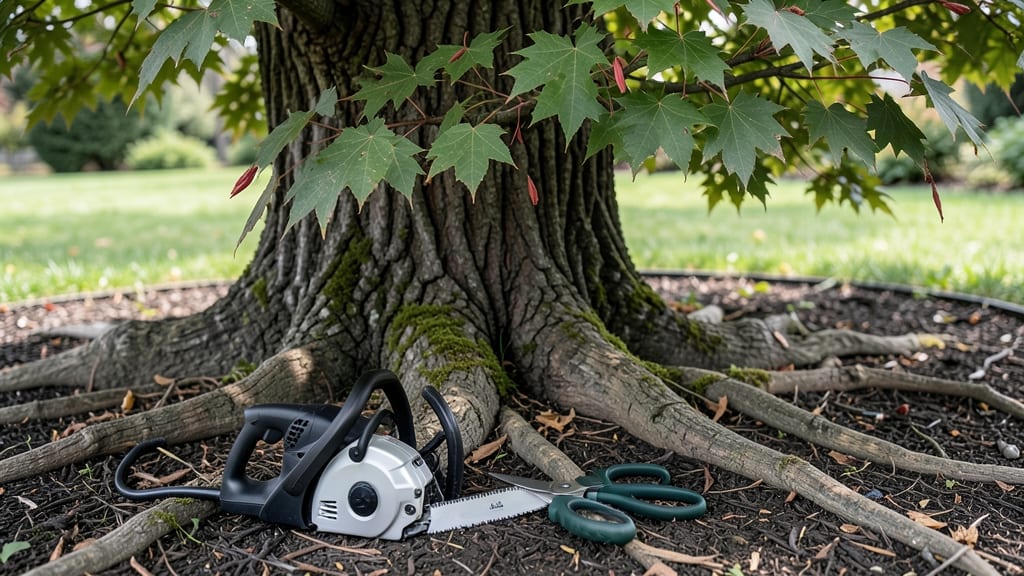
When invasive tree roots threaten your foundation or driveway, a Sawzall is your secret weapon—but only if you cut precisely. I’ve used this method to free up stubborn roots without harming the tree, and the results are cleaner than any other tool I’ve tried.
The key isn’t brute force; it’s knowing where to cut and how to protect the trunk’s lifeline.
You’ll need safety gear (gloves, goggles), a sharp Sawzall blade, and a pruning saw for follow-up trimming. Mark the roots with spray paint first—this helps you visualize the cut lines before making a single pass.
Most people oversaw, but the goal is to remove only the aggressive roots while leaving the smaller feeder roots intact.
After cutting, the tree will send out new growth within 4-6 weeks, but proper aftercare keeps it healthy. Water deeply around the root zone, and avoid compacting soil near the cuts.
If the roots return thicker than before, that’s your cue to call an arborist—some trees need professional root barriers instead.
This technique works for oak, maple, and willow roots, but avoid it on fruit trees or young specimens. The Sawzall’s power makes it ideal for thick roots, but patience is what prevents long-term damage. Ready to reclaim your landscape without sacrificing the tree’s health?
📚 In This Guide
- What you need
- Instructions
- Tips and common mistakes
- Wrapping up and next steps
What you need
- ● Pruning Saw (Sawzall or Reciprocating Saw): 1x Bi-metal or carbide-tooth blade (10–12 inches long, 1/4"–3/8" kerf width)
- ● 1x Safety guard (to protect hands and clothing)
- ● Protective Gear: 1x Safety goggles (ANSI-rated for debris)
- ● 1x Heavy-duty gloves (cut-resistant, like leather or chainmail)
- ● 1x Ear protection (earplugs or muffs for loud saws)
- ● 1x Long-sleeve shirt & pants (to avoid snags or cuts)
- ● Measuring & Marking Tools: 1x Tape measure (10–25 ft, depending on tree size)
- ● 1x Chalk or marking spray (for clean cut lines)
- ● Cleanup Supplies: 1x Wheelbarrow or heavy-duty trash bags (for debris)
- ● 1x Shovel or rake (to clear cut roots)
- ● Root Pruning Tools: 1x Root saw or root pruner (for stubborn, thick roots)
- ● Safety & Comfort: 1x Knee pads (for prolonged kneeling)
- ● 1x Tree wedge or prop (to stabilize the tree while cutting)
- ● Post-Cut Care: 1x Root sealant or wound dressing (to protect exposed cuts)
- ● 1x Mulch (to cover the area after pruning)
Precision techniques for cutting tree roots with a Sawzall
Here’s how to make clean, controlled cuts without harming the trunk or destabilizing the tree.
Assess the Roots and Plan Your Cuts
Start by examining the root system around the tree. Look for lateral roots—thick, horizontal roots spreading from the trunk—that need removal. These are often 2-4 inches in diameter and are the primary targets for sawing. Avoid cutting any roots that are more than 1/3 the diameter of the trunk, as these are critical for structural stability.
Mark your cutting lines with spray paint or a non-toxic marker. Measure at least 12 inches away from the trunk to prevent girdling, which can strangle the tree by severing its nutrient flow. If the roots are tangled or intertwined with others, plan to cut them in sections, working outward from the trunk.
Set Up Your Sawzall for Safety and Efficiency
Equip your Sawzall with a fine-tooth metal-cutting blade designed for clean cuts on dense materials like roots. A blade with 14-18 teeth per inch will reduce tearing and leave smoother edges. Secure the blade firmly in the tool and check the chain tension—it should have just enough slack to move freely without wobbling.
Wear heavy-duty gloves, safety goggles, and long sleeves to protect against flying debris and sap. If the roots are deeply buried or embedded in hard soil, consider renting a root saw attachment for your Sawzall. This attachment provides better leverage and control, especially for roots thicker than 3 inches in diameter.
Make the Cuts with Controlled Precision
Begin cutting at a 45-degree angle to create a clean break and minimize jagged edges that could tear further when the root is removed. Start slowly and apply steady pressure—rushing the cut can cause the blade to bind or kick back. For roots thicker than 2 inches, make two parallel cuts 1/4 inch apart to create a groove, then finish with a final pass to sever the root completely.
Listen for changes in the sound of the blade. A smooth, rhythmic hum indicates you’re cutting through cleanly, while a grinding or squealing noise signals the blade is binding or hitting soil. Pause frequently to clear debris from the cut line with a small pruning hook or your gloved hand. Never force the Sawzall—let the tool do the work to avoid damaging the blade or the tree.
Remove the Cut Roots and Monitor the Tree
Once the roots are fully severed, use a pruning saw or root pruner to lift them from the soil. Be gentle to avoid tearing the remaining root tissue. For large roots, you may need to wiggle them free or use a digging bar to loosen the soil around them. Dispose of the roots properly—composting is fine for small, healthy roots, but diseased or infested roots should be bagged and discarded.
After cutting, inspect the tree for any signs of stress, such as oozing sap or wilting leaves. Water the tree deeply to help it recover, and apply a root-stimulating fertilizer to encourage regrowth. Monitor the area over the next 4-6 weeks for new root development. If the tree shows signs of decline—like yellowing leaves or stunted growth—it may need additional care, such as mulching or pruning to reduce stress.
Tips & tricks for precision root cutting with a Sawzall
These pro techniques will help you make cleaner cuts and keep your tree healthier after the job.
Blade Selection Matters: For roots between 2-4 inches thick, a fine-tooth metal-cutting blade with 14-18 teeth per inch is ideal. If you're dealing with roots thicker than 3 inches, consider renting a root saw attachment—it provides the extra leverage needed for those stubborn, deeply embedded roots. The key is finding the right balance between tooth count and cutting power for your specific root diameter.
Angle and Technique for Clean Cuts: That 45-degree angle in Step 3 isn't just decorative—it creates a clean break that won't tear when you remove the root. Start your cut slightly above the marked line, then angle downward to meet the soil. For roots thicker than 2 inches, the two parallel cuts 1/4 inch apart create a natural stress point that makes the final severing easier without splintering.
Listening to Your Tool: Pay attention to the blade's sound—it's your early warning system. A smooth hum means you're cutting through cleanly, but that grinding or squealing noise means you're hitting soil or the blade is binding. When you hear that change, pause immediately, clear the debris, and reassess your angle. Forcing the Sawzall through resistance is how you dull blades and damage trees.
Post-Cut Monitoring Strategy: The 4-6 week monitoring period in Step 4 isn't just idle waiting—it's when you'll see how well your tree is recovering. Look for new root growth near the cut lines as a good sign. If you notice oozing sap at the cut site, that's normal for a few days, but persistent weeping could indicate damage. Apply that root-stimulating fertilizer within a week of cutting to give the tree a metabolic boost during recovery.
Pro Tips for Sawzall Tree Roots
- These pro techniques will help you make cleaner cuts and keep your tree healthier after the job.
- Blade Selection Matters: For roots between 2-4 inches thick, a fine-tooth metal-cutting blade with 14-18 teeth per inch is ideal.
- Angle and Technique for Clean Cuts: That 45-degree angle in Step 3 isn't just decorative—it creates a clean break that won't tear when you remove the root.
Frequently asked questions
Got questions about tackling tree roots with a Sawzall? You’re not alone—this task can feel tricky, especially when protecting your tree’s health. Below, we’ve rounded up the most common questions (and answers!) to help you cut with confidence.
Can I use a Sawzall on tree roots without hurting the tree?
Yes, but only if you’re strategic! Avoid cutting more than 10-20% of the root’s diameter—especially on smaller roots. Focus on non-structural roots (thinner, fibrous ones) near the trunk’s edge. For larger roots, call an arborist to assess first. Pro tip: Make clean, angled cuts to minimize damage and prevent tearing.
What’s the best time of year to cut roots with a Sawzall?
Late fall or early winter (dormant season) is ideal—roots are less active, so the tree recovers faster. Avoid spring (new growth phase) or summer droughts, which stress the tree. If you must cut in summer, water deeply before/after to aid healing.
Do I need special blades or settings for cutting roots?
Use a bi-metal or carbide-tipped blade (rated for wood/roots) with a slow speed (1,500–2,000 RPM) to avoid overheating. A 14–16-inch blade works well for most jobs. Never use a blade meant for metal—it’ll dull fast and clog with sap.
What if the roots keep growing back after cutting?
Persistent regrowth usually means you didn’t cut deep enough or hit a major root. For stubborn cases:
- Apply root pruning paste (like Tanglefoot) to the cut to seal it.
- Consider mulching the area to suppress new shoots.
- If the tree is young, avoid cutting roots entirely—redirect growth with barriers instead.
Are there safer alternatives to a Sawzall for small root jobs?
For thin roots (<1 inch thick), try:
- A pruning saw or loppers (manual control = less risk).
- A reciprocating saw with a wood-cutting blade (lighter than a Sawzall).
- A shovel or root saw for buried roots (dig carefully to expose them first!).
Wrapping up and next steps
Mastering the art of cutting tree roots with a Sawzall ensures precision while protecting your tree’s health—and now, you’ve got the know-how! 🌳✨ Whether you’re tackling invasive roots or clearing space safely, remember: patience and the right technique are your best tools.
With confidence, you can maintain your landscape without harming the tree’s trunk or future growth.
Ready to put your skills to the test? Grab your gear and start pruning! For extra guidance, explore local arborist resources or share your progress with fellow gardeners—you’ve got this! 🌱💪