
Pruning
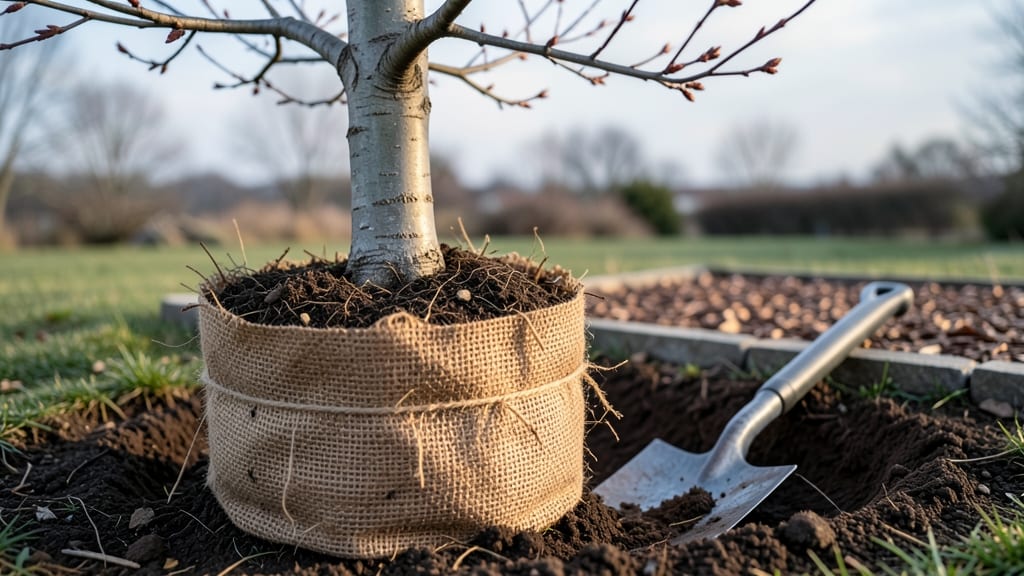
The rootball of a tree is the lifeline between survival and stress after transplanting. 🌳 I’ve dug up trees where the rootball was handled poorly and seen them struggle for years—until I learned the right techniques.
The key isn’t just moving the tree; it’s preserving that dense network of roots wrapped in soil.
Why it matters? A healthy rootball means faster recovery, stronger growth, and fewer transplant shocks. You’ll need basic tools—a shovel, burlap (if wrapping), and a wheelbarrow—plus time to prep the new hole. The secret? Keep the rootball intact, moist, and undisturbed from start to finish.
By the end, your tree will establish itself like it’s been there for years. No wilting, no stunted growth—just a thriving plant that looks like it belongs. We’ll cover when to transplant, how to handle the rootball, and what to do after planting to keep it happy.
Whether you’re moving a young sapling or an established shade tree, these steps work. Let’s get started—your tree’s future depends on how you handle this one critical part.
📚 In This Guide
- What you need
- Instructions
- Tips and common mistakes
- Wrapping up and next steps
What you need
- ● Shovel or spade: A heavy-duty digging spade (24–36" long) or a transplanting spade (for precision). Pro tip: A mattress shovel (48" long) works best for large rootballs!
- ● Root pruning saw: A pruning saw with a fine-tooth blade (10–12" length) for trimming roots if needed.
- ● Wheelbarrow or tarp: A sturdy wheelbarrow (minimum 2–3 cubic feet capacity) or a waterproof tarp (6’x8’ or larger) to transport the rootball.
- ● Burlap or landscape fabric: 100% natural jute burlap (6–12" width, length depends on rootball size) or breathable landscape fabric (to wrap the rootball).
- ● Twine or rope: 3/8" to 1/2" thick, biodegradable twine (20–30 ft roll) to secure the wrap.
- ● Garden hose with nozzle: For thorough watering before and after transplanting.
- ● Pruning shears: Bypass pruners (for trimming branches if necessary).
- ● Gloves: Heavy-duty gardening gloves (waterproof, reinforced palms) to protect your hands.
- ● Stakes and ties: 3–4 wooden or metal stakes (6–8 ft tall) and soft plant ties (for temporary support post-transplant).
- ● Mulch: 2–4 inches of organic mulch (shredded bark, wood chips, or pine straw) for the new planting hole.
- ● Root stimulator: A powder or gel (like Rootone) to reduce transplant shock.
- ● Tree jack or lever: For heavy-duty lifting (especially for trees over 10" in trunk diameter).
- ● Soil moisture meter: To check rootball hydration before digging.
- ● Knee pads: For comfort during long digging sessions!
- ● Label tags: To mark the tree type and transplant date.
Step-by-Step instructions for moving a tree with its rootball
Here’s how to handle the whole process—from digging to planting—without shocking your tree.
🪴 Step 1: Prepare the New Planting Site First
Dig the new hole twice as wide as the rootball but only as deep as the rootball itself. Loosen the sides with a shovel to encourage roots to spread outward. I always add a 2-inch layer of compost to the bottom—this jumpstarts root growth without overwhelming the tree.
Test the soil moisture before planting. If it feels dry, water the hole thoroughly 24 hours ahead so the rootball doesn’t dry out during transplanting. A soggy hole is worse than too dry—you’ll know it’s right when water drains but doesn’t pool.
💧 Step 2: Dig Around the Rootball Carefully
Mark a circle around the tree trunk with a string tied to a stake, about 12 inches beyond the trunk’s diameter. This keeps you from digging too close and damaging the trunk. Use a sharp spade to cut vertically around the circle, then work outward in a wedge pattern to lift the rootball intact.
Here’s the thing—don’t rush. If the rootball breaks apart, wrap the exposed roots in damp burlap or wet newspaper to keep them moist while you replant. A rootball with intact soil holds moisture better and recovers faster. If you hit a stubborn root, use a saw to cut it cleanly rather than tearing.
⏰ Step 3: Move and Plant the Rootball Quickly
Keep the rootball moist at all times—wrap it in burlap if moving it far, and mist with water if it starts to dry. Lower it into the hole so the top of the rootball sits 1-2 inches above ground level—settling will happen over time, and planting too deep suffocates roots.
Backfill with the native soil you removed, tamping lightly every 6 inches to eliminate air pockets. Water deeply right after planting to help soil settle around the roots. A slow drip from a hose works best—no blasting, or you’ll wash away the soil.
☀️ Step 4: Support and Protect the Tree
Stake the tree only if it’s top-heavy or in a windy spot. Use soft ties to avoid girdling the trunk, and leave room for the tree to sway slightly—this strengthens its stem. Mulch the base with 2-3 inches of organic mulch, keeping it 6 inches away from the trunk to prevent rot.
Water deeply once a week for the first month, then taper off as new growth appears. You’ll know it’s working when you see fresh leaves—usually within 4-6 weeks. Avoid fertilizing for the first year; the tree needs to focus on root recovery, not foliage.
Tips & tricks for stress-free tree transplanting
Moving a tree with its rootball can feel intimidating, but these tricks will help you avoid common pitfalls and ensure your tree thrives in its new home.
Timing Secret: The 24-hour watering ahead of time in Step 1 is non-negotiable—especially in dry conditions. I’ve seen rootballs dry out completely during transplanting, which can kill the tree. Test soil moisture by squeezing a handful: if it crumbles, water it. If it stays clumped, it’s ready. Pro tip: Use a moisture meter for precision, particularly in sandy soils that drain quickly.
Digging Technique: In Step 2, when marking that 12-inch circle beyond the trunk’s diameter, use a garden hose to outline the area first. This prevents over-digging near the trunk, which can damage the cambium layer—the tree’s lifeline. For stubborn roots, a handsaw works better than brute force; it gives you clean cuts rather than torn roots that heal poorly.
Planting Position: That 1-2 inch elevation above ground level in Step 3 is crucial—settling happens naturally, but planting too deep suffocates roots. I use a level to check the rootball’s position before backfilling. For large trees, consider adding a small mound of soil in the center of the hole to compensate for future settling. After planting, gently press down the soil with your hands to eliminate air pockets without compacting it too tightly.
Mulching Wisdom: The 2-3 inches of organic mulch in Step 4 should be spread evenly but never touch the trunk. I’ve seen mulch piled against bark, which traps moisture and invites rot. Use a rake to create a slight depression around the trunk to channel water away. For extra protection, add a 2-inch layer of coarse wood chips over the mulch to deter weeds while allowing airflow.
Pro Tips for Rootball Of Tree
- Moving a tree with its rootball can feel intimidating, but these tricks will help you avoid common pitfalls and ensure your tree thrives in its new home.
- Timing Secret: The 24-hour watering ahead of time in Step 1 is non-negotiable—especially in dry conditions.
- Digging Technique: In Step 2, when marking that 12-inch circle beyond the trunk’s diameter, use a garden hose to outline the area first.
Frequently asked questions
Got questions about handling the rootball of a tree during transplanting? You’re not alone! Here are some of the most common concerns—plus straightforward answers to keep your project on track.
What exactly is a rootball, and why does it matter?
The rootball is the dense network of roots and surrounding soil you carefully remove when transplanting a tree. It’s critical because it preserves the tree’s stability and nutrient supply. A well-maintained rootball minimizes transplant shock and helps the tree establish faster. Think of it as the tree’s lifeline—keep it intact!
When is the best time to transplant a tree with its rootball?
Timing is everything! Aim for early spring or late fall when temperatures are mild, and the tree isn’t actively growing. Avoid extreme heat or frost, as these stress the roots. Pro tip: Water the tree heavily 1–2 weeks before transplanting to encourage root growth and make extraction easier.
Can I transplant a tree without digging up the entire rootball?
While possible, it’s risky. A partial rootball can lead to poor anchorage and slower recovery. If you must minimize disturbance, use a root pruning technique (gradually trimming roots over 1–2 years) before transplanting. For most trees, though, a full rootball is the gold standard for survival.
How do I protect the rootball during extraction and transport?
Wrap the rootball in burlap or a tree sack to prevent soil loss and root damage. Use a dolly or wheelbarrow for transport, and keep the rootball moist but not soggy. Avoid dragging it—lift carefully! If moving long distances, store it in a shaded, cool area and water lightly every few days.
What if the rootball breaks or falls apart during transplanting?
Don’t panic! If the rootball cracks, secure it with burlap or wire mesh to hold it together. For minor damage, trim any exposed roots with clean pruners and replant immediately. If the rootball is severely compromised, consider root pruning in stages next time. The key is acting quickly—transplant shock worsens with delay.
Wrapping up and next steps
Understanding how to handle the rootball of a tree during transplanting is the key to giving your plant the best chance to thrive! 🌱 With the right tools, techniques, and preparation—like proper pruning, soil care, and watering—you can minimize stress and ensure a smooth transition.
Whether you're relocating a young sapling or an established tree, patience and precision make all the difference.
Ready to give your tree a fresh start? Start small—practice with smaller plants first if you're new to transplanting. Then, tackle your next project with confidence! 💪 For more tips, explore our pruning guides or consult a local arborist for expert advice.