
Pruning
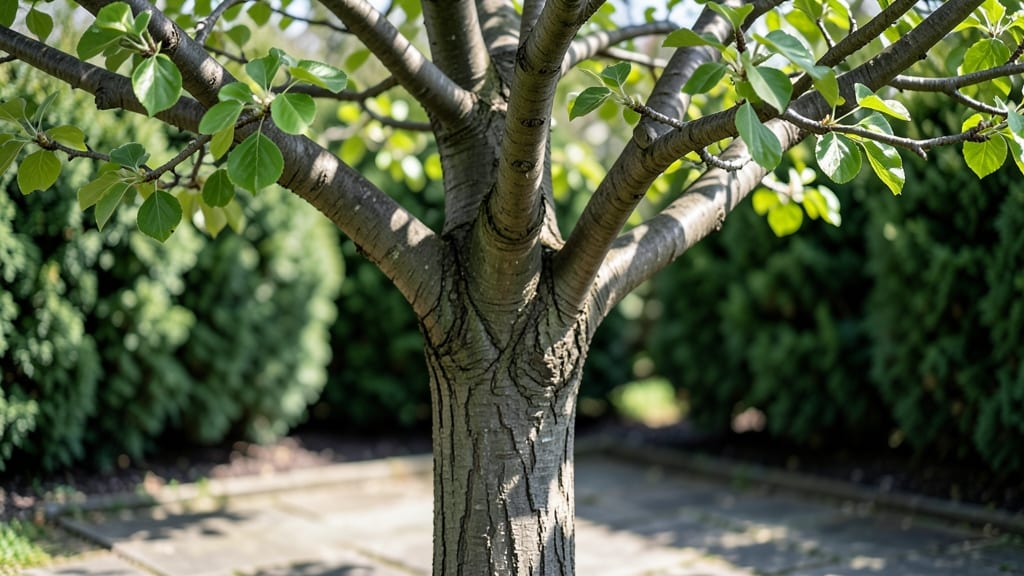
Your Bradford pear tree trunk needs winter pruning more than you think—it’s the secret to preventing weak growth and disease before spring. I’ve seen too many Bradford pears develop canker or fire blight because their trunks were ignored during dormant season.
The right cuts now strengthen the tree’s structure and set it up for a healthier bloom cycle next year.
This isn’t about heavy pruning—just strategic cuts to remove dead wood, thin crowded branches, and open the canopy for better airflow. You’ll need sharp pruners, rubbing alcohol to sterilize cuts, and a ladder if your tree’s over 10 feet tall.
The key is working when the tree’s dormant, between late winter and early spring, before buds swell.
What you’ll end up with is a tree that resists disease better, grows stronger branches, and produces more flowers come spring. The trunk itself stays healthier, reducing the risk of cracks or canker spots that can turn fatal.
Plus, you’ll save time later when the tree’s in full leaf and harder to assess.
Even if you’ve never pruned a Bradford pear before, this method is foolproof—just follow the 3-cut rule for each branch and avoid over-pruning. For larger trees or signs of advanced disease, though, calling in an arborist is worth the investment. Let’s get your tree ready for a stronger season ahead.
📚 In This Guide
- What you need
- Instructions
- Tips and common mistakes
- Wrapping up and next steps
What you need
- ● Pruning shears: Bypass pruners (sharp, 10-12 inch blades) for small branches (¼ inch thick).
- ● Loppers: 20-24 inch handles for thicker branches (½–1½ inch diameter).
- ● Pruning saw: Curved-tooth saw for branches 1½–3 inches thick (avoid ripping bark).
- ● Extension pole: 6–10 ft telescoping pole with pruner attachment for high branches.
- ● Gloves: Heavy-duty, cut-resistant (e.g., mechanics or pruning gloves).
- ● Safety glasses: ANSI-rated for debris protection.
- ● Disinfectant: 70% isopropyl alcohol or 10% bleach solution (1 part bleach to 9 parts water) to sterilize tools.
- ○ Pruning sealant: Tree wound dressing (optional but recommended) for larger cuts.
- ● Ladder: Sturdy, non-slip (if tree exceeds 8 ft in height).
- ● Trash bags: Heavy-duty for debris cleanup.
- ● Notebook & pen: To sketch a pruning map of your tree’s structure.
- ● Pole saw: For hard-to-reach branches without a ladder.
- ● Rope or harness: If working on very tall trees (safety first!).
- ● Tree climbing spikes: Only for experienced climbers (use with caution!).
- ● Camera: To document before/after progress.
- ● Pruning guidebook: For Bradford pear-specific tips (e.g., “The Pruning Book” by Lee Reich).
Step-by-Step guide to winter pruning a Bradford pear tree
Here's how I approach winter pruning to keep your Bradford pear healthy and vigorous.
Assess the Tree for Pruning Needs
Start by examining the tree's structure while it's dormant. Look for dead, diseased, or crossing branches—these are your top priorities. Bradford pears often develop weak branch unions, so focus on removing any branches growing at sharp angles or rubbing against each other. These weak points can lead to splits or disease entry.
I like to use a glove and safety glasses to inspect the trunk and branches carefully. Run your hand along the bark to feel for any rough spots or cankers, which indicate potential problems. Healthy bark should be smooth and firm. If you spot any mushroom-like growths or oozing sap, mark those branches for removal—they're likely infected.
Gather and Prepare Your Tools
Before you begin, make sure you have sharp pruning shears, loppers, and a pruning saw ready. Dull tools tear bark and leave jagged cuts that heal poorly. I always clean my blades with rubbing alcohol between cuts to prevent spreading disease. For larger branches, a pruning saw with a curved blade works best—it makes cleaner cuts than a handsaw.
Wear long sleeves and gloves to protect your skin from thorns and sap. Bradford pears have sharp thorns, especially on younger branches, so take care when reaching into the canopy. Keep a bucket or tarp nearby to collect debris—this makes cleanup easier and prevents spreading disease to other parts of the tree.
Remove Dead, Diseased, or Weak Branches First
Begin by cutting out any dead or diseased wood—these branches won’t contribute to growth and can harbor pests. Make your cuts just outside the branch collar, the swollen area where the branch meets the trunk. Avoid leaving stubs, as they can rot and invite insects. For small branches, use pruning shears; for thicker ones, switch to loppers or a pruning saw.
Next, remove any branches that are crossing, rubbing, or growing inward. These compete for space and can weaken the tree’s structure over time. I always step back occasionally to visualize the tree’s shape—this helps me decide which branches to keep for a balanced canopy. Bradford pears respond well to open, airy pruning, so don’t be afraid to thin out crowded areas.
Thin the Canopy for Better Airflow
Thinning the canopy improves airflow and reduces the risk of fungal diseases, which Bradford pears are prone to. Aim to remove about 20-25% of the tree’s total branches, focusing on those that are thin, weak, or overcrowded. Start from the inside of the tree and work your way out—this opens up the center for sunlight and air circulation.
When thinning, cut branches back to their point of origin or a strong lateral branch. Avoid "heading back" (cutting back to a bud), as this encourages dense, weak growth. After each cut, I step back to check the tree’s balance—you want a rounded, vase-like shape with no heavy branches on one side. This ensures the tree grows evenly and supports its own weight.
Shape the Tree and Seal Large Cuts
Once you’ve removed the necessary branches, focus on shaping the tree for strong structure and future growth. Bradford pears benefit from a rounded, slightly dome-shaped canopy, which distributes weight evenly. Avoid cutting back the leader (central stem) unless it’s damaged—this keeps the tree growing upright.
For cuts larger than ½ inch in diameter, use pruning sealant to protect the wound. Apply it immediately after cutting to prevent moisture loss and disease entry. Smaller cuts don’t need sealant—they’ll heal on their own. After pruning, I always water the base of the tree deeply to help it recover from the stress of cutting.
Tips & tricks for perfect winter pruning of Bradford pear trees
Winter pruning transforms your Bradford pear from a potential weakling into a sturdy, vibrant centerpiece—here's how to avoid common pitfalls and elevate your results.
The Branch Collar Rule: When removing branches in Step 3, focus on cutting just outside the branch collar—the swollen area where the branch meets the trunk. This critical zone contains healing cells that help the wound recover faster. I've seen many pruners leave stubs, which rot and attract pests—don't make that mistake. The collar should always remain intact on the tree.
Pruning Saw Technique: For branches thicker than ½ inch in Step 5, use a pruning saw with a curved blade to make clean cuts. Start from the underside of the branch and cut at a slight angle away from the trunk. Sawing from top to bottom prevents bark tearing. I learned this the hard way after making messy cuts that took years to heal—smooth cuts heal in weeks.
Canopy Visualization: In Step 4, when thinning the canopy, step back every few cuts to visualize the tree's shape. You're aiming for a rounded, vase-like silhouette with no heavy branches on one side. Bradford pears naturally grow with a central leader—preserve this upright growth pattern unless the leader is damaged. This balanced shape prevents wind damage and supports the tree's weight better than a lopsided canopy.
Seasonal Timing: Winter pruning (dormant season) is ideal because the tree's energy isn't actively growing. The lack of leaves makes it easier to see the branch structure. I always prune between late winter and early spring before new growth begins. This timing gives the tree time to heal before the growing season demands energy.
Pro Tips for Bradford Pear Tree Trunk
- Winter pruning transforms your Bradford pear from a potential weakling into a sturdy, vibrant centerpiece—here's how to avoid common pitfalls and elevate your results.
- The Branch Collar Rule: When removing branches in Step 3, focus on cutting just outside the branch collar—the swollen area where the branch meets the trunk.
- Pruning Saw Technique: For branches thicker than ½ inch in Step 5, use a pruning saw with a curved blade to make clean cuts.
Frequently asked questions
Got questions about pruning your Bradford pear tree trunk? You’re not alone!
Here are the most common concerns—plus expert-backed answers to keep your tree thriving.
When is the best time to prune a Bradford pear tree trunk in winter?
The ideal window is late winter to early spring (before buds swell but after the coldest months). For Bradford pears, prune between February and March in most U.S. zones. This timing minimizes stress, prevents disease spread, and encourages vigorous spring growth. Avoid pruning in fall—it invites pests and fungal infections.
How much of the Bradford pear tree trunk can I remove safely?
Never remove more than 25% of the tree’s canopy in one year. For the trunk itself, focus on structural pruning: cut back dead, diseased, or crossing branches at the branch collar (the swollen area where the branch meets the trunk). Avoid "topping" (stubbing the trunk)—it weakens the tree and invites rot.
Why does my Bradford pear tree trunk ooze sap after pruning?
Sap oozing (called "bleeding") is normal for Bradford pears in early spring. It’s the tree’s way of expelling excess water and nutrients. Don’t panic! It won’t harm the tree, but you can reduce it by pruning on warmer, sunny days (above 40°F) and sealing cuts with pruning sealant if they’re large (1.5"+).
Are there alternatives to pruning Bradford pear tree trunks?
If pruning feels overwhelming, consider selective thinning (removing only the most problematic branches) or crown raising (lifting the canopy to improve airflow). For severely overgrown trees, consult an arborist about gradual pruning over 2–3 years. Bradford pears also benefit from annual maintenance (removing suckers and water sprouts) to reduce long-term work.
What should I do if my Bradford pear tree trunk splits after pruning?
If a cut causes a clean split, smooth the edges with a pruning saw and apply pruning sealant to prevent decay. For deep cracks or rot signs (mushrooms, oozing sap, or discoloration), call an arborist—your tree may need cabling or bracing. Avoid heavy pruning until the wound heals (usually 1–2 years).
Wrapping up and next steps
Winter is the perfect time to shape your Bradford pear tree trunk and set the stage for vibrant growth!
By following these pruning steps—using the right tools, timing, and techniques—you’ll promote healthier branches, reduce disease risks, and encourage a stronger, more beautiful tree. Remember, patience and precision pay off in lush, long-term results. 🌳✨
Ready to take action? Grab your pruners, mark your calendar for late winter, and start pruning with confidence. Your Bradford pear will thank you with years of stunning blooms and sturdy structure!