
Pruning
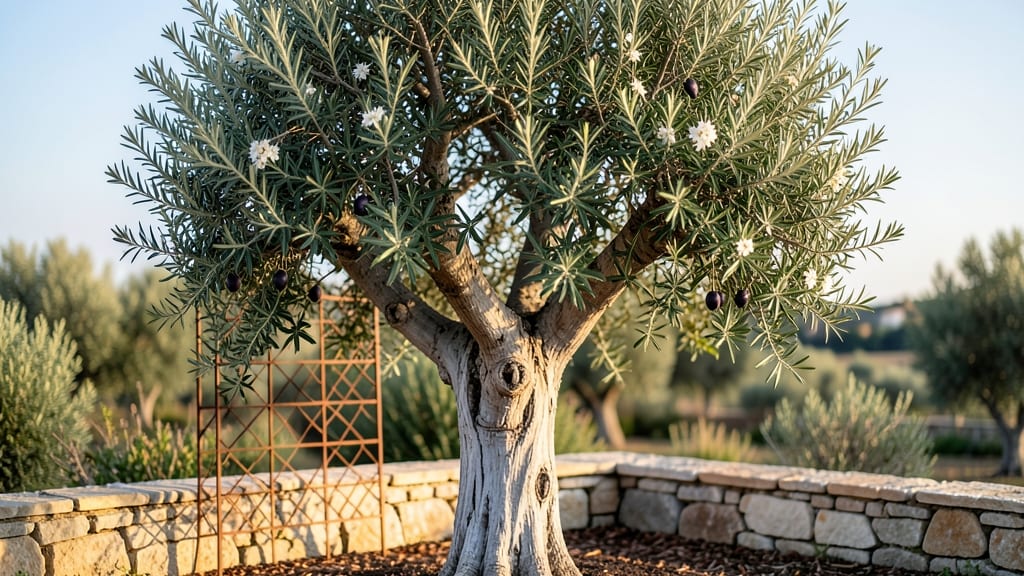
An olive tree in your front yard isn’t just a plant—it’s a statement of Mediterranean elegance that stays stunning through every season. 🌿 I’ve watched mine transform from a bare-branched winter silhouette to a lush, silver-green canopy by summer, and it’s become the heart of my outdoor space.
The key lies in placement, pruning, and pairing it with the right companions to create a cohesive look that feels intentional, not accidental.
Start with sunlight and space: olive trees crave full sun and need 15–25 feet of clearance to mature without crowding your walkway or driveway.
Pair it with drought-tolerant perennials like lavender or rosemary for a cohesive, low-maintenance look, and add a gravel path or stone border to define its presence. The pruning schedule—light in spring, heavier in late winter—keeps it shapely without sacrificing its natural charm.
What you’ll love most is how the tree anchors your yard year-round. In spring, its new growth is velvety and bright, summer brings fragrant blossoms, and fall’s harvestable olives add a touch of rustic luxury.
Even in winter, the gnarled branches hold their own unique beauty. This isn’t just a tree; it’s a living centerpiece that turns heads and invites neighbors to pause and admire.
Whether you’re in a warm climate like California or a cooler zone with microclimates, olive trees adapt beautifully with the right care. The secret? Consistent watering in their first year and a well-draining soil mix to prevent root rot.
For those in frost-prone areas, a young tree can be wrapped in burlap for winter protection—though mature trees often handle cold snaps surprisingly well.
📚 In This Guide
- What you need
- Instructions
- Tips and common mistakes
- Wrapping up and next steps
What you need
- ● Olive tree sapling: 1–3 mature or dwarf varieties (e.g., Olea europaea ‘Arbequina’ or ‘Frantoio’). Choose based on mature height (6–25 ft).
- ● Well-draining soil: 2–3 cubic yards of amended soil mix (50% native soil, 30% compost, 20% coarse sand or perlite).
- ● Pruning tools: 1 pair bypass pruners (for small branches, ¼"–¾" cuts).
- ● 1 pruning saw (for thicker branches, 1"–2" diameter).
- ● 1 loppers (for medium branches, ¾"–1½" cuts).
- ● Mulch: 2–3 bags of wood chips or gravel (3–4 inches deep, 3 ft radius around the tree).
- ● Drip irrigation system: 1–2 emitters (0.5–1 gallon/hour flow rate) + tubing (¼" diameter).
- ● Stakes & ties: 2–4 wooden or metal stakes (16–24" long) + soft tree ties (for young trees).
- ● Fertilizer: 1 bag slow-release olive tree fertilizer (10-10-10 or 8-3-9 NPK ratio).
- ● Decorative elements: Terracotta pots (for companion plants like lavender or rosemary).
- ● Stone pathways or mosaic tiles (for Mediterranean flair).
- ● Solar-powered outdoor lights (warm white, 2–4 fixtures).
- ● Soil amendments: 1 bag mycorrhizal fungi (boosts root health).
- ● 1 lb lime (if soil pH is <6.0; test first!).
- ● Pest control: 1 bottle neem oil or horticultural oil (for aphids/spider mites).
- ● Seasonal care: 1 roll landscape fabric (to suppress weeds around the base).
Step-by-Step guide to planting and designing an olive tree front yard
Here's how to create a Mediterranean-inspired front yard with sturdy olive trees that anchor your landscape year-round.
🌱 Step 1: Select and Prepare Olive Tree Planting Sites
Choose a location with full sun exposure (at least 6-8 hours daily) and well-draining soil. Olive trees thrive in dry, rocky conditions, so avoid low spots where water pools. If your soil is heavy clay, amend it with 3-4 inches of coarse sand or gravel mixed into the top 12 inches of soil to improve drainage.
Dig holes that are twice as wide as the root ball but only as deep as the container the tree came in. This encourages roots to spread horizontally rather than settling too deep. Gently loosen the roots if they're circling the root ball—this prevents girdling as the tree matures. Here's the thing: olive trees hate soggy feet, so prioritize drainage over everything else.
☀️ Step 2: Position Trees for Visual Impact and Spacing
Space mature olive trees 15-20 feet apart to allow for natural growth and airflow. For a front yard design, consider planting one specimen tree as a focal point near the driveway or walkway, flanked by two smaller trees or shrubs for balance. I like to use dwarf varieties like 'Arbequina' or 'Little Ollie' for smaller spaces—they stay under 10 feet tall and fit neatly into landscaped beds.
Arrange trees in odd numbers for natural flow (three or five works best). If using multiple trees, stagger their positions to create visual rhythm. Avoid planting directly against the house foundation—keep them at least 5 feet away to prevent root competition and potential structural issues. Mulch the base with 2-3 inches of wood chips or gravel, keeping it 6 inches away from the trunk to prevent rot.
💧 Step 3: Plant and Establish Young Olive Trees
Place the tree in the hole so the top of the root ball sits 1-2 inches above ground level. This prevents water from pooling around the trunk. Backfill with native soil, tamping lightly every 4-6 inches to remove air pockets. Water deeply immediately after planting to settle the soil and eliminate gaps.
For the first 2-3 weeks, water deeply every 3-4 days until new growth appears. After that, reduce to once a week unless your area experiences extreme heat. Olive trees are drought-tolerant once established, but young trees need consistent moisture to develop strong root systems. Watch for wilting leaves—this is your cue to water, but don’t overdo it. Soggy soil is the #1 killer of new plantings.
✂️ Step 4: Prune and Maintain for Year-Round Structure
Prune in late winter or early spring before new growth begins. Remove any dead, diseased, or crossing branches first. Then, shape the tree by cutting back 1/3 of the new growth to encourage bushier development. Olive trees respond well to pruning, so don’t be afraid to be bold—just avoid heavy pruning in fall, as it stimulates tender growth that won’t survive winter.
Fertilize lightly in early spring with a balanced, slow-release fertilizer (10-10-10) to support new growth. Avoid high-nitrogen fertilizers, which promote leafy growth at the expense of fruit production. Here’s the trick: olive trees are slow growers, so patience pays off. You’ll see fuller canopies and better structure within 2-3 years if you stick to this schedule.
🪴 Step 5: Add Complementary Plants for Mediterranean Flair
Surround your olive trees with drought-tolerant companions like lavender, rosemary, or Mediterranean shrubs like cistus or hellebore. These plants share the same water needs and create a cohesive look. Use gravel or decomposed granite as mulch to reduce evaporation and keep the area looking clean and intentional.
Add a few stepping stones or a simple pathway to guide visitors through the space. Incorporate a small water feature or a rustic bench to create a focal point. The goal is to evoke that relaxed, sun-drenched Mediterranean vibe—think terracotta pots, wrought-iron accents, and a mix of textures. Your front yard should feel like a welcoming retreat, not just another landscape feature.
Tips & tricks for perfect olive tree front yard design
Here's what nobody tells you about creating a Mediterranean-inspired front yard that thrives year after year.
Soil Preparation Secret: Before amending your soil with the 3-4 inches of coarse sand or gravel, test your drainage by digging a hole and filling it with water. If it drains completely within 1 hour, your soil is already suitable. If not, you'll definitely need that amendment layer. I've seen too many olive trees fail because people skipped this step and ended up with soggy roots. The goal is to mimic the dry, rocky conditions olives love in their native Mediterranean habitat.
Root Ball Technique: When loosening circling roots in Step 1, be gentle—you're not trying to remove them completely, just create gentle breaks so they can spread outward. I use my fingers to carefully separate the roots along their natural growth lines. This prevents girdling while encouraging the tree to establish a strong root system that spreads horizontally, which is exactly what you want for stability in your front yard design.
Watering Wisdom: The 3-4 days of deep watering in the first 2-3 weeks might seem like a lot, but it's crucial for root establishment. Use a hose with a gentle spray nozzle to water slowly until you see water running out of the drainage holes at the bottom of the planting hole. This ensures the entire root ball gets saturated without creating puddles. Think of it as giving your olive tree a proper Mediterranean-style shower—deep but infrequent.
Pruning Precision: When shaping your tree by cutting back 1/3 of new growth in Step 4, make your cuts just above a leaf node or outward-facing bud. This encourages bushier growth rather than long, leggy branches. I always prune on a dry day when the tree is dormant—late winter or early spring is perfect. The key is to shape gradually over time; olive trees respond well to patient pruning that maintains their natural form while creating that beautiful Mediterranean silhouette.
Pro Tips for Olive Tree Front Yard
- Here's what nobody tells you about creating a Mediterranean-inspired front yard that thrives year after year.
- Soil Preparation Secret: Before amending your soil with the 3-4 inches of coarse sand or gravel, test your drainage by digging a hole and filling it with water.
- Root Ball Technique: When loosening circling roots in Step 1, be gentle—you're not trying to remove them completely, just create gentle breaks so they can spread outward.
Frequently asked questions
Got questions about adding an olive tree to your front yard? Here are some of the most common ones—plus straightforward answers to help you plan like a pro!
How much space does an olive tree need in a front yard?
Olive trees thrive with plenty of room—aim for 15–25 feet of space between the tree and your home, driveway, or sidewalks. Dwarf varieties (like Arbequina) stay compact (8–10 feet), while standard types can reach 20–30 feet tall. Always check local planting codes to avoid root conflicts with foundations or utilities!
When is the best time to plant an olive tree in my yard?
Plant in early spring or fall (March–May or September–November) for ideal results. Avoid extreme heat (summer) or frost (winter), as young trees are sensitive. If planting in summer, water deeply and mulch heavily to retain moisture. Pro tip: Soak the root ball before transplanting to reduce shock!
How often should I water an olive tree in a front yard?
Newly planted trees need 1–2 inches of water per week (including rainfall). Once established (after 2–3 years), they’re drought-tolerant but still prefer deep watering every 2–3 weeks. Water at the base, not the leaves, to prevent fungal issues. Overwatering is worse than underwatering—let the top 2–3 inches of soil dry out between waterings!
Do olive trees need pruning, and how do I do it right?
Yes! Prune in late winter or early spring to shape the tree and encourage fruit production. Remove dead, crossing, or overcrowded branches first, then thin out excess growth to improve airflow. Use sterilized tools and avoid heavy pruning (never cut more than 25% of the canopy at once). Never prune in fall—it stimulates new growth that can’t harden before winter!
What are some low-maintenance alternatives to olive trees for a Mediterranean look?
If olive trees seem high-maintenance, try these drought-tolerant, low-fuss options:
- Dwarf citrus trees (like Calamondin or Meyer lemon) for year-round color and fragrance.
- Texas Sage (Leucophyllum frutesens)—blooms purple after rain and thrives in heat.
- Rosemary bushes (upright varieties like Rosmarinus officinalis ‘Tuscan Blue’) for texture and culinary use.
- Agave or Yucca for bold, architectural structure with zero fuss.
All pair beautifully with lavender, bougainvillea, or Mediterranean gravel for that dreamy look!
Wrapping up and next steps
Transforming your front yard with an olive tree isn’t just about aesthetics—it’s an investment in timeless beauty and low-maintenance elegance. Whether you’re drawn to the Mediterranean charm or the year-round structure, this design brings sophistication and resilience to your outdoor space.
Now that you’re equipped with the right tools, techniques, and tips, it’s time to roll up your sleeves and make it happen!
Start by sketching your design, gathering supplies, and scheduling your first pruning session—your dream front yard is just a few cuts away. 🌿✨