
Pruning
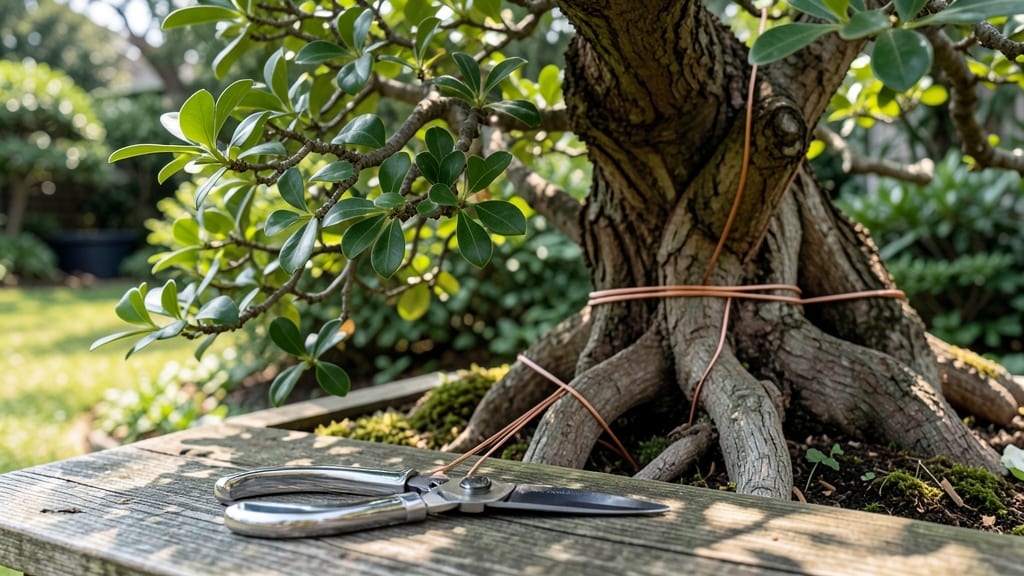
Japanese tree shaping transforms ordinary branches into living art—where every curve tells a story and every season reveals new balance. ✨ I stumbled onto this practice while struggling with a wild, overgrown cherry tree, and now my garden feels like a serene Japanese landscape, even in winter.
The techniques aren’t just about pruning; they’re about shaping life itself into harmony with nature’s rhythms.
The beauty of this method is its simplicity once you know the basics: a few sharp tools, a steady hand, and an eye for natural lines. You don’t need decades of practice to create stunning shapes—just a willingness to observe how branches grow and respond.
Start with small trees or shrubs, and you’ll see dramatic changes within a single growing season.
What you’ll end up with is a garden feature that stays elegant year-round, whether it’s a sweeping willow silhouette or a neatly sculpted boxwood hedge. The satisfaction comes from watching your trees mature into intentional designs, their leaves rustling in winds that now feel like whispers through an ancient forest.
Perfect for urban yards, small patios, or even container plants—this technique scales to any space. Let’s turn your overgrown branches into living masterpieces without the complexity of full bonsai.
📚 In This Guide
- What you need
- Instructions
- Tips and common mistakes
- Wrapping up and next steps
What you need
- ● Pruning shears: Bypass shears (8–10 inches) for clean cuts on small branches.
- ● Loppers: 10–14 inches for thicker branches (up to 1.5 inches in diameter).
- ○ Pruning saw: Curved or folding saw for larger limbs (optional but helpful for mature trees).
- ● Hand pruners: Anvil-style for quick trims (avoid for delicate cuts).
- ● Rope or twine: Thin, natural fiber (e.g., jute) to guide growth (10–20 feet per tree).
- ● Plant ties: Soft fabric strips for securing branches during shaping.
- ● Sharpener: A file or sharpening stone to keep blades razor-sharp.
- ● Disinfectant: 70% isopropyl alcohol or pruning sealant to prevent disease.
- ● Wire cutters: For adjusting support wires without damaging branches.
- ● Spray bottle: With water to keep tools clean and cuts precise.
- ● Measuring tape: For consistent branch spacing (especially for geometric designs).
- ● Gloves: Lightweight, breathable gloves to protect hands from thorns or sap.
- ● Reference images: Sketches or photos of your desired tree shape (e.g., katsura or cloud-pruned styles).
How to shape Japanese trees for natural, year-round balance
Here's how I transform ordinary trees into living artworks—step by step.
🌿 Step 1: Observe and Plan Your Tree's Natural Growth Pattern
Start by studying your tree's current shape for at least 3 weeks. Japanese shaping works with nature, not against it. Look for the tree's dominant growth direction—most will lean slightly toward morning sun. Note where branches compete for space or where bare spots develop in winter.
I sketch a rough outline of the canopy on paper, marking the main trunk, primary branches, and any structural flaws. This becomes your blueprint. For example, if a branch grows straight up, it will cast harsh winter shadows—this is a prime candidate for gentle bending. The goal is to create a balanced silhouette that looks good from every angle, not just summer.
✂️ Step 2: Select the Right Tools and Timing
Use only sharp, clean pruning tools—dull blades tear bark and invite disease. For Japanese shaping, I recommend a bypass pruner for clean cuts and a flexible branch bender (available at specialty nurseries) for controlled bending. Avoid loppers unless you're working with branches over 1 inch in diameter.
Timing matters most: late winter to early spring is ideal when the tree is just waking up but before new growth begins. This gives you a clear view of the branch structure and lets you make cuts that encourage balanced regrowth. Never shape during extreme heat or drought—the tree will struggle to recover.
🌱 Step 3: Begin with Structural Pruning
Remove any dead, crossing, or diseased branches first—these are the only cuts you should make with confidence. For live branches, I use the "third cut" method: make your first cut about 6 inches out from the branch collar, then a second cut just outside the first. Finally, make your clean cut just outside the branch collar. This prevents bark from tearing.
Look for branches growing straight up from the trunk—these create weak points. If they're small (< ½ inch diameter), you can remove them entirely. For larger branches, make a 45-degree cut just above an outward-facing bud to encourage growth in the direction you want. This is where patience comes in: new growth may take 2-3 weeks to appear, so don't rush.
🪴 Step 4: Shape with Gentle Bending and Weight
For branches you want to bend (like creating a natural weeping effect), use the flexible branch bender wrapped with soft cloth to protect the bark. Start at the branch's midpoint and gradually work toward the tip, applying even pressure over 5-10 minutes. You'll hear a slight crackling sound as the fibers adjust—this is normal and indicates successful bending.
For heavier branches, I tie weighted ropes (using 1/4-inch nylon cord) to the branch tips and anchor them to the trunk or ground. Check the weights weekly and adjust as the branch settles. Never leave weights for more than 4-6 weeks—longer periods can girdle the branch. Watch for new growth at the bend: this confirms the tree is adapting to the new shape.
☀️ Step 5: Maintain Balance Through the Seasons
After shaping, monitor your tree's response closely. In early summer, you may see new growth pushing in unexpected directions—this is the tree's way of compensating. Use hand pruners to guide this growth by pinching back the tips of overly aggressive shoots. The goal is to maintain the silhouette you created while letting the tree grow naturally.
Winter is your best time to assess progress. Look for bare spots where branches may have died back or where new growth filled gaps. Make minimal adjustments then—just enough to restore balance. Over time, you'll develop an intuitive sense of when to intervene and when to let the tree's natural rhythms take over. This is where the artistry comes in: your tree should look intentional, not forced.
Tips & tricks for perfect Japanese tree shaping
Transforming trees into living artworks takes patience and precision—here's how to elevate your technique beyond the basics.
Seasonal Timing is Everything: The 3-week observation period in Step 1 is non-negotiable. Trees respond differently each season—late winter to early spring gives you the clearest view of structural flaws while the tree is dormant but ready to respond. I've ruined beautiful canopies by shaping in summer heat when trees are stressed. If you absolutely must work outside this window, choose a mild autumn day when growth has slowed but leaves still provide context.
Tool Precision Prevents Damage: That 6-inch first cut in the third cut method isn't arbitrary—it creates a clean break point that heals properly. Use a bypass pruner (not anvil type) to avoid crushing bark. For branches over 1 inch, consider a pruning saw with a curved blade—it follows natural branch angles better. I keep a small file in my toolkit to sharpen blades mid-project; dull tools tear bark and invite disease. The goal is to make cuts that look intentional, not like they were made with a chainsaw.
Bending Technique Secrets: The 5-10 minute gradual pressure application in Step 4 is where most beginners fail. Start at the branch's midpoint because that's where fibers are most flexible. Work toward the tip slowly—you'll hear that satisfying crackling sound when fibers adjust. Pro tip: If a branch resists, wrap it with a damp cloth first. The moisture helps fibers stretch more easily. And never bend branches when they're frozen—cold makes them brittle and prone to snapping.
Weight Management Matters: The 4-6 week weight limit isn't just about girdling—it's about giving the tree time to callus over the wound created by the rope. I use soft cloth between the rope and bark to prevent abrasion. For heavy branches, distribute weights evenly on both sides of the branch to avoid uneven stress. Check weekly because branches can shift as they grow—adjust weights before they start to sag or bind.
Pro Tips for Japanese Tree Shaping
- Transforming trees into living artworks takes patience and precision—here's how to elevate your technique beyond the basics.
- Seasonal Timing is Everything: The 3-week observation period in Step 1 is non-negotiable.
- Tool Precision Prevents Damage: That 6-inch first cut in the third cut method isn't arbitrary—it creates a clean break point that heals properly.
Frequently asked questions
Got curious questions about Japanese tree shaping?
Whether you're a beginner or a seasoned gardener, these answers will help you navigate the art of sculpting your trees with confidence. Let’s dive in!
What types of trees are best suited for Japanese tree shaping?
Japanese tree shaping works best on flexible, slow-growing trees like Japanese maples (Acer palmatum), azaleas, or junipers. Avoid rigid, fast-growing species—they’re harder to train and may snap under pressure. Start with young trees (3–5 years old) for easier shaping!
How long does it take to see results from Japanese tree shaping?
Patience is key! Basic shapes (like weeping or cloud styles) may show progress in 1–2 years, while intricate designs take 5–10 years. Regular pruning (2–3 times a year) and proper support (cabling/wiring) speed up the process. Think of it as a long-term investment in your tree’s beauty.
Can I shape a mature tree, or should I only start with young trees?
Mature trees can be shaped, but it’s riskier—they’re less flexible and may take longer to heal. If you’re working with an older tree, go slow: remove no more than 20–30% of foliage per session, and prioritize structural support (like staking). Consult a professional if unsure!
Are there alternative methods to Japanese tree shaping for small spaces?
For limited spaces, try miniature bonsai techniques or topiary (geometric shapes). You can also use container gardening to shape trees in pots. Even hedge trimming (like spiral or animal shapes) offers a low-maintenance alternative. Creativity is the only limit!
What should I do if my shaped tree develops dead branches or pests?
Dead branches? Prune them immediately to prevent disease. For pests (like spider mites or scale), use neem oil or insecticidal soap. Monitor your tree regularly, and avoid over-pruning—this weakens the tree and attracts pests. A healthy tree is your best defense!
Wrapping up and next steps
Japanese tree shaping isn’t just about aesthetics—it’s a harmonious blend of artistry, patience, and nature’s rhythm. By mastering techniques like niwaki or keshiki-bonchi, you can transform your garden into a serene, year-round masterpiece while promoting tree health. The key? Start small, observe seasonal shifts, and embrace the process with creativity.
Ready to begin? Pick one tree and try a simple shape this season—your future garden (and future self) will thank you! 🌿✨