
Propagation
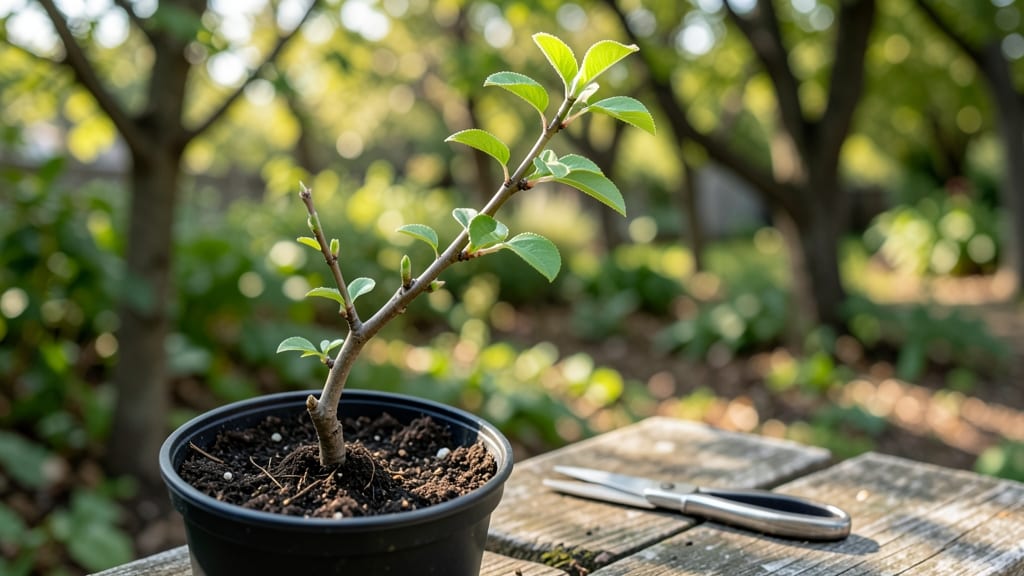
Growing a Japanese plum tree from seed feels like planting a seed for future memories—each step brings you closer to that first blush-pink bloom in spring. 🌱 The trick to reliable germination?
Cold stratification, a process that mimics winter's natural dormancy and tricks the seed into breaking its slumber. Without it, you might wait months (or never) see a sprout.
Here's the thing—you don't need fancy equipment. Just a plastic bag, some damp peat moss, and your fridge's crisper drawer. The seeds need 60-90 days of cold, moist conditions to soften their hard outer shells, and that's where the magic happens.
After stratification, germination rates jump from hit-or-miss to predictable, with most seeds sprouting within 2-4 weeks of warm soil.
What you'll end up with is a sturdy sapling that, with time, could grow into a 20-foot tree bearing sweet, fragrant fruit.
The first year focuses on root development—keep it in bright indirect light, water when the top inch of soil dries, and avoid transplant shock by hardening off seedlings gradually. Patience is key: fruit may take 5-10 years, but the journey is half the reward.
This method works best for backyard gardeners in USDA Zones 5-9, where winters are cold enough to naturally stratify seeds. For warmer climates, extend the cold treatment or use a seedling heat mat. The payoff? A tree with disease-resistant roots and a genetic uniqueness store-bought grafts can't match.
📚 In This Guide
- What you need
- Instructions
- Tips and common mistakes
- Wrapping up and next steps
What you need
- ● Japanese plum pit (seed): 1-2 fresh, fully ripe pits (avoid cracked or moldy ones).
- ● Cold stratification medium: Option 1: Damp peat moss or coco coir (2 cups).
- ● Option 2: Damp sand (coarse, sterile) or a paper towel (for quick setup).
- ● Sealed container: 1 plastic bag (ziplock) or small airtight jar (like a mason jar) with ventilation holes.
- ● Refrigerator: Space for 6-12 weeks (must stay between 34–41°F (1–5°C)).
- ● Planting pots: 2-3 small pots (3–4 inches wide) with well-draining soil (e.g., 50% potting mix + 50% perlite).
- ● Spray bottle: For gentle moisture control.
- ● Sterilizing agent: Hydrogen peroxide (3%) or rubbing alcohol (to clean pits/tools).
- ○ Heat mat (optional): For post-stratification warmth (70–75°F / 21–24°C).
- ● Grow lights: LED or fluorescent (12–16 hrs/day) if natural light is weak.
- ● Humidity dome: Clear plastic wrap or mini greenhouse lid to retain moisture.
- ○ pH tester (optional): To check soil acidity (ideal: 6.0–7.0).
- ● Fertilizer: Balanced liquid fertilizer (e.g., 10-10-10) after sprouting.
Step-by-step instructions for germinating Japanese plum seeds
Here's how I've refined my method over years to break dormancy and coax reliable germination.
🌱 Step 1: Extract and Clean the Seeds
Harvest plums when they're fully ripe but still firm, then scoop the seeds out with a spoon. Rinse them thoroughly under cool water to remove all fruit pulp—any remaining flesh will mold during stratification. I like to use a fine mesh strainer to scrub away stubborn bits while keeping the seeds contained.
Pat them dry with paper towels and let them air-dry for 24 hours in a warm, dry spot. This prevents moisture from trapping inside the seed coat during cold treatment. Store them in a sealed container until you're ready to stratify—just don't let them dry out completely.
⏰ Step 2: Cold Stratify for 90 Days
Place the dried seeds in a resealable plastic bag with a damp paper towel—enough moisture to keep it damp but not dripping. I fold the towel to create pockets for each seed, then seal the bag and label it with the date. The key is maintaining 35-40°F consistently, which mimics winter conditions.
Store the bag in your refrigerator's crisper drawer (not the freezer). Check every 10-14 days to ensure the towel stays moist—never soggy. After 90 days, the seeds will have softened enough to break dormancy. This is where most growers fail: patience is everything. If you rush it, you'll end up with weak or no germination.
🌱 Step 3: Sow in Sterile Growing Medium
Fill a 4-inch deep container with sterile seed-starting mix—never garden soil, as it carries pathogens. I press the mix down lightly to eliminate air pockets, then moisten it until it holds together when squeezed but doesn't drip. The goal is a fluffy yet firm base for the seeds to root into.
Plant each seed ½ inch deep, spacing them 2 inches apart in the container. Cover them lightly with additional mix, then mist the surface with water until evenly damp. Don't water from above after sowing—you'll disturb the seeds. Instead, place the container in a shallow tray filled with ½ inch of water and let it wick up moisture.
☀️ Step 4: Provide Warmth and Light
Move the container to a warm spot (65-75°F) with bright, indirect light—a south-facing window works well. Avoid direct sunlight at first, as it can dry out the soil too quickly. You'll see the first signs of germination in 2-4 weeks, when the radicle (root) pushes through the soil.
Once the seedlings emerge, increase light to 12-14 hours daily. A grow light positioned 4-6 inches above the plants ensures even growth. Watch for first true leaves—these are the second set of leaves after the initial cotyledons. At this stage, the seedlings are ready to harden off for transplanting.
✂️ Step 5: Transplant and Harden Off
When seedlings reach 4-6 inches tall with 3-4 true leaves, transplant them into 6-inch pots filled with a well-draining potting mix. Handle them gently to avoid damaging the delicate roots. Water lightly after transplanting to settle the soil around the base.
Harden off the seedlings by placing them outdoors in a sheltered spot for 1-2 hours the first day, gradually increasing exposure over 10-14 days. This acclimates them to outdoor conditions before planting in the garden. Choose a sunny, well-drained location with full sun exposure for mature growth.
Tips & tricks for perfect Japanese plum seed germination
Patience and precision are your best tools when working with Japanese plum seeds—here's how to maximize your success without common pitfalls.
Seed Selection: Choose plums that are fully ripe but still firm to ensure maximum viability. The seeds should be plump and free of cracks or soft spots. I've found that seeds from organic plums often have higher germination rates due to fewer chemical treatments that can inhibit growth.
Stratification Setup: The 90-day cold treatment at 35-40°F is non-negotiable for breaking dormancy, but how you arrange the seeds matters. I place each seed in its own pocket of the damp paper towel to prevent them from sticking together, which can create anaerobic conditions that lead to mold. Labeling the bag with the start date is crucial—many people forget when they began stratification and either rush or over-extend the process.
Moisture Management: During the 90-day stratification, maintaining the right moisture level is everything. The paper towel should feel like a wrung-out sponge—not dripping, but not bone-dry either. I check every 10-14 days and adjust by adding a tiny amount of water if needed. Too much moisture causes mold; too little means the seeds won't soften properly.
Sowing Technique: When planting the stratified seeds at ½ inch depth, use a pencil or dibber to create precise holes rather than pressing them in with your fingers. This prevents crushing the delicate radicle that's just beginning to form. The 2-inch spacing gives roots room to establish without competing immediately, which is especially important for these tender seedlings.
Pro Tips for Japanese Plum Tree From Seed
- Patience and precision are your best tools when working with Japanese plum seeds—here's how to maximize your success without common pitfalls.
- Seed Selection: Choose plums that are fully ripe but still firm to ensure maximum viability.
- Stratification Setup: The 90-day cold treatment at 35-40°F is non-negotiable for breaking dormancy, but how you arrange the seeds matters.
Frequently asked questions
Got questions about growing a Japanese plum tree from seed? You’re not alone!
Here are some of the most common queries—plus straightforward answers to help you avoid pitfalls and boost your success rate.
How long does cold stratification take for Japanese plum seeds?
Cold stratification typically requires 6–12 weeks in the fridge (or outdoors in a cold, moist environment). For best results, place seeds in a damp paper towel or peat moss, then store them at 35–40°F (2–4°C) until you see sprouts. Patience is key—rushing can reduce germination rates!
When is the best time to plant stratified Japanese plum seeds?
Plant your seeds right after stratification, ideally in early spring (March–April) when soil temperatures are warming. If you’ve refrigerated them, transition seeds to a sunny windowsill or seed tray for 1–2 weeks before transplanting to avoid shock. Avoid planting in fall—young seedlings won’t survive winter!
Can I skip cold stratification and still get germination?
While possible, germination rates drop drastically without stratification—expect 5–20% success vs. 50–80% with proper cold treatment. For faster, more reliable results, mimic winter conditions. Pro tip: Some growers soak seeds in warm water for 24 hours first to soften the shell before stratifying.
Why aren’t my Japanese plum seeds sprouting after stratification?
Check these common issues:
- Old seeds: Japanese plum seeds lose viability after 1–2 years. Use fresh, plump seeds.
- Improper moisture: Seeds must stay damp but not soggy during stratification.
- Temperature fluctuations: Keep them consistent (avoid fridge door swings).
- Depth in soil: Plant seeds only ½ inch deep—too deep = poor germination.
How long until a Japanese plum tree from seed bears fruit?
Be patient! Seed-grown Japanese plums take 5–10 years to bear fruit, compared to 3–5 years for grafted trees. Grafting (if done later) can speed this up, but seed-grown trees may produce smaller, less predictable fruit. Focus on nurturing strong growth first—healthy roots = future blooms!
Wrapping up and next steps
Growing a Japanese plum tree from seed is a rewarding journey that blends patience with the joy of nurturing life from scratch! With the right cold stratification technique, you’ll unlock reliable germination—turning a tiny seed into a stunning tree with fragrant blooms and delicious fruit. 🌱✨
Now that you’re armed with the know-how, take the next step: gather your seeds, prepare your stratification setup, and watch nature work its magic. Whether you’re a seasoned gardener or a beginner, every seedling you grow is a testament to your dedication.
Happy planting—your future plum tree is waiting! 🌿💚