
Pruning
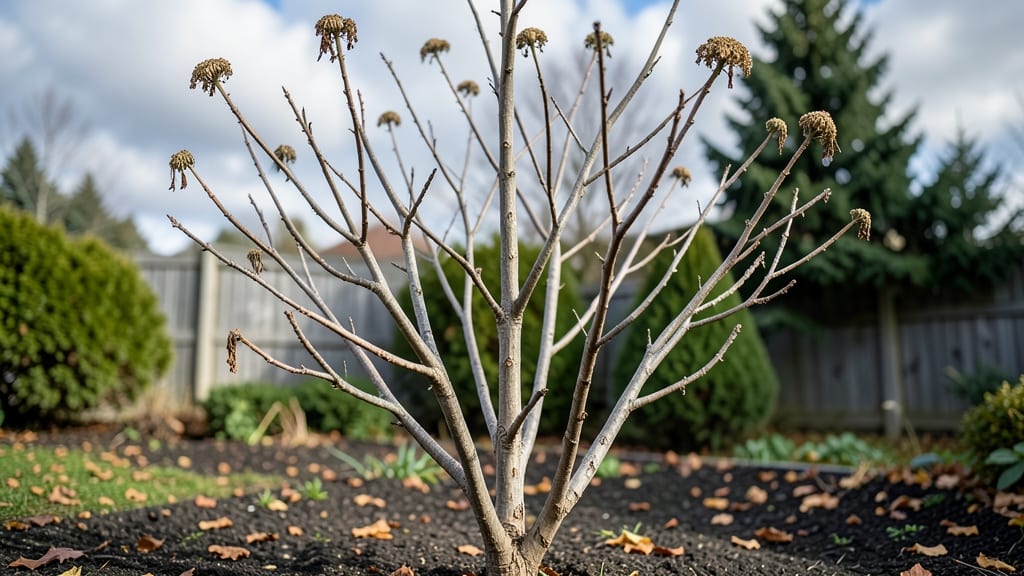
Winter pruning your hydrangea tree isn’t just about cutting back—it’s about waking up those dormant blooms for a shockingly lush spring display. 🌿 I’ve learned the hard way that timing and technique make all the difference, especially in colder zones where frost can sneak in and damage new growth.
The right cuts now mean fewer surprises later, and that’s what separates a thriving shrub from a sad, bare silhouette.
You’ll need sharp pruners, a clear day when temps are above freezing, and a basic understanding of your hydrangea type—whether it’s oakleaf, bigleaf, or panicle. Most varieties bloom on old wood, so the goal is to shape without sacrificing next year’s flowers.
Think of it like giving your plant a fresh start: remove dead branches first, then trim back by one-third to encourage new, sturdy growth. Mulch heavily afterward to lock in warmth and moisture.
By late winter, you’ll see fresh green shoots pushing through the bark, proof that your cuts paid off. The blooms come later, but the foundation is already set—thicker stems, better airflow, and fewer pests.
Even in Zone 5, where winters test patience, this method keeps my hydrangeas coming back stronger every year. The key? Don’t wait until spring—act now while the plant is still dormant.
Works for all hydrangea types, from towering panicle varieties to delicate oakleaf types. Here’s how to do it without overcomplicating things—because winter pruning should feel like a reset, not a guessing game.
📚 In This Guide
- What you need
- Instructions
- Tips and common mistakes
- Wrapping up and next steps
What you need
- ● Pruning shears or loppers – Choose bypass pruners (for clean cuts) or anvil pruners (for thicker branches). Ensure blades are sharp and sanitized with 70% rubbing alcohol or a 10% bleach solution to prevent disease spread.
- ● Hand pruners – For smaller branches (up to ½ inch thick). Look for ergonomic, bypass-style pruners for precision.
- ● Gloves – Heavy-duty, cut-resistant gloves (e.g., Mechanix or Filon) to protect hands from thorns and sharp edges.
- ● Pruning saw – For branches thicker than 2 inches. A bow saw or pruning saw with a curved blade works best.
- ○ Disposable pruning bags or bucket – To collect and dispose of trimmings (optional but helpful for cleanup). A 5-gallon bucket or heavy-duty trash bags suffice.
- ● Ladder or step stool – If your hydrangea tree is taller than 6 feet. Use a stable, non-slip ladder (e.g., Little Giant or Werner) and have someone spot you.
- ● Rag or paper towels – For wiping down tools and cleaning sap off branches.
- ● Marking twine or paint – To tag branches for removal (e.g., bright orange twine or non-toxic spray paint).
- ● Disinfectant spray – A 10% bleach-water mix (1 part bleach to 9 parts water) to clean tools between cuts.
- ● Pruning sealant – Not always necessary, but a tree wound sealant (like Tanglefoot Tree Wound Pruning Seal) can help large cuts heal faster.
- ● Garden kneeler or stool – For comfort if you’re working close to the ground.
- ● Camera or notebook – To document the tree’s structure before and after pruning (helpful for tracking growth!).
- ● Safety glasses – Protect your eyes from debris, especially when using a saw.
How to prune a hydrangea tree for winter revival
Winter's the perfect time to shape your hydrangea tree—just 3 strategic cuts keep it healthy and blooming.
🌿 Step 1: Identify and Remove Dead or Damaged Wood
Start by scanning your hydrangea tree for any branches that are brown, brittle, or clearly dead. These won’t recover and only take energy from the healthy parts. I grab a small pair of pruning shears and cut just outside the branch collar—the swollen area where the branch meets the trunk. This ensures the tree heals cleanly and doesn’t leave a jagged wound.
Don’t worry if you miss a few—hydrangeas are forgiving. Just focus on the obvious deadwood first. You’ll know you’ve done well when the tree looks more open and air can circulate freely through the branches. This step alone reduces the risk of pests and disease in spring.
✂️ Step 2: Thin Out Overcrowded Branches
Next, look for branches that are rubbing against each other or growing inward toward the center of the tree. These compete for sunlight and can create weak spots where disease can take hold. I like to remove about one-third of the oldest branches—these are usually the thickest and least productive. Cut them back to the branch collar, making sure to angle the cut slightly away from the trunk.
Here’s the thing—hydrangeas bloom on both old and new wood, depending on the variety. If you’re unsure, err on the side of thinning rather than cutting back too aggressively. You’ll see a more balanced shape, and the remaining branches will have room to grow stronger next season.
⏰ Step 3: Shape the Tree for Next Season’s Growth
Now it’s time to shape the tree for next year’s blooms. I focus on creating an open, vase-like structure by shortening some of the longest branches. Cut back no more than one-third of the length of any branch—this encourages bushier growth. For example, if a branch is 6 feet long, I’ll trim it to 4 feet. Always cut just above a bud or side branch to promote new growth in the right direction.
Step back and look at the tree from all angles. The goal is to maintain a natural, balanced shape while still allowing sunlight to reach the center. If you’re feeling unsure, take a photo first—you can always adjust later. Hydrangeas respond well to gentle pruning, so don’t stress over perfection.
Tips & tricks for perfect hydrangea tree winter pruning
Between us, winter pruning can feel intimidating—but these little tricks make all the difference for your hydrangea's health and next year's blooms.
Branch Collar Know-How: That swollen area where branches meet the trunk (the branch collar) is your target spot for every cut. I learned this the hard way after seeing a tree develop ugly wounds from improper cuts. Always cut just outside this collar—it's nature's built-in healing seal. Use sharp pruning shears to make clean cuts rather than tearing the bark, which invites disease. A magnifying glass helps if you're unsure where the collar is.
Pruning Shears Selection: Don't skimp on your tools—bypass pruners with a 6-8 inch blade handle work best for most hydrangea branches. For thicker branches (over 1/2 inch), use loppers with long handles to avoid straining your back. I keep a small pair of hand pruners in my gardening belt for quick touch-ups. Always clean your tools with rubbing alcohol between cuts to prevent spreading any potential diseases from dead branches.
Visual Pruning Guide: Step back frequently and imagine sunlight streaming through your tree. In Step 2, you're aiming for an "open vase" shape—picture how sunlight would naturally filter through. For Step 3, visualize cutting branches so they form a gentle curve rather than sharp angles. If you're still unsure, take a photo before pruning and compare it to reference images of properly pruned hydrangeas. The goal is to create an airy structure that allows light and air to circulate freely.
Pro Tips for Hydrangea Tree In Winter
- Between us, winter pruning can feel intimidating—but these little tricks make all the difference for your hydrangea's health and next year's blooms.
- Branch Collar Know-How: That swollen area where branches meet the trunk (the branch collar) is your target spot for every cut.
- Pruning Shears Selection: Don't skimp on your tools—bypass pruners with a 6-8 inch blade handle work best for most hydrangea branches.
Frequently asked questions
about hydrangea trees in winter—because winter prep can feel like a puzzle! Here’s what you need to know before diving in:When is the best time to prune a hydrangea tree in winter?
The ideal window is late winter to early spring (February–March), before new growth starts. This timing ensures you don’t accidentally trim off next year’s buds. For panicle or oakleaf hydrangeas, prune in late winter; for bigleaf varieties, wait until spring (after blooms fade).
Do I need to protect my hydrangea tree from winter cold?
Most hydrangea trees are hardy, but young plants or tender varieties (like panicle) benefit from mulch (2–3 inches) around the base. Wrap the trunk with burlap if your zone drops below 10°F (-12°C). Skip wrapping if your tree is mature and well-established—overprotection can cause rot!
What if I prune too late and miss the winter window?
No panic! Prune after blooms fade in early summer (June–July) for bigleaf hydrangeas, or right after flowering for panicle types. Just avoid heavy cuts—focus on shaping and removing dead wood. Late pruning won’t kill your tree, but it may reduce next year’s blooms.
Can I grow hydrangeas in containers and prune them the same way?
Yes! Container hydrangeas follow the same pruning rules, but size matters. Use sterilized shears and repot every 2–3 years to refresh soil. In winter, move containers to a sheltered spot (like a garage or under eaves) if temps drop below 20°F (-7°C). Drainage holes are a must—hydrangeas hate soggy roots!
What should I do if my hydrangea tree looks dead after winter?
Don’t toss it yet! Wait until late spring (May) to confirm. If branches are brown and brittle, they’re likely dead—cut them back. If they’re green under the bark when scratched, they’re alive. Hydrangeas are resilient; even if it looks grim, new growth often surprises you!
Wrapping up and next steps
With the right tools, timing, and technique, your hydrangea tree in winter can bounce back stronger than ever! 🌱 Remember, the key is patience—focus on one or two strategic cuts to shape growth and encourage vibrant blooms next season.
Now that you’re armed with knowledge, grab your pruners and give your tree the care it deserves.
Ready to transform your dormant beauty? Start pruning this winter—your future blooms will thank you! For extra confidence, watch a quick video tutorial or join a local gardening group to share tips with fellow plant lovers. Happy pruning! ✂️