
Pruning
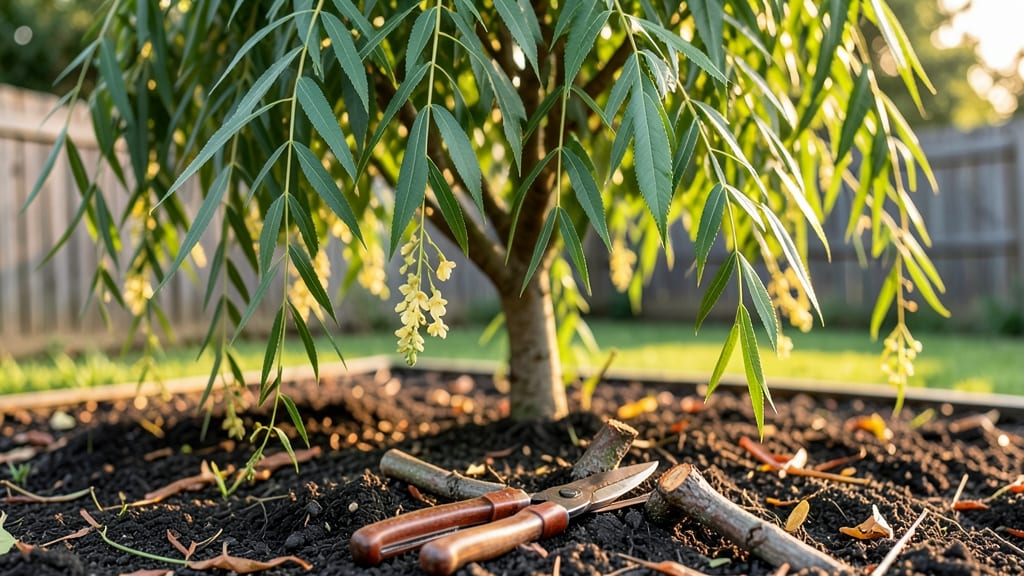
Pruning a weeping mulberry tree in late winter reveals its true elegance—those cascading branches finally take shape after months of dormancy. 🌿 I’ve spent years watching these trees transform from tangled messes into graceful, fountain-like masterpieces, and the secret lies in timing, technique, and a little patience.
The right cuts don’t just clean up the tree; they encourage thicker growth, better fruit production, and a structure that bends beautifully with age.
You’ll need just a few tools: sharp pruning shears for smaller branches, loppers for thicker limbs, and a sturdy ladder if your tree stands taller than your outstretched arms. Work on a dry day when the tree’s sap isn’t flowing wildly—this minimizes stress and makes cuts heal cleaner.
The goal is to remove no more than 25% of the tree’s foliage in one session, so think of this as a gentle sculpting process rather than a drastic haircut.
Start by removing dead, crossing, or rubbing branches first—they’re the tree’s weak points and will only cause problems down the road. Next, thin out the interior to let light and air reach the center, which prevents disease and encourages new growth.
For the signature weeping shape, focus on shortening the outer branches by about one-third, but leave the inner branches longer to maintain that cascading effect. Every cut should be made just above a bud or lateral branch, angled slightly away from it.
The payoff comes in spring, when your tree bursts into fresh, vibrant foliage and those long branches sway like a natural curtain. With proper pruning, you’ll also see more berries—sweeter, plumper, and easier to harvest.
And here’s the best part: once you’ve mastered the technique, this tree will reward you for years with minimal effort. Ready to shape your tree’s future?
📚 In This Guide
- What you need
- Instructions
- Tips and common mistakes
- Wrapping up and next steps
What you need
- ● Pruning shears (bypass or anvil type) – Sharp, clean shears for small branches (4-inch blades or larger). Quantity: 1 pair
- ● Loppers – For thicker branches (up to 2 inches in diameter). Quantity: 1 pair
- ● Pruning saw – Heavy-duty saw for branches thicker than 2 inches. Quantity: 1
- ● Gloves (gardening or pruning gloves) – Protects hands from thorns and rough bark. Quantity: 1 pair
- ● Disinfectant (70% isopropyl alcohol or bleach solution) – Cleans tools between cuts to prevent disease spread. Quantity: Small bottle or spray
- ○ Pruning sealant (optional but recommended) – Helps larger wounds heal faster. Quantity: Small tube
- ● Ladder or sturdy stool – For reaching higher branches safely. Quantity: 1 (if needed)
- ● Heavy-duty trash bags – For collecting pruned branches. Quantity: 2-3
- ○ Sharpie or marker – To mark branches for future reference (optional but helpful). Quantity: 1
- ● Safety glasses – Protects eyes from debris.
- ● Earplugs – Reduces noise from power tools (if using an electric saw).
- ● Tree wound dressing – Alternative to sealant for larger cuts.
- ● Extension pole pruners – For high branches without a ladder.
- ● Notebook & pen – To sketch your tree’s shape before pruning.
Step-by-step guide for pruning a weeping mulberry tree
Here’s how to shape your tree for beauty and health—without stressing the branches.
✂️ Step 1: Gather Tools and Assess the Tree
Start by collecting sharp, clean pruning shears for small branches and a pruning saw for thicker growth. I always disinfect my tools with rubbing alcohol first—this prevents spreading disease between cuts. Next, scan the tree for dead, crossing, or overcrowded branches. These are your priority targets.
Look for branches that rub against each other or grow inward—they’ll eventually tear or create weak points. Healthy branches have smooth bark and vibrant green leaves, while dead wood looks dry, brown, and brittle. Mark these with a piece of twine or tape so you don’t miss them later.
🌿 Step 2: Remove Dead, Damaged, or Weak Branches
Begin by cutting out any dead or diseased branches first. Make clean cuts just outside the branch collar—the swollen area where the branch meets the trunk. This ensures the tree seals the wound naturally. For thicker branches, use the pruning saw and cut at a slight angle to avoid tearing the bark.
Next, remove any branches that cross or rub against others. These create wounds that invite pests and disease. If a branch is too small to handle with the saw, use the shears but make sure the cut is smooth—not jagged. Step back occasionally to visualize the tree’s shape. You’re sculpting, not hacking.
☀️ Step 3: Thin Out Overcrowded Growth
Weeping mulberry trees thrive when air circulates freely. Focus on thinning branches from the center outward to let light reach the inner canopy. Aim to remove about 20-30% of the tree’s total branches—this keeps it healthy without stressing it. Start at the bottom and work upward.
Look for branches that grow straight up or outward too aggressively. These compete for sunlight and weaken the tree’s structure. Cut them back to a lateral branch or bud facing the direction you want growth to continue. Avoid leaving stubs—always cut just above a bud or branch collar. You’ll see new, balanced growth emerge within a few weeks.
⏰ Step 4: Shape the Canopy for Balance
Now’s the time to refine the tree’s natural weeping shape. Gently guide the branches to create a graceful, cascading form by selectively shortening overlong limbs. For each cut, step back and check the tree’s symmetry. The goal is to maintain its elegant, drooping silhouette while keeping it open enough for sunlight to filter through.
If a branch is too heavy or weak, shorten it to a strong lateral branch. Never remove more than one-third of the tree’s foliage in a single pruning session—this can shock the tree. Water deeply after pruning to help it recover faster. You’ll notice fresh, vibrant growth in the following spring.
Tips & tricks for pruning a weeping mulberry tree
Transforming your weeping mulberry into a stunning focal point takes more than just cutting branches—it’s about understanding the tree’s natural rhythm. Here’s how to elevate your pruning game without stressing the tree.
Tool Prep Matters: Beyond just having sharp shears and a saw, take an extra 5 minutes to disinfect your tools between cuts. I use rubbing alcohol on a clean cloth—this simple step prevents spreading fungal diseases that can linger on tools. For stubborn sap buildup, wipe blades with mineral oil after each session to keep them in top condition. This small effort makes all the difference in keeping your tree healthy long-term.
Visualize the Final Shape: Before making any cuts, step back and mentally trace the tree’s ideal silhouette. Weeping mulberries thrive when you preserve their natural drooping form, so focus on removing only what disrupts this elegant flow. I like to sketch a rough outline on paper first—it helps me see which branches need shortening versus complete removal. Think of it as sculpting with nature’s materials.
Branch Collar Awareness: In Step 2, when removing branches, pay close attention to the branch collar—the swollen area where the branch meets the trunk. Cutting just outside this collar (about ¼ inch) is crucial because it allows the tree to seal the wound naturally. I’ve seen too many pruning jobs where cuts were made too close or too far, leaving ugly scars. This one detail separates amateur cuts from professional results.
Seasonal Timing Strategy: While the instructions don’t specify timing, late winter to early spring (just before buds swell) is ideal for pruning weeping mulberries. This timing gives the tree time to heal before summer heat stress. If you must prune later in the season, do it on a cool, overcast day to reduce water loss through fresh cuts. The tree’s natural sap flow will be slower, making recovery easier.
Pro Tips for Prune A Weeping Mulberry Tree
- Transforming your weeping mulberry into a stunning focal point takes more than just cutting branches—it’s about understanding the tree’s natural rhythm.
- Tool Prep Matters: Beyond just having sharp shears and a saw, take an extra 5 minutes to disinfect your tools between cuts.
- Visualize the Final Shape: Before making any cuts, step back and mentally trace the tree’s ideal silhouette.
Frequently asked questions
Got questions about pruning your weeping mulberry tree? You’re not alone! Here are answers to the most common concerns to help you prune with confidence.
When is the best time to prune a weeping mulberry tree?
Prune your weeping mulberry tree in late winter or early spring (just before new growth starts). This timing encourages healthy growth and minimizes stress. Avoid pruning in fall—it can stimulate tender new shoots that may not survive winter. For light shaping, you can prune lightly in summer, but avoid heavy cuts during hot months.
How much can I cut back without harming the tree?
Weeping mulberry trees are resilient, but never remove more than 25% of the foliage in one season. For young trees, you can trim up to 30% if needed. Over-pruning weakens the tree and reduces fruit production. Focus on selective pruning—remove dead, diseased, or crossing branches first, then shape gently.
Will pruning affect fruit production?
Yes, but not drastically if done correctly! Pruning too aggressively (especially in spring) can reduce fruit yield, as the tree diverts energy to new growth. To balance aesthetics and harvest, prune lightly in late winter and avoid heavy cuts during fruiting season (summer/fall). If fruit isn’t a priority, prune more boldly for shape.
Can I prune a weeping mulberry tree in summer?
You can, but it’s best to avoid heavy pruning in summer heat. Light trimming (like removing a few wayward branches) is fine, but major cuts stress the tree and slow recovery. If you must prune in summer, do it on a cool, cloudy day and water thoroughly afterward. Save big jobs for dormancy.
What should I do if my tree bleeds sap after pruning?
Sap bleeding (or “weeping”) is normal for mulberry trees and harmless—it won’t harm the tree. To minimize mess, prune on a dry day and avoid cutting into large branches. If sap bothers you, apply pruning sealant to cuts over ½-inch thick, but it’s optional. The tree will heal quickly with proper aftercare!
Wrapping up and next steps
Pruning your weeping mulberry tree doesn’t have to be intimidating—with the right tools, timing, and technique, you’ll help it thrive while keeping its elegant shape. Remember, patience and consistency are key, and always prioritize the health of your tree over perfection.
Now that you’re armed with these steps, grab your pruners and give your tree the care it deserves!
Ready to take it further? Consider adding mulch or fertilizer to support new growth, or explore creative ways to showcase your tree’s beauty in your landscape. Happy pruning! 🌿✨