
Size
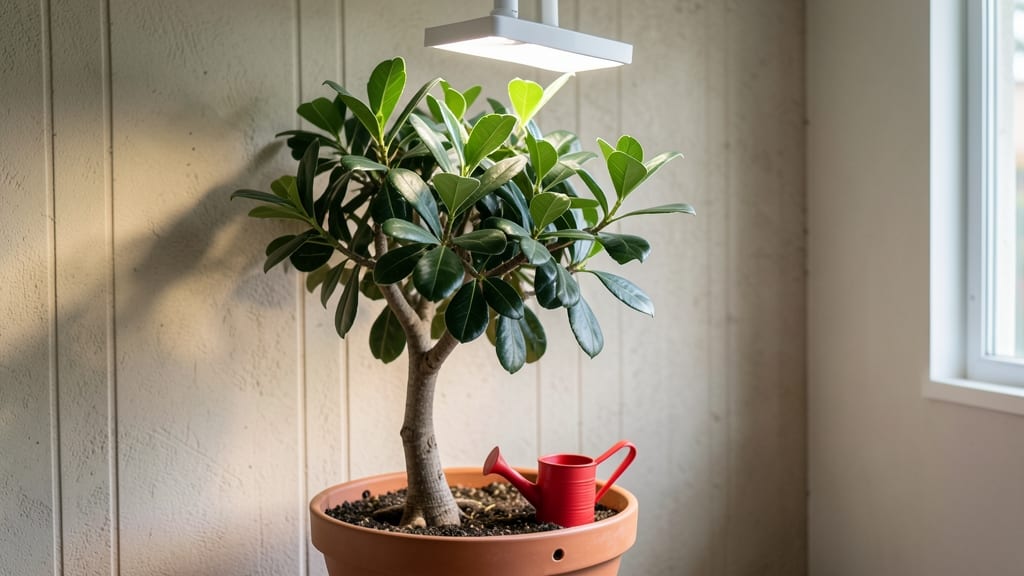
Growing an avocado tree indoors starts with that pit from your grocery store breakfast—yes, really. 🌱 I’ve turned more than a few into lush, leafy plants by following the same simple steps, and you can too.
The key isn’t some secret fertilizer or fancy pot, but matching the tree’s tropical needs to your indoor space.
You’ll need a well-draining potting mix, a container with drainage holes, and patience—though the first leaves appear faster than you’d expect. My first attempt took just 3 months to show real growth, and the trick is keeping the soil slightly moist but never soggy.
Too much water is the #1 killer, but with the right balance, your tree will thrive year-round.
By the time you’re pruning leggy stems or harvesting tiny avocados (yes, it happens!), you’ll have a 5-foot-tall conversation piece that purifies the air. The glossy leaves alone make it worth the effort, but the real magic is watching roots grow through the drainage holes—proof you’re doing it right.
Works in apartments, kitchens, or sunrooms—just adjust light with a grow bulb if needed. Here’s how to avoid the common mistakes that turn brown leaves into a gardening nightmare.
📚 In This Guide
- What you need
- Instructions
- Tips and common mistakes
- Wrapping up and next steps
What you need
- ● Avocado pit: 1 fresh, organic avocado pit (the larger, the better for faster growth). Pro tip: 💡 Choose pits from Hass avocados—they’re the most common and easiest to grow!
- ● Toothpicks or chopsticks: 3-4 (for suspending the pit while it roots).
- ● Glass or jar: 1 large-mouthed jar (16-24 oz) with water to cover ⅓ of the pit.
- ● Well-draining potting mix: 1 bag (1-2 gallons) of cactus/succulent mix or a blend of 50% potting soil + 50% perlite/pumice.
- ○ Pot: 1 small pot (6-8 inches in diameter) with drainage holes. Optional: A self-watering pot for beginners!
- ● Spray bottle: 1 (for misting leaves and maintaining humidity).
- ● Grow lights or sunny window: Access to 6+ hours of bright, indirect light daily (south or west-facing window ideal).
- ● Fertilizer: 1 bottle of balanced liquid fertilizer (10-10-10 or 20-20-20) or organic options like fish emulsion.
- ● Humidity tray: A shallow tray with pebbles and water to boost moisture around the plant.
- ● Plant food: Slow-release granules for occasional nutrient boosts.
- ● Pruning shears: Small, sharp pair for trimming leggy growth.
- ● Avocado tree support: A small stake or trellis if your tree grows tall.
- ● Monitoring tools: A hygrometer to track humidity (40-60% is ideal!).
How to grow an avocado tree indoors: Step-by-Step guide
Here's how to coax a lush avocado tree from a simple pit—no green thumb required.
🌱 Step 1: Prepare the Avocado Pit for Germination
Rinse the avocado pit thoroughly under warm water to remove any remaining fruit flesh. This prevents mold and rot during germination. I like to use a soft brush to scrub off all traces of pulp—you want the pit completely clean before moving forward.
Insert three toothpicks evenly around the pit, spacing them about 1/4 inch apart. These will suspend the pit over a glass of water without letting it touch the bottom. The toothpicks should be positioned so the pit's widest, flattest side faces downward—this is where the roots will emerge naturally.
Fill a glass with room-temperature water until it reaches about 1 inch below the toothpicks. Place the pit in the glass so it hovers just above the waterline. Here's the thing—don't submerge it. The pit needs oxygen to germinate, and too much water will drown it before roots even appear.
💧 Step 2: Create Ideal Germination Conditions
Position the glass in a warm spot with bright, indirect light—think 60-70°F and away from direct sunlight, which can overheat the water. A kitchen windowsill or countertop near a south-facing window works perfectly. You'll see tiny roots emerging from the bottom in about 2-6 weeks, depending on your home's humidity and warmth.
Change the water every 3-4 days to prevent bacterial growth. I use a clean glass each time to avoid contamination. Watch for the roots to grow to about 2-3 inches long before moving to soil—that's your signal the pit is ready for the next stage.
Real talk: If the water gets cloudy or smells funky, dump it and refresh immediately. A foul odor means bacteria are taking over, and your pit could rot before sprouting. Keep the water level consistent—never let the pit dry out completely, but don't let it sit submerged either.
☀️ Step 3: Plant the Germinated Pit in Soil
Fill a 6-inch diameter pot with well-draining potting mix. I always use a mix labeled for "cactus and succulents" because it drains excess water quickly—avocado trees hate soggy roots. Press the mix down lightly to create a firm base, then make a small hole in the center about 1 inch deep.
Gently place the germinated pit into the hole, covering the roots completely but leaving the top half exposed. The toothpicks can stay in place temporarily to help position the pit, but remove them once the soil is firmly packed around the roots. Water lightly until the soil feels evenly moist but not saturated.
Here's where it gets fun—watch the cotyledons pop through the soil after a few days. These are the first true leaves, and they'll signal that your avocado tree is thriving. Place the pot in bright, indirect light immediately. Direct sunlight can scorch the delicate new leaves, so a sheer curtain works well if your window is south-facing.
🌿 Step 4: Care for Your Young Avocado Tree
Water your avocado tree when the top inch of soil feels dry to the touch. Stick your finger in the soil—if it's dry past your first knuckle, it's time to water. Overwatering is the #1 killer of indoor avocado trees, so I use a moisture meter to double-check. Aim for soil that's consistently moist but never waterlogged.
Fertilize lightly every 2 months with a balanced, water-soluble fertilizer diluted to half strength. I start this routine 3 months after planting once the tree shows signs of new growth. Too much fertilizer too soon burns the roots—patience is key here. Rotate the pot a quarter turn weekly so the tree grows straight toward the light, not lopsided.
Your tree will eventually outgrow its first pot. When you see roots circling the bottom or growing out of the drainage holes, it's time to upgrade to a 12-inch pot. This usually happens within 6-12 months, depending on how vigorously your tree grows. Always use fresh potting mix when repotting to avoid compacted soil that stunts root development.
Tips & tricks for perfect indoor avocado tree growth
Turning that humble avocado pit into a thriving tree takes patience—and these little tricks will help you avoid common pitfalls along the way.
Cleanliness is Key: In Step 1, when you're scrubbing the pit, don't rush this step. Leftover fruit pulp on the pit can attract mold and bacteria, which will rot your pit before it even sprouts. I like to use a small toothbrush for those hard-to-reach crevices—it gets every last bit of pulp off. This thorough cleaning is what prevents that foul smell in your water later on.
Toothpick Placement Matters: When inserting the three toothpicks around the pit, make sure they're evenly spaced and positioned at the widest part of the pit. This creates a stable balance so the pit doesn't tip over in the water. I've seen pits wobble dangerously when the toothpicks are uneven—just a little extra attention here prevents potential spills and keeps your pit stable for root growth.
Lighting Secrets: For Step 2, that "bright, indirect light" is crucial. If you notice your pit's roots growing toward the light source (a condition called phototropism), it's getting too much direct light. I use a sheer curtain to diffuse sunlight from my south-facing window—this prevents the water from overheating and keeps the roots healthy. You'll know you've got it right when the water stays at that perfect 60-70°F range without getting too warm.
Root Development Watch: In Step 2, when you're waiting for those 2-3 inch roots, don't be tempted to rush the process. I've seen people move pits to soil too soon, and the fragile roots often break during transplanting. Wait until you see roots that are at least pencil-thick before moving to soil—that's when they're strong enough to handle the transition. You'll also notice the roots will start to branch out at this stage, which is a great sign of health.
Pro Tips for Grow An Avocado Tree Indoors
- Turning that humble avocado pit into a thriving tree takes patience—and these little tricks will help you avoid common pitfalls along the way.
- Cleanliness is Key: In Step 1, when you're scrubbing the pit, don't rush this step.
- Toothpick Placement Matters: When inserting the three toothpicks around the pit, make sure they're evenly spaced and positioned at the widest part of the pit.
Frequently asked questions
How long does it take for an avocado pit to sprout indoors?
Patience is key! With consistent care (warmth, moisture, and indirect light), your pit should sprout roots in 2–8 weeks. Once roots reach 2–3 inches, you can transplant it into soil. If nothing happens after 2 months, gently check for rot or dryness—sometimes a little adjustment is all it needs!
Can I use any avocado pit to grow a tree?
Not all pits are created equal! Choose a firm, blemish-free pit from a ripe, organic avocado (store-bought pits often have chemical residues). Hass avocados (the most common) work best. Avoid pits from unripe or overly soft fruit—they’re less likely to sprout successfully.
How fast will my indoor avocado tree grow, and will it bear fruit?
Growth is slow at first—expect 6–12 inches per year indoors. Fruit production is a long game: it can take 5–13 years (or longer!) for a homegrown avocado tree to bear fruit. Focus on enjoying the lush, tropical vibes—bonus points for air purification!
Why is my avocado tree’s leaves turning yellow or brown?
Yellow/brown leaves usually signal overwatering, underwatering, or pests. Check the soil—it should be damp but not soggy. Move the plant to brighter (but indirect) light if leaves look pale. For brown tips, reduce humidity or trim affected areas. Spider mites can also cause stress—wipe leaves with soapy water if needed!
What’s the best alternative if my avocado pit won’t sprout?
No stress—try these easy indoor plant swaps:
- Citrus trees (like Meyer lemons): Fast-growing and fragrant!
- Money trees (Pachira): Low-maintenance and symbolic.
- Herbs like basil or mint: Edible and compact.
- Succulents (e.g., jade plants): Thrives in bright light.
Wrapping up and next steps
Growing an avocado tree indoors is a rewarding journey that blends patience, care, and a dash of tropical magic! 🌱 With the right materials, a little patience, and consistent attention to light, water, and nutrients, you’ll soon enjoy lush green leaves—and maybe even fruit—right in your home.
Start small, stay consistent, and before you know it, you’ll have a thriving indoor avocado tree to admire.
Now that you’re armed with the know-how, why not take the next step? Share your progress with fellow plant enthusiasts online, or explore advanced care tips to keep your tree flourishing for years to come! 🌟