
Pruning
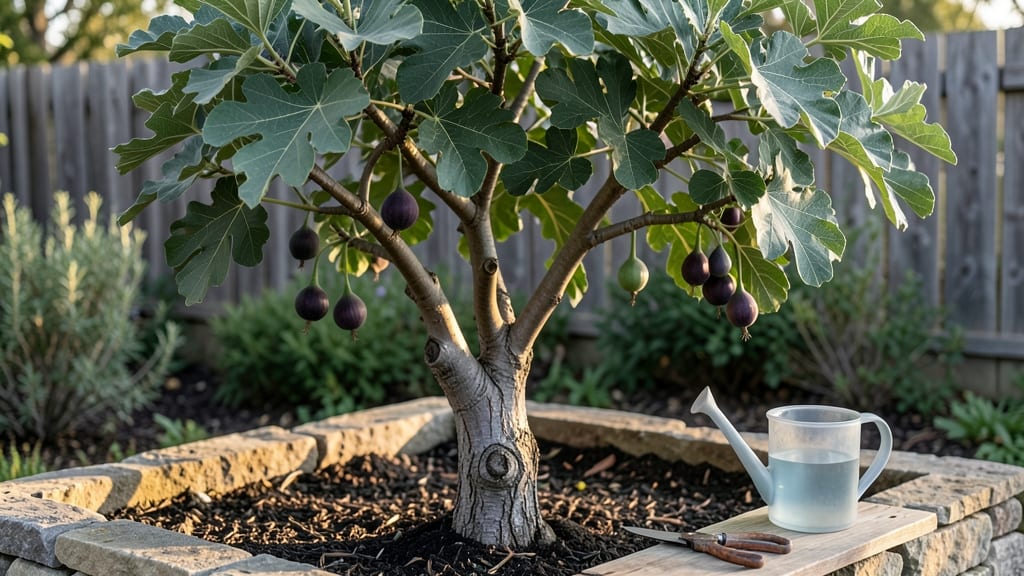
Growing a fig tree from scratch means waking up to sun-warmed fruit dripping with honeyed sweetness by midsummer. 🌿 I’ve pruned figs for years, and the dormant season is when you set the stage for next year’s harvest—thinning out crowded branches now means bigger, juicier fruit later.
The key is timing: wait until late winter when the tree’s still asleep, then cut with confidence to encourage strong new growth.
You’ll need sharp pruners, a ladder (for taller trees), and a clear day to work. Start by removing dead or crossing branches first—they’re easy to spot and always go. Then focus on shaping the tree to let sunlight reach the center, where most of the fruit forms.
A little elbow grease now saves you from tangled branches and poor airflow later, which keeps pests away.
What you end up with is a tree that bursts into leaf in spring and produces fruit so heavy the branches sag. The secret’s in the cuts: make them clean, just above a bud or leaf joint, and at a slight angle to keep water from pooling.
By summer, you’ll be harvesting figs that taste like sunshine—sweet, jammy, and impossible to resist.
This method works for both container figs and in-ground trees, from cold-hardy varieties like ‘Chicago Hardy’ to heat-lovers like ‘Brown Turkey.’ Just adjust your pruning timing based on your zone—warmer climates can prune a little later. Ready to transform that bare branch into a fruit-laden dream?
📚 In This Guide
- What you need
- Instructions
- Tips and common mistakes
- Wrapping up and next steps
What you need
- ● Fig tree: A healthy dormant fig tree (bare-root or potted, depending on your preference). Choose a variety suited to your climate (e.g., Brown Turkey, Celeste, or Black Mission).
- ● Pruning shears: Sharp, high-quality bypass pruners (avoid anvil-type shears to prevent crushing). Recommended: Felco F-2 or Corona 3-in-1.
- ● Loppers: For thicker branches (up to 2 inches in diameter). Look for ratcheting loppers for extra leverage.
- ● Hand saw: A pruning saw with a curved blade for branches too thick for loppers (3+ inches).
- ● Rubbing alcohol (70% or higher): To sterilize tools between cuts and prevent disease spread.
- ○ Pruning sealant: Optional but helpful for sealing large cuts (e.g., Tanglefoot Tree Wound Pruning Seal).
- ● Gloves: Heavy-duty gardening gloves to protect against thorns and sap.
- ● Watering can or hose: With a gentle spray nozzle for post-pruning hydration.
- ● Well-draining potting mix: If planting in containers (e.g., 50% potting soil, 30% perlite, 20% compost).
- ● Container or planting hole: For in-ground planting: A hole twice as wide as the root ball and just as deep.
- ● For container growing: A pot at least 15-gallon with drainage holes (larger for mature trees).
- ● Mulch: Organic mulch (e.g., wood chips or straw) to retain moisture and regulate soil temperature.
- ● Fertilizer: A balanced 10-10-10 or 6-6-6 fertilizer to nourish the tree after pruning.
- ● Tree ties or stakes: For supporting young or newly planted fig trees in windy areas.
- ● Spray bottle with water: For misting cuts to reduce sap bleeding.
- ● Label tags: To mark varieties or pruning dates (especially useful for multiple trees!).
Step-by-step guide to pruning your fig tree for maximum fruit
Here's how I transform a wild fig tree into a productive harvest machine—just a few cuts make all the difference.
✂️ Step 1: Identify the Right Time to Prune
Figs need their pruning done while they're dormant, which means late winter or early spring before new growth starts. You'll know it's time when your tree has lost all its leaves and the weather stays consistently below 50°F. Pruning too early can expose fresh cuts to cold damage, while pruning too late lets the tree waste energy on new growth before spring.
I always check the forecast for a stretch of dry, warm days after pruning—this helps the cuts heal faster. If you're in a mild winter zone, wait until you see the first tiny buds swelling on the branches. These buds are your signal that the tree is waking up and ready for shaping.
✂️ Step 2: Remove Dead, Diseased, or Crossing Branches First
Start by cutting out any branches that are completely dead, diseased, or rubbing against other branches. Use sharp pruning shears to make clean cuts at a 45-degree angle, about ¼ inch above a bud that's facing outward. This outward-facing bud ensures new growth will develop away from the center of the tree, improving airflow and sunlight penetration.
I look for branches that are dark brown inside when cut open—these are dead and need removal. For diseased branches, sterilize your tools with rubbing alcohol between cuts to prevent spreading any pathogens. If you're unsure whether a branch is dead, gently scratch the bark with your fingernail. Green underneath means it's alive; brown means it's dead.
✂️ Step 3: Thin the Canopy for Better Sunlight and Airflow
Next, focus on thinning the canopy by removing about 20-30% of the remaining branches. Start at the center of the tree and work your way outward, cutting back branches that are growing inward or crossing over others. This opens up the tree so sunlight can reach the inner branches, which is where many of the fruit develop.
I aim to create an open, vase-like shape with my fig tree. This shape encourages fruit production while reducing the risk of fungal diseases that thrive in dense, shaded foliage. When thinning, prioritize branches that are less than ½ inch in diameter—these are easier for the tree to regenerate after pruning.
✂️ Step 4: Shorten Last Year's Growth to Encourage Fruit Production
Now, it's time to shorten the remaining branches by about ⅓ of their length. Focus on the branches that grew last year, cutting just above a strong, outward-facing bud. This encourages the tree to produce more fruit-bearing branches while keeping the tree at a manageable size. Avoid cutting back into old wood—this can stimulate excessive vegetative growth at the expense of fruit production.
I like to step back and look at the tree after each cut to visualize the shape. Figs respond well to pruning, so don't be afraid to be bold. If you're unsure about a cut, wait a few minutes and reassess. Sometimes, a branch looks like it needs trimming until you see how it fits into the overall shape of the tree.
💧 Step 5: Clean Up and Apply Post-Pruning Care
After pruning, gather all the clippings and dispose of them properly. If any branches were diseased, bag them separately and dispose of them in the trash—not the compost pile. Next, give the tree a deep watering to help it recover from the stress of pruning. Focus the water at the base of the tree, avoiding the trunk itself to prevent rot.
I also apply a balanced, slow-release fertilizer around the drip line of the tree after pruning. This gives the tree the nutrients it needs to produce new growth and fruit. Keep an eye on the tree over the next few weeks for any signs of stress, like wilting leaves or oozing sap at the pruning cuts. If you see these signs, hold off on any additional pruning until the tree has recovered.
Tips & tricks for perfect fig tree pruning
Transforming a wild fig tree into a fruit-bearing powerhouse starts with these essential pruning secrets.
Timing is Everything: The 50°F temperature threshold is your golden rule for pruning—this ensures the tree is fully dormant and won't waste energy on new growth. If you're in a mild climate where winter barely dips below 50°F, wait until you spot those first tiny buds swelling. This is your tree's way of saying, "I'm ready!" Pruning too early risks cold damage to fresh cuts, while waiting too long lets the tree focus on leaves instead of fruit.
Tool Prep Prevents Problems: Sterilize your pruning shears with rubbing alcohol between cuts, especially when dealing with diseased branches. I keep a small spray bottle of 70% isopropyl alcohol handy for quick disinfection. Sharp tools make clean cuts that heal faster—dull blades tear the bark, creating larger wounds that attract pests and diseases. Test your tools by making a clean cut through a pencil—if it crushes instead of slices, they need sharpening.
Visualize the Vase Shape: When thinning the canopy in Step 3, step back every few cuts to check your progress. The goal is that open, vase-like shape where sunlight can reach all branches. I imagine removing branches like taking away supports from a tent—you want the tree to open up naturally. Prioritize branches growing inward or crossing others, as these compete for sunlight and nutrients. Remember, you're aiming to remove 20-30% of the branches, not strip the tree bare.
Post-Pruning Recovery: After your work, give the tree a deep watering focused at the base—not the trunk—to help it recover. I've seen fig trees perk up noticeably after just 24 hours of proper post-pruning care. Keep an eye out for oozing sap at the cuts—this is normal for the first week as the tree seals itself. If you notice wilting leaves or excessive sap after two weeks, your tree might be stressed and needs more time to recover before additional pruning.
Pro Tips for Fig Tree
- Transforming a wild fig tree into a fruit-bearing powerhouse starts with these essential pruning secrets.
- Timing is Everything: The 50°F temperature threshold is your golden rule for pruning—this ensures the tree is fully dormant and won't waste energy on new growth.
- Tool Prep Prevents Problems: Sterilize your pruning shears with rubbing alcohol between cuts, especially when dealing with diseased branches.
Frequently asked questions
Got questions about growing and pruning your fig tree?
You’re not alone! Here are some of the most common queries—and their straightforward answers—to help you nurture a thriving tree.
When is the best time to prune a fig tree?
Prune your fig tree late winter or early spring, just before new growth begins. This timing ensures you remove dead wood while stimulating fresh, healthy branches for the growing season. Avoid pruning in fall or winter, as it can leave cuts vulnerable to disease.
How much can I prune off a fig tree without harming it?
For mature fig trees, you can safely remove up to one-third of the canopy during dormant pruning. Focus on dead, diseased, or crossing branches first. Younger trees benefit from lighter pruning—just shape them to encourage an open structure. Pro tip: Never prune more than 25% of the tree in a single session to avoid stress.
Why aren’t my figs ripening, even after pruning?
Fig ripening issues often stem from over-pruning, poor sunlight, or improper watering. Ensure your tree gets at least 6–8 hours of direct sun daily and prune lightly to maintain a balanced canopy. Also, check for pests (like aphids) or fungal diseases that may stunt fruit development. Adjust watering to keep soil consistently moist but not soggy.
Can I grow a fig tree in a pot, and how does pruning differ?
Yes! Fig trees thrive in pots if you choose dwarf varieties (like ‘Little Miss Figgy’) and use well-draining soil. Pruning container-grown figs follows the same rules, but size matters: Prune to control height and encourage bushier growth. Repot every 2–3 years to refresh soil nutrients, and move pots indoors or to a sheltered spot if temps drop below 20°F (-7°C).
What’s the fastest way to revive a fig tree that’s struggling?
Start with basic care fixes: Trim back dead or yellowing branches, improve drainage (figs hate soggy roots), and fertilize lightly with citrus-specific or organic fertilizer. If pests are the issue, use neem oil or insecticidal soap. For severe stress, consider root pruning (gently loosening roots) to encourage regrowth. Patience is key—figs recover slowly but steadily!
Wrapping up and next steps
Growing a thriving fig tree is all about patience, precision, and a little seasonal know-how—especially when it comes to dormant pruning! By mastering the right techniques, you’ll unlock healthier branches, better air circulation, and those sweet, sun-ripened figs you’ve been dreaming of. 🌱✨
Now that you’re armed with the secrets of when and how to prune, it’s time to roll up your sleeves and give your tree the TLC it deserves.
Start small, observe your tree’s response, and soon, you’ll be harvesting figs like a pro. Happy pruning—and here’s to your future fig feast!
👉 Next step: Mark your calendar for late winter or early spring, grab your tools, and get ready to transform your fig tree into a fruit-bearing powerhouse!