
Trees
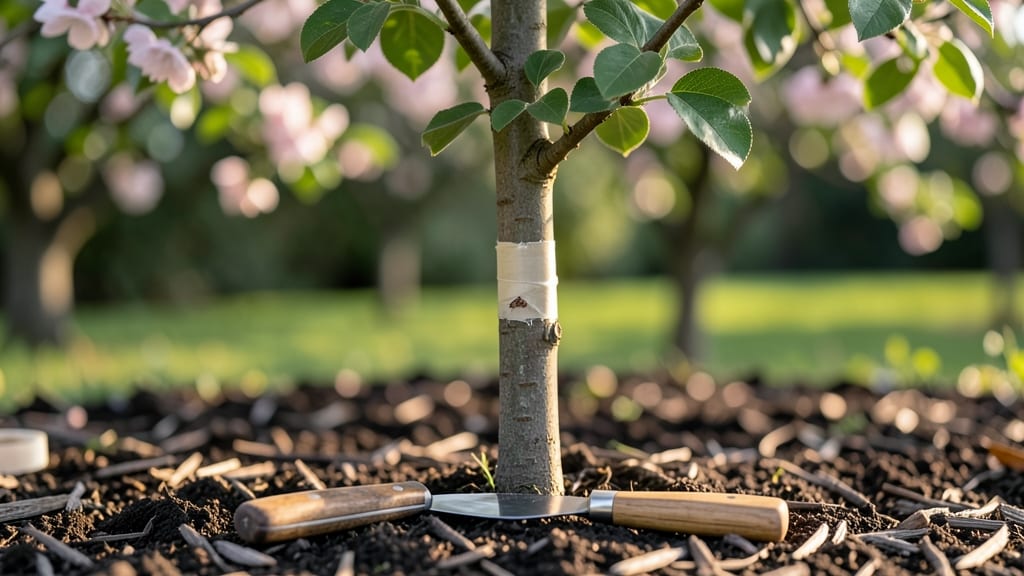
Grafting pear trees unlocks varieties you can't buy at nurseries—think heirloom Bartletts or hardy Asian pears—by fusing two trees into one stronger plant. 🌱 I’ve grafted over a dozen trees now, and the first time I saw a scion sprout from my own cuttings, I knew this was the secret to expanding my orchard without buying expensive stock.
The whip-and-tongue method is my go-to because it works even when the cambium layers don’t align perfectly, which happens more often than you’d think.
You’ll need sharp grafting tools—a clean knife, grafting tape, and pruning shears—plus a compatible rootstock and scion wood cut in late winter or early spring when trees are still dormant.
The key is making precise cuts: no jagged edges, and always match the cambium layers like puzzle pieces. Even if your first few attempts fail (and they probably will), you’ll learn what works by the time you’re ready to try again.
Within 6-8 weeks, you’ll see new growth at the graft union, a sign the trees have fused. By next spring, your grafted pear tree will be putting out leaves and branches from the scion, while the rootstock handles the heavy lifting of water and nutrient uptake.
The best part? You’re not just growing a tree—you’re creating a living legacy of flavors and varieties that might otherwise disappear.
This method works for backyard orchards, urban homesteads, or even container-grown pears. Whether you’re grafting to revive an old tree or build a new variety collection, the satisfaction of watching a graft take root is unmatched. Let’s get those knives sharp and those unions strong!
📚 In This Guide
- What you need
- Instructions
- Tips and common mistakes
- Wrapping up and next steps
What you need
- ● Scion wood: Healthy, dormant pear tree branches (about pencil-thick, 4–6 inches long) from the variety you want to graft. Quantity: 3–5 per graft attempt.
- ● Rootstock: A compatible, disease-free pear rootstock (e.g., Pyrus communis varieties like 'Old Home' or 'Bartlett'). Age: 1–3 years old, ½–1 inch in diameter.
- ● Grafting knife or pruning shears: Sharp, clean, and sterilized (use rubbing alcohol or a bleach solution).
- ● Grafting tape or rubber bands: To secure the graft union snugly (avoid plastic wrap—it traps moisture!).
- ○ Pruning sealant (optional but helpful): A tree wound dressing to prevent disease entry (e.g., Tanglefoot Tree Wound Pruning Seal).
- ● Grafting wax or clay: To seal the cut surfaces and retain moisture (e.g., Tanglefoot Tree Wound Pruning Seal or Duct tape as a last resort).
- ● Plastic bag or humidity dome: A small clear bag to create a mini greenhouse over the graft (remove once the union heals).
- ● Grafting clips: For extra stability if tape isn’t enough.
- ● Hormone rooting gel: To encourage faster root growth (apply sparingly to the rootstock cut).
- ● Labeling tags: To mark grafted trees with variety names and dates.
- ● Disinfectant spray: For sterilizing tools between grafts (e.g., 70% isopropyl alcohol).
Step-by-Step instructions for grafting pear trees
Here’s how to create strong, healthy unions that’ll have your pear tree thriving in no time.
🌱 Step 1: Prepare Your Scion and Rootstock
Start by selecting a scion—your chosen pear variety—with 3-5 buds and a diameter slightly smaller than your rootstock. I like to use 1-year-old wood for scions because it’s flexible enough to work with but still sturdy. Cut the scion at a 45-degree angle about 2 inches below the bud, leaving a smooth, clean surface. The rootstock should be 3-4 inches in diameter and freshly cut to expose fresh cambium layers.
Here’s the thing—timing matters. Do this when your rootstock is dormant but not frozen (late winter to early spring). If you’re grafting in summer, work during cool, overcast days to reduce stress on the tree. I always keep my tools sharpened and sanitized with rubbing alcohol to prevent disease from spreading.
🌿 Step 2: Make the Grafting Cuts
First, cut the rootstock at a 45-degree angle, about 2-3 inches above the ground. The cut should be 1-2 inches long and expose the cambium layer—that’s the green, living tissue just under the bark. This is where the union will form. Now, make a vertical slit about 1 inch deep down the center of the cut surface. This creates a pocket for the scion.
For the scion, make a matching 45-degree cut at the base, ensuring the cambium layers align perfectly when you insert it. If the scion is too thick, you can whittle it slightly to fit snugly. The goal is to have the cambium layers touch—this is what grows together to form the union. I tap the scion gently into place until it’s secure but not crushed.
💧 Step 3: Secure the Graft and Protect the Union
Wrap the graft tightly with rafting tape or plastic grafting film, starting just below the union and extending up the scion. The tape should be snug but not too tight—you don’t want to restrict growth. Seal the wrap with rafting wax or tree sealant to keep moisture in and pests out. This step is critical because a dry graft won’t heal properly.
Next, cover the entire graft with moist sphagnum moss and wrap it securely with more tape. This keeps the union hydrated while it heals. Place the grafted tree in a shady, sheltered spot for the first 4-6 weeks to reduce stress. You’ll know it’s working when you see new growth emerging from the scion in 4-8 weeks.
☀️ Step 4: Monitor and Maintain the Union
After 6-8 weeks, check the graft for signs of callusing—that’s the swollen, healed tissue around the union. If the scion starts growing, it’s a good sign, but keep an eye out for suckers (new shoots from the rootstock). Remove these immediately so they don’t drain energy from the graft. I use clean pruning shears to snip them off at the base.
Once the graft is fully healed and the scion is growing strongly, you can gradually expose it to sunlight over a few weeks. Water deeply once a week during dry spells, but avoid soaking the graft site. A healthy graft will have a thick, sturdy stem with no signs of disease or rot. If you see yellowing leaves or oozing sap, the graft may have failed—start over with fresh cuts.
Tips & tricks for perfect pear tree grafting
Real talk: Grafting isn't just about making cuts—it's about creating a partnership between two trees that'll last decades. Here's what I've learned to make those unions stronger and more reliable.
Scion Selection Matters: When choosing your scion, look for wood that's 1-year-old—it's flexible enough to work with but still sturdy. I always check for 3-5 buds and make sure the diameter matches the rootstock. The scion should be slightly smaller to fit snugly into the rootstock's pocket. Confession: I skipped this matching step for years and wondered why some grafts failed—turns out, perfect fit is everything.
Cambium Alignment is Non-Negotiable: In Step 2, when you're making those 45-degree cuts, focus on exposing the cambium layer—the green tissue just under the bark. This is where the magic happens. I use a sharp knife to make a clean cut, then gently tap the scion into place until the cambium layers touch completely. If you see any gaps, whittle the scion slightly—don't force it, but make sure it fits perfectly.
Moisture Protection is Critical: After securing your graft in Step 3, covering it with moist sphagnum moss isn't just helpful—it's essential. I've seen grafts fail because they dried out during those first critical 4-6 weeks. Keep that moss damp but not soggy, and make sure your tape seal is airtight. The goal is to create a mini greenhouse environment that keeps the union hydrated while it heals.
Patience Pays Off: Those 4-8 weeks until you see new growth can feel like forever, but rushing will ruin everything. Don't peek at your graft too often—each time you remove the wrap, you risk drying it out. I mark my calendar and check only when I know I'll have time to properly rewrap if needed. And remember, gradual sunlight exposure after 6-8 weeks is key—don't just toss your graft into full sun too soon.
Pro Tips for Grafting Pear Trees
- Real talk: Grafting isn't just about making cuts—it's about creating a partnership between two trees that'll last decades.
- Scion Selection Matters: When choosing your scion, look for wood that's 1-year-old—it's flexible enough to work with but still sturdy.
- Cambium Alignment is Non-Negotiable: In Step 2, when you're making those 45-degree cuts, focus on exposing the cambium layer—the green tissue just under the bark.
Frequently asked questions
Got questions about grafting pear trees? You’re not alone—this technique can feel tricky at first! Below, we’ve rounded up the most common queries to help you feel confident before you start. Whether you’re a beginner or just need a quick refresher, these answers will save you time and stress.
When is the best time to graft pear trees?
The ideal time to graft pear trees is during their dormant season, typically late winter to early spring (just before buds swell). For container-grown trees or warm climates, late fall can also work. Avoid grafting during extreme heat or frost—your tree’s sap flow needs to be steady for success!
Can I graft a pear tree onto a different rootstock?
Grafting pear scions onto rootstocks like Quince A (dwarfing) or Old Home x Farmingdale (standard size) is common. Just ensure the rootstock and scion are compatible—pears generally graft well together, but cross-family grafts (e.g., pear onto apple) may fail. Check local nurseries for certified rootstocks!
Why did my graft fail? What are the signs?
Failed grafts often show no callus formation, wilted or dead scions, or cracked unions. Other red flags: fungus at the graft site (gray mold) or no new growth after 4–6 weeks. If you see these, re-graft or check for poor compatibility or improper wound alignment. Patience is key—some grafts take longer to “take.”
Do I need special tools for grafting pear trees?
While basic tools (sharp knife, grafting tape, pruning shears) work, specialized tools like a grafting knife or clipper make the job easier. A grafting tube (for whip-and-tongue grafts) or rubber budding tape can also improve success rates. Sterilize tools with rubbing alcohol to prevent disease—clean cuts = happier unions!
How do I care for a grafted pear tree after the procedure?
Keep the grafted area moist but not soggy for the first 2–3 weeks, then reduce watering slightly. Protect the graft from direct sun with shade cloth if temperatures spike. Avoid fertilizing for 4–6 weeks—let the tree focus on healing. Prune any competing shoots near the graft to direct energy upward!
Wrapping up and next steps
Grafting pear trees is a rewarding skill that can revitalize aging trees, introduce new varieties, or even save a struggling orchard! With the right tools, timing, and technique, you’ll create a stronger, more productive tree.
Remember: patience and precision are key—don’t rush the process, and soon you’ll be harvesting juicy pears with confidence! 🌱✨
Next steps:
- Start with a healthy rootstock and practice on a few branches before tackling your main tree.
- Join a local gardening group or forum to share your progress and learn from others.
- Mark your calendar for next year’s grafting season—consistency is the secret to success!