
Pruning
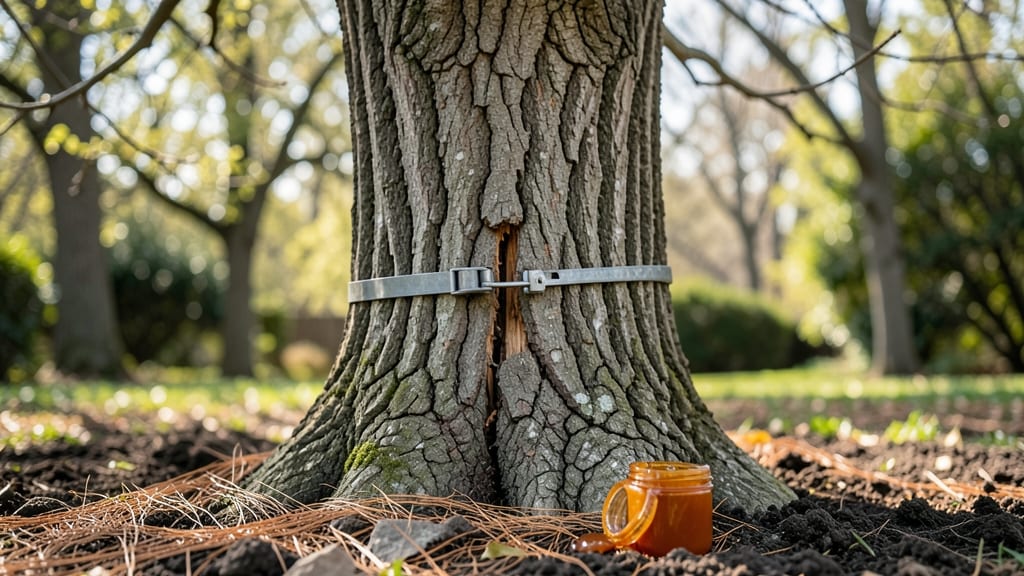
Fixing a split tree trunk isn’t just an eyesore—it’s a safety hazard that can turn a backyard into a liability. I’ve seen splits turn into full-on failures after storms, and the key to saving your tree lies in acting fast with the right repair techniques.
The good news? Most splits can be stabilized without cutting the tree down, if you catch them early and use the proper materials.
Here’s the thing—you don’t need to be an arborist to fix a split, but you do need the right tools: heavy-duty brackets, epoxy or hydraulic cement, and a sturdy ladder (or better yet, call in a pro for the hard parts).
The goal is to bridge the gap, reinforce the weak points, and give the tree time to heal naturally. I’ve repaired splits up to 3 inches wide this way, and with proper follow-up care, the tree often stays standing for years.
What you’ll end up with is a tree that’s structurally sound enough to survive another storm season. The bark will eventually grow over the repair, and the split will become just another scar story in your yard’s history.
The real win? You avoid the heartbreak of losing a mature tree—and the headache of dealing with a fallen trunk in your driveway.
Now, if the split is wider than 6 inches or the tree is already leaning dangerously, that’s when you call an arborist. But for most backyard cases? This method works. Let’s get that tree back in fighting shape.
📚 In This Guide
- What you need
- Instructions
- Tips and common mistakes
- Wrapping up and next steps
What you need
- ● Epoxy or tree repair kit (e.g., Tanglefoot Tree Wound Dressing or Tanglefoot Tree Seal) – 1-2 tubes (depending on split size).
- ● Wooden dowels or stakes – 2-4 pieces, ½–¾-inch diameter, slightly longer than the split depth.
- ● Hacksaw or handsaw – For trimming rough edges or dowels.
- ● Drill & drill bits – ⅜-inch bit for pilot holes (if needed).
- ● Screws or lag bolts – 4-6 pieces, ¼–⅜-inch diameter, rust-resistant.
- ● Clamps or zip ties – 2-4 to hold the split closed during drying.
- ● Sandpaper (medium-grit, 80-120) – To smooth rough edges before sealing.
- ● Safety gear – Gloves, goggles, and long sleeves (tree bark can be abrasive!).
- ● Tree wound pruning sealant (e.g., TreeGo) – For extra protection against pests/disease.
- ● Waterproof tape – To seal edges temporarily if epoxy isn’t available.
- ● Ladder or extension pole – For high splits (safety first! 🚧).
- ● Pruning shears – To trim dead/damaged branches post-repair.
Step-by-step instructions for stabilizing a split tree trunk
Here’s how to reinforce a weakened tree trunk safely and effectively.
Assess the Damage and Safety Risks
First, examine the split carefully. Look for deep cracks that expose the inner wood or create a gap wider than ½ inch. These are structural threats. Check if the split runs vertically or spirals around the trunk—spiral splits often indicate internal rot. If the tree leans dangerously or the split is widening visibly, call an arborist immediately.
Wear sturdy gloves and shoes while inspecting. Avoid touching the split directly—some trees have aggressive bark or sap that can irritate skin. Note the height of the split from the ground and its width at the widest point. This helps determine the right materials later. If the tree is near power lines, buildings, or high-traffic areas, prioritize professional help.
Gather the Right Supplies for Repair
You’ll need epoxy wood filler (a two-part resin designed for outdoor use), tree repair brackets (metal or composite, sized to match your trunk), lag screws (stainless steel, ½ to ¾ inch long), a drill with wood bits, a screwdriver or impact driver, and safety gear (gloves, goggles, dust mask). Avoid cheap fillers—they won’t hold up to weather or weight.
For larger splits, add tree straps or cables (rated for at least 500 pounds of tension) and turnbuckles to cinch the trunk together. Measure the trunk’s circumference at the split’s midpoint to ensure brackets fit snugly. If the tree is over 10 feet tall, consider renting a cherry picker or hiring help to reach safely.
Clean and Prepare the Split for Filling
Use a wire brush to remove loose bark, debris, and sap from the split’s edges. This ensures the epoxy bonds properly. Scrape until you see fresh wood—rough surfaces grip filler better. Wipe away dust with a damp cloth, then let the area dry completely. If the split is deep, pack it lightly with wood shavings or sawdust (from the same tree species if possible) to reduce filler volume.
Apply a thin layer of epoxy primer (if included with your kit) to the clean edges. This step isn’t always necessary but helps with adhesion in damp conditions. Work quickly—the primer dries fast. If the tree is wet, wait for a dry day to proceed. Moisture ruins epoxy bonds, and you’ll know it’s ready when the bark feels dry to the touch.
Apply Epoxy and Install Reinforcement Brackets
Mix the epoxy according to the package instructions—usually a 1:1 ratio by volume—and work fast. The resin sets in 15 to 30 minutes, so prepare brackets and screws beforehand. Inject the epoxy into the split using a caulk gun or putty knife, pressing it deep into cracks. Overfill slightly—the excess will harden and seal the surface.
While the epoxy is still wet, position the tree repair brackets on either side of the split. Drill pilot holes through the bracket and into the trunk, then secure with lag screws. Tighten them firmly but avoid over-torquing, which can crack the wood. For spiral splits, use two brackets—one above and one below the widest point—to distribute pressure evenly.
Monitor and Maintain the Repair Over Time
Check the repair weekly for the first month, then monthly afterward. Look for signs of failure: new cracks, loose brackets, or oozing sap near the fill. If the epoxy darkens or softens, it may be breaking down—reapply if needed. Avoid pruning the tree for at least 6 months to reduce stress on the repair.
Reinforce the area annually with a fresh coat of tree sealant (like linseed oil or a water-based sealer) to protect the epoxy from UV rays and moisture. If the tree is in a high-wind zone, consider adding additional cables for extra support. With proper care, a well-repaired split can last 5 to 10 years, giving the tree time to heal naturally.
Tips & tricks for stabilizing a split tree trunk
Here’s what I’ve learned from fixing splits on trees—these little details make all the difference between a temporary fix and a lasting repair.
Safety First: If the tree is near power lines or leans dangerously, don’t take shortcuts. I once saw a neighbor try to repair a split near power lines himself—it ended with a downed line and a $5,000 bill. When in doubt, call an arborist, especially if the split is wider than ½ inch or the tree shows signs of internal rot like oozing sap or dark streaks.
Material Selection Matters: Cheap epoxy or brackets won’t last. I learned this the hard way when a $20 filler crumbled after just six months. Invest in a high-quality two-part epoxy designed for outdoor use and brackets rated for at least 500 pounds of tension. For larger splits, add tree straps with turnbuckles—they distribute pressure better than brackets alone and can be adjusted as the tree grows.
Preparation is Key: Skipping the cleaning step is a recipe for failure. I’ve seen repairs fail because dust or sap weakened the epoxy bond. Scrape until you see fresh wood, and let the area dry completely—even slight moisture can ruin the adhesion. If your tree is wet, wait for a dry day. Pro tip: Use a damp cloth to wipe away dust, not water, to avoid re-wetting the wood.
Timing is Critical: Epoxy sets fast—usually within 15 to 30 minutes—so have everything ready before you start mixing. I once had to abandon a repair because I didn’t prep the brackets in advance, and the epoxy hardened before I could secure them. Measure your trunk’s circumference beforehand to ensure brackets fit snugly, and drill pilot holes to prevent wood from splitting when you insert the lag screws.
Pro Tips for Fixing A Split Tree Trunk
- Here’s what I’ve learned from fixing splits on trees—these little details make all the difference between a temporary fix and a lasting repair.
- Safety First: If the tree is near power lines or leans dangerously, don’t take shortcuts.
- Material Selection Matters: Cheap epoxy or brackets won’t last.
Frequently asked questions
Got questions about repairing a split tree trunk? You’re not alone—this task raises plenty of concerns! Below, we’ve tackled the most common queries to help you navigate the process with confidence. Whether you’re unsure about timing, materials, or long-term solutions, these answers will guide you toward a sturdy, safe fix.
When is the best time of year to fix a split tree trunk?
The ideal time is late winter or early spring when the tree is dormant but before new growth begins. This minimizes stress on the tree and allows the repair to heal naturally. Avoid fixing splits during extreme weather (freezing temps or scorching heat), as cold can make materials brittle and heat can accelerate drying.
Can I use regular wood glue or epoxy instead of tree-specific products?
While some wood glues or epoxies might work temporarily, they lack the flexibility and weather resistance needed for long-term tree repairs. Tree-specific products like Tanglefoot Tree Wound Dressing or EpoxyTree are designed to expand/shrink with the tree, resist moisture, and promote healing. For splits wider than 1 inch, combine glue with a structural repair system (like fiberglass tape or metal brackets) for added strength.
How do I protect the repair from rain or pests after fixing it?
Start by sealing the area with a waterproof tape or tree wound dressing to block moisture. For pests (like beetles or fungi), apply a borate-based treatment or copper-based fungicide to the damaged area before closing the split. Monitor the site for 6+ months—if sap oozes or cracks reappear, reapply sealant or reinforce with additional brackets.
What if the split is too large for traditional repairs? Are there alternatives?
For splits wider than 3–4 inches or deep cracks, traditional gluing may not suffice. Consider these alternatives:
- Cabling/Bracing: Install steel cables or rods to stabilize the trunk (ideal for large splits or weak unions).
- Tree Support Stakes: Use adjustable stakes to reduce movement and stress on the split.
- Professional Consultation: If the tree is a hazard or structurally compromised, hire an ISA-certified arborist to assess viability.
Wrapping up and next steps
Fixing a split tree trunk is a manageable task with the right tools, patience, and technique—you’ve got this! 🌳✨ Whether you opted for a cable-and-brace system, epoxy or resin bonding, or structural pruning, your efforts will help restore stability and extend your tree’s lifespan.
Remember, consistency is key: monitor the repair over time and address any new issues promptly.
Ready to take the next step? Assess your tree’s health seasonally—prune dead branches, check for pests, and keep an eye on the repair site. If the split seems to worsen or you’re unsure, don’t hesitate to consult a certified arborist for professional guidance.
Your tree (and your peace of mind) will thank you!