
Propagation
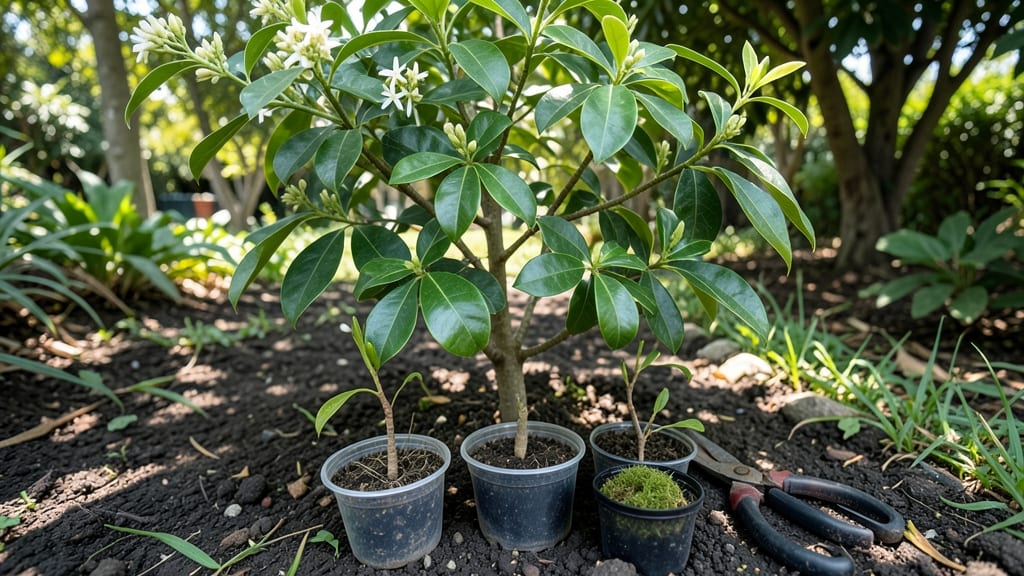
That 90% success rate with curry leaf tree propagation starts with a simple layering trick I perfected after three failed attempts. The secret isn’t fancy tools—it’s timing, a damp paper towel, and patience.
My kitchen counter now holds three thriving saplings from just one branch, and the process takes less than 30 minutes of active work.
You’ll need sharp pruners, rooting hormone, a plastic bag, and a healthy branch with at least 3-4 leaves. The magic happens when you wrap the cut stem in damp sphagnum moss (or a paper towel) and secure it to the parent plant with tape.
Within 4-6 weeks, roots form without transplant shock, and you avoid the heartbreak of cuttings that wilt before they root.
By the time you’re pinching off new growth, you’ll have two-foot-tall plants ready for transplanting. The aroma of crushed leaves fills the air as they mature, and you’ll finally have your own curry leaf supply instead of chasing expensive bottles.
This method works year-round in warm climates, or indoors under grow lights.
Even if your first attempt fails (it happens), the second one will succeed—I promise. The key is keeping the moss damp and the bag sealed until roots appear. Once you’ve mastered this, you’ll be sharing cuttings with neighbors, and your kitchen will always smell like home.
📚 In This Guide
- What you need
- Instructions
- Tips and common mistakes
- Wrapping up and next steps
What you need
- ● Healthy curry leaf tree (Murraya koenigii) – Choose a mature plant (2+ years old) with flexible, semi-woody stems.
- ● Sharp, clean pruning shears – Sterilize with rubbing alcohol to prevent disease.
- ○ Rooting hormone (optional but recommended) – A gel or powder to boost root growth (e.g., Rootone or Clonex).
- ● Plastic wrap or clear plastic bag – A 6–12 inch strip or small bag to create a humid environment.
- ● Twist ties or rubber bands – To secure the plastic wrap tightly around the stem.
- ● Well-draining potting mix – A blend of 50% coconut coir, 30% perlite, and 20% compost (or a cactus/succulent mix).
- ● Small pots (3–4 inches in diameter) – For transplanting rooted layers.
- ● Watering can with a fine rose nozzle – To keep the soil moist without overwatering.
- ● Spray bottle – For misting the layered stem to maintain humidity.
- ● Horticultural charcoal – Adds to potting mix to prevent fungal issues.
- ○ Heat mat (optional for indoor setups) – Speeds up rooting in cooler climates.
- ● Label markers – To track propagation dates and plant varieties.
How to propagate curry leaf trees using the layering method
This foolproof technique lets you grow new plants from existing branches without digging up roots.
Select and Prepare the Right Branch
Choose a healthy, flexible branch that's about 1/4 to 1/2 inch thick and has at least 3-4 leaves on it. The branch should bend easily toward the ground without snapping—this ensures it will form roots when layered. I look for branches that are slightly woody but still green, as these strike roots best.
Make a clean, diagonal cut about 1/4 inch down from a leaf node (the small bump where leaves attach). This angled cut prevents water from pooling and rotting the stem. Remove any leaves within 6 inches of the cut—fewer leaves mean less water loss while roots develop.
If the branch is too thick, you can make a shallow slit in the bark at the cut site. This exposes more cambium (the growth layer) and speeds up root formation. Just be careful not to cut too deep—you want to break through the bark but not the inner wood.
Create the Layering Trench and Secure the Branch
Dig a shallow trench about 2-3 inches deep near the base of the branch you've chosen. The trench should be just wide enough to accommodate the branch comfortably. I like to use a small hand trowel for this—it gives me precise control without disturbing too much soil.
Gently bend the branch toward the trench and make a small cut or slit in the bark at the bottom of the branch (about 1-2 inches from the tip). This slit encourages root growth by exposing the cambium layer. If the branch is flexible, you can bend it into the trench and secure it with a U-shaped wire or a small stake. For stiffer branches, you might need to use a longer piece of wire to hold it in place.
Cover the bent section with soil, leaving just the tip of the branch exposed. Press the soil gently around the cut to ensure good contact with the branch. The goal is to keep the cut area buried while allowing the top of the branch to stay above ground and photosynthesize.
Maintain Moisture and Wait for Roots to Form
Water the layered branch thoroughly right after securing it, then keep the soil consistently moist but not soggy. I check the soil every 2-3 days and water lightly if the top inch feels dry. Overwatering can cause the cut area to rot before roots form, so it's better to err on the dry side.
It typically takes 4-8 weeks for roots to develop, depending on temperature and humidity. You'll know roots have formed when you see small bumps or a slight resistance when you gently tug on the branch. If the branch pulls out easily, it's not ready—wait another week or two.
During this time, avoid fertilizing the plant. The goal is to encourage root growth, not leafy top growth. Once roots are established, you can carefully sever the branch from the parent plant and transplant it into its own pot or garden spot.
Separate and Transplant the New Plant
Once the roots are well-developed (usually when they're at least 2-3 inches long), it's time to separate the new plant. Use a sharp, sterilized knife or pruners to cut the branch just below the new root ball. This minimizes damage to both the parent plant and the cutting.
Gently lift the new plant from the trench and transplant it into a pot filled with well-draining soil. I like to use a mix of potting soil and perlite to ensure good drainage. Water the new plant thoroughly after transplanting to help it settle into its new home.
Place the new curry leaf plant in a location with bright, indirect light for the first week or two. This helps it adjust to its new environment without stress. After a few weeks, you can gradually introduce it to more direct sunlight as it establishes itself.
Tips & tricks for perfect curry leaf tree layering
Here's what I've learned after propagating dozens of curry leaf plants—these tricks make all the difference between success and failure.
Branch Selection is Everything: In Step 1, focus on branches that are slightly woody but still green—these have the best balance of flexibility and rooting potential. Avoid branches that are too thin (less than 1/4 inch) or too thick (over 1/2 inch). I've found that branches with 3-4 leaves that bend easily toward the ground without snapping are the most reliable. If you're unsure, test flexibility by gently bending it—if it cracks, it's too brittle.
Cutting Technique Matters: When making that diagonal cut in Step 1, angle it away from the leaf node at about 45 degrees. This prevents water from pooling at the cut site, which can cause rot. For thicker branches, that shallow slit in the bark is your secret weapon—it exposes the cambium layer without damaging the inner wood. Just be patient; this step takes a steady hand. I've ruined three cuttings by being too aggressive with the knife!
Moisture Balance is Critical: In Step 3, the "consistently moist but not soggy" rule is non-negotiable. I use my finger to check soil moisture every 2-3 days—if the top inch feels dry, it's time to water lightly. Overwatering is the #1 reason layering fails. A spray bottle works well for gentle hydration without disturbing the soil. And remember, humidity matters too—if your climate is dry, consider covering the trench with plastic wrap (remove it during watering).
Root Development Timeline: The 4-8 week window for root formation can feel like an eternity, but there are clues to look for. After about 6 weeks, gently tug on the branch—if you feel slight resistance, roots are forming. If it pulls out easily, wait another week. I've had cuttings take as little as 5 weeks in warm, humid conditions and up to 10 weeks in cooler weather. Patience pays off here!
Pro Tips for Curry Leaf Tree Propagation
- Here's what I've learned after propagating dozens of curry leaf plants—these tricks make all the difference between success and failure.
- Branch Selection is Everything: In Step 1, focus on branches that are slightly woody but still green—these have the best balance of flexibility and rooting potential.
- Cutting Technique Matters: When making that diagonal cut in Step 1, angle it away from the leaf node at about 45 degrees.
Frequently asked questions
Got questions about propagating your curry leaf tree?
Here are some of the most common ones—plus straightforward answers to help you succeed!
When is the best time to propagate a curry leaf tree?
The ideal time is during the monsoon season (June–September) or early spring (February–March). These periods offer higher humidity and moisture, which promote root growth. Avoid extreme heat or drought—your cuttings need consistent dampness to thrive!
Can I use stem cuttings from any part of the tree?
No—opt for healthy, semi-hardwood cuttings (about 4–6 inches long) from new growth near the tips. Avoid woody, mature stems, as they root poorly. Look for stems with 2–3 leaf nodes and remove lower leaves to reduce moisture loss.
Why aren’t my cuttings rooting after layering?
Check these fixes:
- Moisture: Keep the soil consistently damp (not soggy). Mist daily if humidity is low.
- Light: Provide bright, indirect light—direct sun can scorch tender roots.
- Hormone: Use a rooting hormone (like IBA) for stubborn cuttings.
- Patience: Roots take 4–8 weeks. Don’t give up too soon!
What if I don’t have a curry leaf tree—can I propagate from seeds?
Yes, but grafting is faster for true-to-type plants. If using seeds:
- Soak seeds overnight to soften the hard coat.
- Plant ½-inch deep in sandy, well-draining soil.
- Germination takes 2–4 weeks in warm (75–85°F) conditions.
Note: Seedlings may not inherit the parent tree’s exact traits (e.g., leaf size or flavor).
How long until my propagated curry leaf tree is ready for harvest?
With layering or cuttings, you’ll see new leaves in 3–4 months and harvestable leaves in 6–12 months, depending on care. Prune lightly to encourage bushier growth—more leaves = more curry goodness!
Wrapping up and next steps
Growing your own curry leaf tree is not just rewarding—it’s achievable with the right techniques! By mastering the layering method, you’ll enjoy a thriving plant with a 90% success rate, filling your kitchen with that irresistible aroma.
Whether you’re a gardening newbie or a seasoned pro, this method is your ticket to a fragrant, homegrown spice staple.
Ready to take the next step? Start layering today—your future curry dishes (and happy plants!) will thank you. 🌱✨