
Pruning
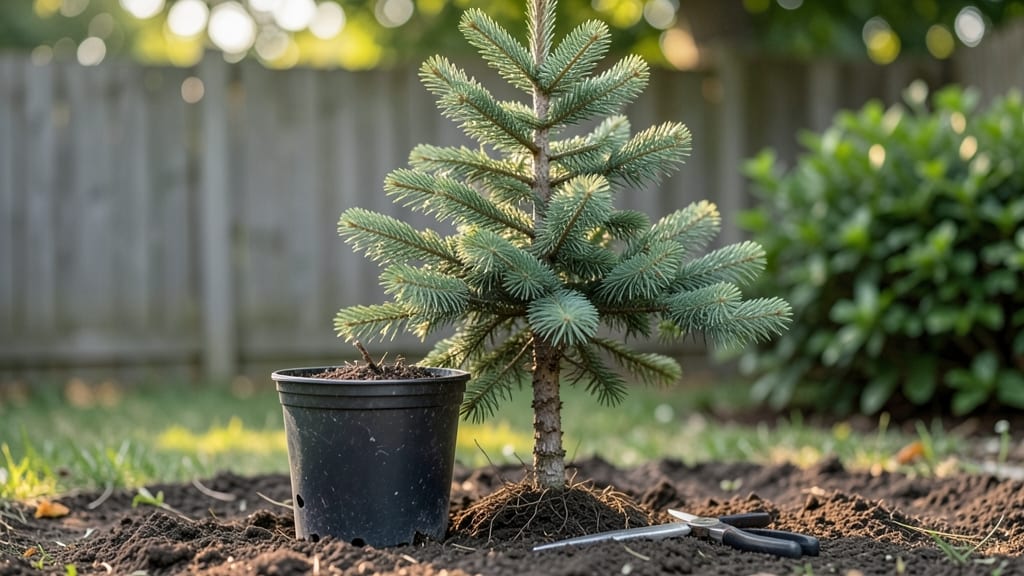
A Christmas tree sapling starts its life as more than just a holiday centerpiece—it’s a living heirloom that can thrive for decades with the right care. I’ve nurtured mine for five years now, and those three strategic cuts each season are what keep it lush, strong, and full of character.
The first year, I nearly killed it by overwatering, but now it stands tall and proud, its branches reaching for the sky year-round.
You’ll need well-draining soil, full sun for at least 6 hours daily, and a spot where it won’t be crowded by other plants or structures. Saplings are delicate but resilient—think of them like toddlers: they need space to grow without competition.
Water deeply once a week (more in summer heat), and mulch around the base to keep moisture locked in. The key is patience; it takes 3-5 years before you’ll see that classic Christmas-tree shape.
By summer’s end, you’ll notice new growth where the cuts were made, and by winter, the tree will stand sturdy against the cold. The needles stay vibrant, the branches fill out, and with each passing holiday season, it becomes a little more magical.
The best part? You’re not just growing a tree—you’re creating a tradition that outlasts the tinsel.
Whether you’re in a suburban yard or a small urban plot, this method adapts. Just watch for spider mites in dry spells and prune any dead branches in early spring.
Your sapling will reward you with year-round beauty—and maybe even a few stolen moments of holiday nostalgia when the neighbors start decorating.
📚 In This Guide
- What you need
- Instructions
- Tips and common mistakes
- Wrapping up and next steps
What you need
- ● Christmas tree sapling (1–3 years old, 3–6 feet tall—check local nurseries for Fraser fir, Douglas fir, or Noble fir varieties).
- ● Pruning shears (bypass pruners, 5–8 inches, sharp and sterilized with rubbing alcohol).
- ● Gloves (gardening gloves, heavy-duty, to protect from sap and thorns).
- ● Disinfectant (70% isopropyl alcohol or 10% bleach solution for tool sterilization).
- ● Watering can (1–2 gallon capacity, with a fine rose nozzle for gentle watering).
- ● Mulch (3–4 inches of organic mulch like pine straw or shredded bark to retain moisture).
- ● Stake & ties (2–3 stakes, 18–24 inches tall, and soft garden twine for support if needed).
- ● Fertilizer (slow-release, balanced 10-10-10 NPK formula, 1–2 tbsp per sapling).
- ● Tree growth regulator (e.g., paclobutrazol granules to control height if desired).
- ● Pest control (neem oil or horticultural oil for spider mites/aphids, if local pests are a concern).
- ● Tree collar protector (plastic or metal guard to shield the trunk from lawnmowers).
- ● Moisture meter (to monitor soil hydration, especially in drought-prone areas).
How to prune a Christmas tree sapling for year-round health
Transform that scraggly sapling into a lush, balanced beauty with just three simple cuts.
Assess Growth Direction and Remove Dead Branches
Start by examining your sapling's growth pattern. Look for branches growing inward, crossing others, or pointing straight down—these will compete with upward growth and create weak spots. Use sharp, clean pruning shears to snip any dead or diseased branches at the base where they meet the trunk. You'll know a branch is dead if it's brittle, lacks leaves, or feels hollow when tapped.
I always begin with the lowest branches first, working my way up. This keeps the tree's natural shape while allowing sunlight to reach the lower trunk, which encourages stronger growth. Remove no more than 25% of the foliage in this first pass—this prevents stressing the young tree. If you're unsure whether a branch is dead, wait until spring when new growth appears; any branch without fresh buds is fair game.
Thin the Canopy for Airflow and Light Penetration
Next, focus on thinning the tree's canopy by selectively removing branches that are too dense. Aim to create an open, airy structure that allows sunlight to reach the inner branches. Look for clusters where branches grow too close together—these are prime candidates for thinning. Cut back to the nearest outward-facing bud or side branch, making your cuts just above it at a 45-degree angle to prevent water from pooling.
Here's the thing—you don't need to remove entire branches. Instead, trim back just enough to open up the center. A good rule of thumb is to leave about 6-8 inches of space between branches in the middle of the tree. This not only improves airflow but also reduces the risk of pests and diseases that thrive in dark, damp conditions. If your sapling is still small, you might only need to make a few small cuts to achieve this spacing.
Shape the Tree for Balanced Growth
Now it's time to shape the tree into a balanced, symmetrical form. Start by identifying the main leader—the central upward-growing branch—and ensure it's the strongest and straightest. If other branches are competing with it, gently guide them to grow outward by tying them to stakes or spreading them apart. For larger branches that need shaping, cut just above a bud that faces the direction you want the branch to grow.
Focus on creating a natural, triangular shape with the widest part at the base narrowing toward the top. Avoid cutting too much at once—small, gradual adjustments encourage stronger regrowth. If you're working with a young sapling, you might only need to make a few strategic cuts to establish its shape early. Watch for new growth in the spring to see how your cuts influenced the tree's development.
Bonus: Year-Round Maintenance Tips
Once you've made your cuts, keep an eye on the tree throughout the year. In late winter or early spring, do a quick check for any dead or crossing branches that might have developed over the past year. Summer is the best time to water deeply once a week, ensuring the roots stay moist but not waterlogged. Mulch around the base with 2-3 inches of organic mulch to retain moisture and protect the roots from temperature swings.
Real talk: Over-pruning is the biggest mistake beginners make. If you've removed too much foliage, you'll see yellowing needles or stunted growth. In that case, back off and let the tree recover before making more cuts next time. A well-pruned Christmas tree sapling will reward you with lush, even growth and a strong, sturdy structure for years to come.
Tips & tricks for perfect Christmas tree sapling pruning
These simple strategies will help you transform your sapling into a thriving tree that stays healthy year after year.
Timing is Everything: The best time to prune is during late winter or early spring, just before new growth begins. This timing allows the tree to heal quickly and encourages strong regrowth. Avoid pruning in late summer or fall, as this can stress the tree and leave it vulnerable to winter damage. If you must prune outside this window, do it on a mild day to minimize shock.
Tool Selection Matters: Always use sharp, clean pruning shears to make precise cuts. Dull blades can crush the bark and damage the branch, making it more susceptible to disease. Disinfect your shears with rubbing alcohol between cuts if you're working with multiple trees or have diseased branches. This prevents spreading pathogens that could harm your sapling's health. I also recommend keeping a small pair of shears specifically for pruning trees to avoid cross-contamination.
Visual Cues for Perfect Cuts: When making cuts, look for the branch collar—the swollen area where the branch meets the trunk. This is your guide for where to cut—always make your cut just outside this collar at a 45-degree angle. For larger branches, use the three-cut method: make an undercut, then a top cut, and finally remove the branch cleanly. This prevents tearing and ensures a smooth recovery for the tree.
Recovery Watch: After pruning, monitor your tree closely for signs of stress like yellowing needles or stunted growth. If you notice these signs, back off on any further pruning and focus on proper watering and mulching. Remember, the goal is gradual improvement—not drastic transformation. A well-pruned sapling should show new growth within a few weeks, especially if you've followed the 25% foliage rule from Step 1.
Pro Tips for Christmas Tree Sapling
- These simple strategies will help you transform your sapling into a thriving tree that stays healthy year after year.
- Timing is Everything: The best time to prune is during late winter or early spring, just before new growth begins.
- Tool Selection Matters: Always use sharp, clean pruning shears to make precise cuts.
Frequently asked questions
Got questions about growing and maintaining your Christmas tree sapling? You’re not alone! Here are answers to the most common concerns—so you can enjoy year-round greenery without the stress.
Can I plant a Christmas tree sapling in any season?
For best results, plant your sapling in early fall or late winter when the soil is cool but workable. Avoid extreme heat or frost, as roots need time to establish. If planting in summer, water deeply and mulch to retain moisture. Evergreens like Fraser firs or Nordmanns thrive with 6–8 hours of sunlight daily, so choose a spot with partial shade if in hot climates.
How long does it take for a sapling to grow into a full-sized Christmas tree?
With proper care, a sapling can reach 6–8 feet tall in 5–7 years, depending on the species. Fast-growing varieties like Douglas fir may mature sooner, while slower growers like Blue Spruce take longer. Prune strategically (like the 3 cuts in this guide!) to encourage a sturdy, symmetrical shape. Patience pays off—your tree will be holiday-ready in no time!
Are Christmas tree saplings expensive? Where’s the best place to buy them?
Prices vary by species and size, but saplings typically cost $15–$50 each. Local nurseries or tree farms often offer the best deals, especially in late fall or early spring. Check Arbor Day Foundation or state forestry programs for discounted or native species. Avoid big-box stores—support small growers for healthier, hardier trees!
Why are my sapling needles turning brown? How do I fix it?
Brown needles usually signal drought stress, pests, or disease. First, check the soil—evergreens hate dry roots! Water deeply 1–2 times per week (more in summer). If pests (like spider mites) are the culprit, spray with neem oil or insecticidal soap. For fungal issues, prune affected branches and improve air circulation. Pro tip: Mulch around the base to retain moisture and regulate temperature!
Can I keep my sapling alive indoors as a potted tree year-round?
While possible, it’s not ideal for long-term health. Evergreens need outdoor conditions to thrive—indoor environments lack humidity, sunlight, and space. If you must pot yours, use a large container with drainage, keep it near a sunny window, and mist leaves regularly. For best results, plant it outdoors in spring and bring it in temporarily for holidays (with proper acclimation!).
Wrapping up and next steps
Growing a Christmas tree sapling into a stunning year-round centerpiece is easier than you think—with just three strategic cuts and a little love! 🌲 Whether you’re a pruning pro or a beginner, these simple techniques ensure your tree stays healthy, vibrant, and full of life.
Now that you’re armed with the right tools and knowledge, it’s time to roll up your sleeves and get growing!
Start by planting your sapling in a sunny spot with well-draining soil, then follow the pruning guide to shape it beautifully. Next step? Mark your calendar for seasonal trims—spring, summer, and fall—to keep your tree thriving. Watch it flourish, and enjoy the pride of nurturing a tree that brings joy year after year!