
Blooming
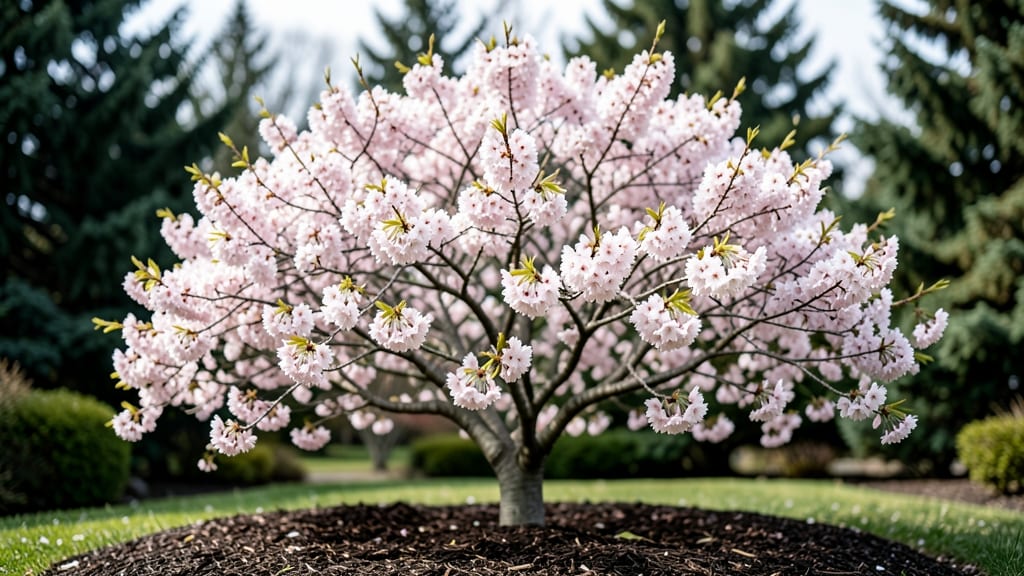
Spring transforms your yard when a cherry blossom tree bursts into bloom—pink petals soft as cotton candy drifting over your garden. 🌸 I’ve watched mine go from bare branches to a canopy of color in just three weeks, and the secret lies in spring prep that starts before buds even swell.
The first step is pruning: cut back any dead wood now, while the tree’s still dormant, and shape it to encourage strong branches for next year’s blooms. Fertilize lightly in early spring with a balanced 10-10-10 mix—too much too soon stresses the tree.
Water deeply once a week, keeping the soil moist but never soggy, and watch for pink buds to form by late March or April.
By May, you’ll have that dreamy pink cloud you imagined, with fragrance heavy enough to fill your whole neighborhood. The trade-off? Blossoms mean energy goes into flowers first—hold off on heavy pruning until after they fade.
Mulch around the base to retain moisture and deter weeds, and keep an eye out for aphids or spider mites hiding on new growth.
This routine works for standard Yoshino cherries or weeping varieties alike, though pruning times shift slightly by zone. Whether you’re in Zone 5 or 8, the key is timing: act too early, and you risk frost damage; wait too long, and you miss the window for strong new growth.
Let’s get your tree ready for its springtime debut.
📚 In This Guide
- What you need
- Instructions
- Tips and common mistakes
- Wrapping up and next steps
What you need
- ● Cherry Blossom Tree (Prunus serrulata): 1-3 trees (for a small garden)
- ● 3-5+ trees (for a full canopy effect)
- ● Varieties: ‘Kwanzan’ (pink), ‘Somei-Yoshino’ (white-pink), or ‘Yoshino’ (classic pink)
- ● Planting Site Requirements: Full sun (6+ hours/day)
- ● Well-draining soil (amend with compost if needed)
- ● Space: 20–30 feet wide (mature size) and 20–30 feet tall
- ● Tools: Shovel or digging spade
- ● Garden gloves
- ● Wheelbarrow (for soil/compost)
- ● Pruning shears (for shaping)
- ● Measuring tape (to mark spacing)
- ○ Soil Amendments (Optional but Helpful): 5–10 lbs of organic compost or aged manure
- ● 1–2 lbs of slow-release fertilizer (balanced 10-10-10)
- ● Mulch: 2–3 inches of wood chips or bark (to retain moisture)
- ● Watering Supplies: Hose with adjustable nozzle
- ○ Drip irrigation kit (optional for deep roots)
- ● Pest Control (Preventative): Neem oil spray (for aphids or borers)
- ● Sticky traps (for early pest detection)
- ○ Decorative Touches (Optional): Lanterns or fairy lights (for evening ambiance)
- ● Garden bench or seating area (to enjoy the view!)
Step-by-Step guide to planting a cherry blossom tree in spring
Spring’s the perfect time to plant your cherry blossom—here’s how to set it up for years of pink blooms.
🌱 Step 1: Choose the Right Spot and Prepare the Soil
Pick a location with full sun exposure—at least 6-8 hours daily—since cherry blossoms need plenty of light to produce vibrant flowers. Avoid low spots where cold air settles, as blossoms can get damaged by late frosts. Test your soil’s drainage by digging a hole and filling it with water; if it doesn’t drain within 30 minutes, amend with 2-3 inches of compost or sand to improve aeration.
Cherry blossoms thrive in slightly acidic to neutral soil (pH 6.0-7.0). If your soil is heavy clay, mix in 1 part peat moss to 3 parts native soil to loosen it. I like to spread 2-3 inches of mulch around the planting area (but not touching the trunk) to retain moisture and regulate soil temperature.
☀️ Step 2: Plant at the Correct Depth and Stake for Support
Dig a hole twice as wide as the root ball but no deeper—planting too low can suffocate roots. Gently remove the tree from its container and loosen any circling roots with your fingers. Place it in the hole so the top of the root ball sits level with the surrounding soil—burying the graft union (usually a visible bump near the base) will stunt growth.
Fill the hole halfway with soil, then water deeply to settle it. Add a 5-foot stake placed 3 inches from the trunk at a 45-degree angle, securing it with 2-3 soft ties (never wire—it can girdle the bark). Backfill the rest of the hole, tamping soil lightly to eliminate air pockets. Water again until the soil is evenly moist to a depth of 12 inches.
💧 Step 3: Water and Mulch for Strong Root Establishment
Water your cherry blossom deeply 2-3 times per week for the first month, ensuring moisture reaches 12 inches down. You’ll know it’s enough when water drains freely from the bottom of the hole. After that, water once a week unless rainfall provides 1 inch or more. Overwatering in spring can lead to root rot, so always check the soil—it should feel damp but not soggy two inches below the surface.
Spread 2-3 inches of mulch (like shredded bark or wood chips) in a 3-inch-wide ring around the base, keeping it 6 inches away from the trunk. Mulch helps retain moisture and prevents weeds, but too much piled against the tree can trap moisture and cause rot. Replenish mulch annually as it breaks down.
✂️ Step 4: Prune for Shape and Health in Late Spring
Wait until after flowering (typically 4-6 weeks post-bloom) to prune, as spring blooms form on last year’s wood. Remove any dead, diseased, or crossing branches first—these compete for energy and can spread disease. Cut just outside the branch collar (the swollen area where the branch meets the trunk) to promote fast healing.
Shape the tree by thinning out overcrowded branches to improve airflow, which reduces fungal issues. Aim for an open vase shape to let light reach inner branches. Avoid heavy pruning—never remove more than 25% of the canopy in one season, or you’ll stress the tree and limit next year’s blooms.
Tips & tricks for planting a cherry blossom tree in spring
Ready to turn your garden into a dreamy pink paradise? These simple tricks will help your cherry blossom thrive from day one.
Sunlight Strategy: The 6-8 hours of full sun mentioned in Step 1 is non-negotiable for those showstopping blooms. If your yard has partial shade, plant near a south-facing wall or fence to maximize sunlight exposure. I've seen blossoms struggle in spots with less than 5 hours of direct sun—don't make that mistake! Remember, these trees need light to power their spectacular spring display.
Root Ball Rescue: When loosening circling roots in Step 2, take your time—don't just pull them apart. Gently tease them with your fingers to prevent damage. I've learned this the hard way after seeing roots tear when forced apart. The goal is to encourage outward root growth, not create wounds that invite disease. Think of it like untangling headphones—patience pays off.
Watering Wisdom: Those first 30 minutes of drainage testing in Step 1 are crucial. If water pools after 30 minutes, you'll need to amend the soil immediately—don't wait until after planting. For the first month's watering schedule, I recommend using a moisture meter to verify the 12-inch depth. Many gardeners overwater without realizing it, thinking more is better. The soil should feel like a damp sponge, not a swamp.
Pruning Pro Tip: The 4-6 week window after flowering in Step 4 gives you flexibility, but don't wait too long. I've seen gardeners miss the window and accidentally prune next year's flower buds. Look for fresh green growth on branches—this indicates you've safely passed the bloom-forming period. And remember, those 2-3 soft ties for staking? Use fabric strips or old t-shirts—they're gentler than wire and won't scar the bark as the tree grows.
Pro Tips for Cherry Blossom Tree In Spring
- Ready to turn your garden into a dreamy pink paradise?
- Sunlight Strategy: The 6-8 hours of full sun mentioned in Step 1 is non-negotiable for those showstopping blooms.
- Root Ball Rescue: When loosening circling roots in Step 2, take your time—don't just pull them apart.
Frequently asked questions
Got questions about creating your own cherry blossom paradise? Here are some of the most common ones—and their answers!
When is the best time to plant a cherry blossom tree in spring?
The ideal window is late March to early May, after the last frost but before the tree buds open. This gives roots time to establish before summer heat. Pro tip: If you’re in a colder zone, wait until May to avoid frost damage.
How much space does a cherry blossom tree need to thrive?
Most varieties require 20–30 feet of space for full growth, with roots spreading even wider. Dwarf cultivars (like 'Okame') can fit smaller yards (10–15 feet). Always check the specific variety’s mature size before planting!
Do cherry blossom trees need special care during spring rains?
While they love moisture, overwatering can drown roots. Ensure the soil drains well—amend heavy clay with compost. If buds swell but don’t bloom, it might signal late frost or pests (like aphids). Inspect leaves regularly!
Can I grow a cherry blossom tree in a pot instead of the ground?
Yes! Use a large container (at least 20 gallons) with drainage holes and well-draining soil. Dwarf varieties adapt best, but repot every 2–3 years. Warning: Potted trees may bloom less dramatically than in-ground plants.
Why aren’t my cherry blossoms blooming this spring?
Common culprits include:
- Age: Young trees (under 3–5 years) may not bloom yet.
- Frost: Late frosts can damage buds—choose early-blooming varieties if frost is a risk.
- Nutrition: Lack of phosphorus (check soil test) can stunt flowers.
- Stress: Over-pruning or drought weakens blooms.
Wrapping up and next steps
Watching a cherry blossom tree burst into life in spring is like inviting a pink cloud into your garden—magical, fleeting, and utterly worth the effort! 🌸 Whether you’re planting one from scratch or simply admiring the beauty of nature’s seasonal masterpiece, these trees bring joy, color, and a touch of serenity to any space.
Now that you’re equipped with the right tools, tips, and answers, it’s time to roll up your sleeves—or at least your gardening gloves—and make that dreamy canopy a reality.
Ready to take the next step? Start by sketching your tree’s future home (or browsing nurseries for the perfect sapling!), then share your blossom goals with fellow gardeners for inspiration. After all, spring’s fleeting—so why not make the most of it? 🌱✨