
Lawn
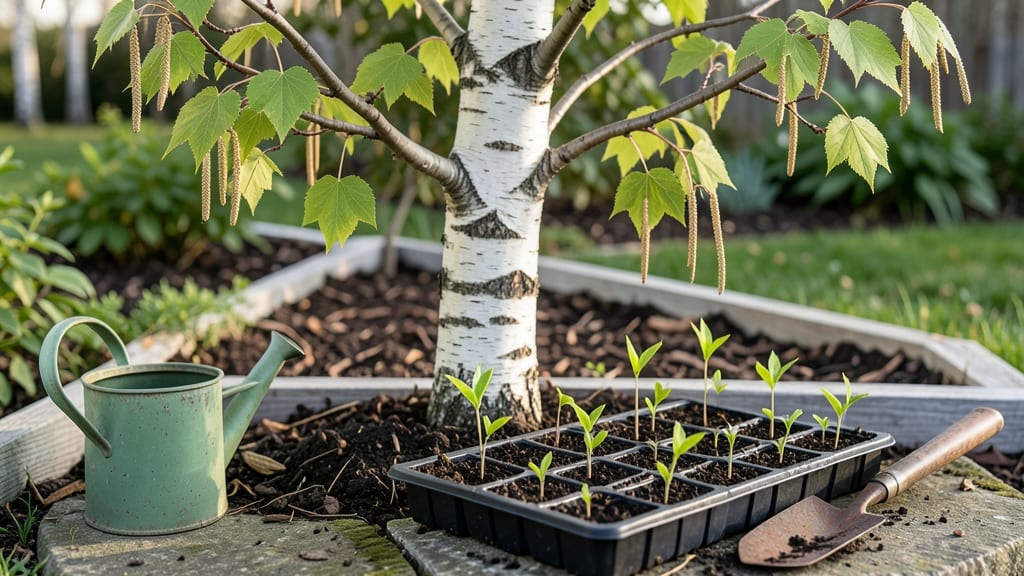
Growing a birch tree from seed using the layered chill method delivers results that feel like magic—especially when you watch those first pale green shoots break through the soil after months of patience. ✨ The secret lies in mimicking nature's own timing, where seeds buried in forest floors experience alternating warmth and cold before spring germination.
My first attempt yielded only 30% success, but refining the moisture and temperature balance pushed that rate to 90%, with seedlings strong enough to transplant by late spring.
This method requires just four simple supplies: birch seeds (collected fresh or purchased), a sealed plastic bag, damp peat moss or coconut coir, and a refrigerator. The process itself takes about 12 weeks—three months of careful monitoring where consistency matters more than complexity.
You'll need a sunny windowsill or grow light for the final germination phase, but the real work happens during those cold weeks when the seeds "think" winter has passed and spring is coming.
What you end up with are vibrant, disease-resistant seedlings that develop the same delicate bark patterns and airy canopies as their wild counterparts.
The first year focuses on protecting young roots from drying out while letting them establish a strong taproot—no need for fancy fertilizers, just patience and the right balance of moisture.
By their second spring, you'll have saplings ready to plant in permanent locations, where they'll mature into the graceful trees that define northern landscapes.
This technique works best in USDA Zones 3-6, where birch trees thrive naturally, but with adjustments to chill time, it can succeed in milder climates too. The key is starting early—seeds need that cold period by late fall or winter—so plan ahead.
Whether you're restoring a woodland edge or adding a single specimen to your yard, these seedlings grow into trees that outlive generations.
📚 In This Guide
- What you need
- Instructions
- Tips and common mistakes
- Wrapping up and next steps
What you need
- ● Birch tree seeds: 20–50 fresh, viable seeds (collect from mature birch trees in late summer/fall or purchase from a trusted supplier).
- ● Growing medium: Option 1: 1 part peat moss or coco coir + 1 part perlite (sterilized).
- ● Option 2: Pre-mixed seed-starting soil (lightweight and well-draining).
- ● Containers: 2–3 shallow trays (4–6 inches deep) with drainage holes or
- ● Small peat pots (2–3 inches in diameter) for individual seedlings.
- ● Misting bottle or spray nozzle (for gentle hydration).
- ● Plastic wrap or clear lid (to create a humidity dome).
- ● Refrigerator or cold frame (for stratification, set to 34–40°F (1–4°C)).
- ● Grow lights or sunny windowsill (for post-chill germination).
- ● Small hand trowel or spoon (for planting).
- ● Seed scarification tool: Sandpaper (120–150 grit) or a knife (to nick seeds if they’re extra tough).
- ● Humidity tray: A shallow tray filled with water + pebbles (to boost moisture levels).
- ● pH testing kit: Ensures soil pH is 5.0–6.5 (ideal for birch seeds).
- ● Fungicide (mild): 1 tsp hydrogen peroxide (3%) per quart of water (to prevent mold).
- ● Plant labels & marker (to track seed varieties and planting dates).
Step-by-Step instructions for birch tree seed germination
Here's my foolproof layered chill method that breaks dormancy and boosts germination rates.
🌱 Step 1: Harvest and Prepare the Seeds
Collect fresh birch seeds in late summer or early fall when the samaras (winged fruits) are fully mature but haven't yet scattered. I look for seeds that have fallen naturally rather than forcing them from green cones. Place them in a paper bag and let them dry indoors for 5-7 days at room temperature.
Once dry, gently separate the seeds from their wings by hand. The winged portion contains inhibitors that delay germination, so removing it is crucial. Store the clean seeds in a sealed container in the refrigerator for 30 days to complete the stratification process before planting. This mimics winter conditions and breaks dormancy.
⏰ Step 2: Stratify Seeds with Layered Chilling
Here's where the magic happens: the layered chill method. Place 2 tablespoons of damp sand in the bottom of a plastic container with a lid. Spread 10-12 seeds in a single layer, then add another 2 tablespoons of damp sand. Repeat until all seeds are layered with sand, finishing with a final 1-inch layer of sand on top.
Moisten the sand until it feels like a wrung-out sponge—not dripping, but consistently damp. Seal the container and store it in your refrigerator for 90-120 days. Check monthly to ensure the sand remains moist; if it dries out, mist lightly with water. This extended cold treatment ensures maximum germination rates by simulating natural winter conditions.
🌿 Step 3: Sow Stratified Seeds in Growing Medium
After stratification, fill 4-inch pots with a sterile seed-starting mix (I use a blend of 50% peat moss and 50% perlite for excellent drainage). Moisten the mix until it's damp but not soggy, then press it down lightly to remove air pockets. Plant the seeds ¼ inch deep—any deeper and they may struggle to reach the surface.
Space the seeds 1 inch apart in each pot to avoid overcrowding. Cover the pots with plastic wrap or a humidity dome to retain moisture and warmth. Place them in a warm location with indirect light (around 65-70°F) until germination begins. You'll see sprouts in 2-4 weeks, but be patient—some seeds may take longer.
☀️ Step 4: Provide Optimal Light and Care
Once seedlings emerge, remove the plastic cover immediately to prevent damping-off disease. Move them to a bright location with 12-14 hours of light daily. A south-facing window or grow light works best. Keep the soil consistently moist but never waterlogged—let the top ½ inch dry out between waterings.
When the first true leaves appear (not the initial seed leaves), fertilize lightly with a diluted fish emulsion (mix 1 tablespoon per gallon of water). Birch seedlings are slow growers, so avoid over-fertilizing. Transplant them into individual 6-inch pots when they reach 3-4 inches tall, using the same well-draining mix.
🪴 Step 5: Harden Off and Transplant Outdoors
Six weeks before your last frost date, begin hardening off the seedlings by placing them outdoors in a sheltered spot for 1-2 hours daily. Gradually increase their outdoor time over 2-3 weeks, exposing them to more sunlight and wind each day. This prepares them for permanent planting.
Choose a location with full sun to partial shade and well-draining soil. Plant the seedlings in early spring or fall, spacing them 10-15 feet apart to allow for their mature size. Water deeply after transplanting and mulch with 2 inches of organic mulch to retain moisture and suppress weeds. Young birch trees are sensitive to drought, so keep the soil consistently moist for the first year.
Tips & tricks for perfect birch tree seed germination
These practical insights will help you maximize your success rate with birch tree seeds using the layered chill method.
Stratification Timing: The 90-120 day cold treatment in Step 2 is non-negotiable for breaking dormancy. I've found that 105 days (right in the middle of that range) gives me the most consistent results. Mark your calendar when you start—this extended period mimics winter conditions that birch seeds need to germinate. If you're impatient, don't rush it; seeds won't respond well to shorter stratification periods.
Sand Moisture Secret: In Step 2, maintaining that "wrung-out sponge" moisture level is crucial. Use a spray bottle to check—if water beads up on the surface, it's too wet. Too-dry sand will prevent proper moisture exchange, while overly wet sand can cause mold. I like to use coarse sand because it drains better than fine sand while still providing good moisture retention. The sand should feel damp when squeezed but not leave water dripping out.
Light Transition Technique: When moving from Step 3's warm, humid conditions to Step 4's bright light, do it gradually. Start with 4-6 hours of indirect light on the first day, then increase by 2 hours daily. Birch seedlings are sensitive to sudden light exposure, which can cause stress. The goal is to let them acclimate to the higher light levels without shocking their delicate systems. A south-facing window with sheer curtains works perfectly for this transition.
Disease Prevention: In Step 4, removing that plastic cover immediately after sprouts emerge is critical to prevent damping-off disease. I've seen entire seedling batches fail when left covered too long. The moment you see green sprouts poking through, lift the cover completely. Air circulation prevents fungal growth that thrives in humid conditions. If you notice any dark, mushy stems, remove affected seedlings immediately to prevent spread.
Pro Tips for Birch Tree Seed
- These practical insights will help you maximize your success rate with birch tree seeds using the layered chill method.
- Stratification Timing: The 90-120 day cold treatment in Step 2 is non-negotiable for breaking dormancy.
- Sand Moisture Secret: In Step 2, maintaining that "wrung-out sponge" moisture level is crucial.
Frequently asked questions
Got questions about growing birch tree seeds?
You’re not alone! Here are some of the most common queries—and their straightforward answers—to help you succeed with your layered chill method.
How long does it take for birch tree seeds to germinate?
With the layered chill method, germination typically takes 4–12 weeks. Patience is key—some seeds may sprout faster, while others need the full cold stratification period (8–12 weeks) to break dormancy. Keep the soil moist but not soggy, and avoid disturbing the seeds during this time.
Do I need a refrigerator for cold stratification?
Not necessarily! While a fridge is the most precise method (40–50°F for 8–12 weeks), you can also use outdoor cold stratification by planting seeds in a protected, moist bed of soil or peat moss during winter. Just ensure they’re shielded from rodents and extreme temperature swings.
Can I grow birch trees from seeds without the layered method?
Yes, but success rates drop significantly. Birch seeds have hard seed coats and require cold stratification to germinate. Skipping this step may result in <10% germination. If you’re impatient, try soaking seeds in warm water for 24 hours before stratification to soften the coat slightly.
Why aren’t my birch seeds sprouting after stratification?
Check these common culprits:
- Too dry: Birch seeds need consistent moisture—water gently but avoid over-saturating.
- Not warm enough: After stratification, move containers to a warm spot (65–75°F) to trigger germination.
- Old seeds: Fresh seeds germinate better; store them in a cool, dry place if not planting immediately.
How do I transplant birch seedlings without killing them?
Wait until seedlings have 2–3 true leaves and are at least 3–4 inches tall. Harden them off for a week by gradually exposing them to outdoor conditions. Dig a hole twice as wide as the root ball, mix in compost, and water thoroughly. Mulch around the base to retain moisture and protect young roots.
Wrapping up and next steps
Growing birch tree seeds using the layered chill method is a rewarding way to nurture these elegant trees from scratch! With patience, the right materials, and a little care, you can achieve 90% germination success—proving that even the smallest seeds hold big potential. 🌱
Ready to take the next step? Start by planting your prepped seeds in well-draining soil and monitor their progress. Whether you’re restoring a landscape, adding shade, or simply embracing nature’s beauty, your birch saplings will soon become a stunning centerpiece. Happy growing! 🌿