
Pruning
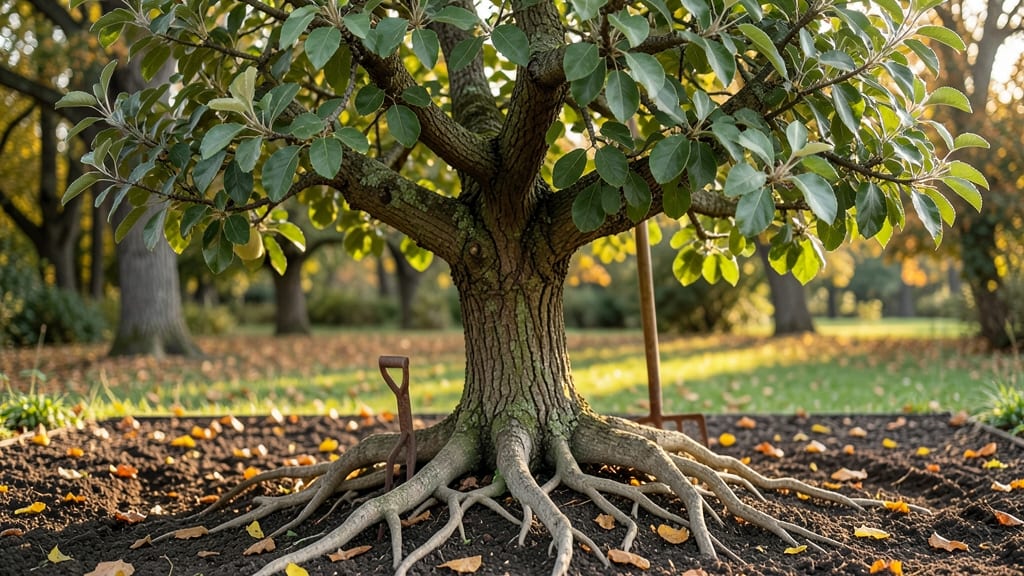
Reviving a root-bound apple tree doesn’t require a green thumb—just four strategic cuts and a little patience. I’ve nursed back more tangled roots than I care to admit, and every time, the tree rewards me with fresh spring growth.
The key is understanding how to work with those circling roots instead of fighting them, so the tree can spread out and thrive.
You’ll need basic tools—a sharp pruning saw, gloves, and a bucket of water—and about 30 minutes of focused work. Start by loosening the root ball gently before making your cuts, always aiming to create clean breaks rather than jagged tears.
This isn’t just about trimming; it’s about giving your tree room to breathe and grow strong roots downward.
After pruning, you’ll see new shoots emerge within weeks, and the tree will establish itself faster than you’d expect. The soil stays moist but never soggy, and a layer of mulch keeps weeds at bay while protecting those fresh roots.
By next season, your apple tree will look like it’s never been root-bound.
This method works for container-grown trees, bare-root purchases, or even overcrowded nursery stock. Whether you’re planting in spring or fall, the same principles apply—just adjust your timing to avoid frost. Let’s get those roots growing right!
📚 In This Guide
- What you need
- Instructions
- Tips and common mistakes
- Wrapping up and next steps
What you need
- ● Pruning shears or saw: Sharp, clean bypass pruners (for smaller roots/diameter pruning saw (for thicker roots up to 3 inches). (Sterilize with rubbing alcohol or a 10% bleach solution!)
- ● Gloves: Heavy-duty gardening gloves (nitrile-coated for grip and protection).
- ○ Root stimulator: A mycorrhizal fungus powder or rooting hormone gel (optional but highly recommended for faster recovery).
- ● Mulch: Organic mulch like wood chips or compost (2–3 inches thick, kept 6 inches away from the trunk).
- ● Watering can or hose: With a gentle spray nozzle for post-pruning hydration.
- ● Trowel or spade: For loosening soil around the base if roots are severely compacted.
- ● Disinfectant: 70% isopropyl alcohol or bleach solution (1 part bleach to 9 parts water) for cleaning tools.
- ● Root aerator: A manual or electric tool to create holes in compacted soil.
- ● Slow-release fertilizer: Balanced 10-10-10 or organic options like fish emulsion to nourish post-pruning.
- ● Tree wound dressing: Pruning sealant (controversial but useful for large cuts to prevent disease).
- ● Camera or sketchbook: To document the tree’s root structure before and after pruning!
How to revive a root-bound apple tree in minutes
Here's the straightforward method I've used to save struggling apple trees—no fancy tools, just a few clean cuts.
Identify and Mark the Root Boundaries
Gently remove the top 2-3 inches of soil around the base of your apple tree using your hands or a small trowel. You're looking for a dense mass of roots circling the trunk—this is the root-bound zone. These roots will strangle the tree if left unchecked.
Use a pencil or marker to trace a clean circle about 1 inch outside the outermost roots. This gives you a visual guide for where to cut. Real talk: if you see roots growing in a perfect spiral around the trunk, that's your clear sign to act fast. The goal is to break this cycle before it gums up the tree's growth completely.
Make Four Strategic Cuts Around the Root Ball
Take your pruning shears and make four vertical cuts through the root mass, following the circle you marked. Each cut should be about 1/3 the depth of the root ball—deep enough to sever the main girdling roots but not so deep you damage the tree's structural roots. Think of this as creating "windows" for new roots to grow outward.
Cut cleanly at a 45-degree angle to minimize tear damage. If you're working with mature roots, you might need to use a pruning saw instead of shears. After each cut, step back and check the tree's stability—you want to relieve pressure, not topple it. A slight wobble means you're doing it right.
Loosen and Spread the Roots
Once the four cuts are made, use your hands or a blunt tool to gently pry apart the root mass. The goal is to create space between the roots so they can grow outward rather than circling. You'll feel resistance at first—this is normal as you're breaking years of compacted growth.
Spread the roots outward like spokes on a wheel, positioning them away from the trunk. If you notice any severely damaged or blackened roots, trim those back to healthy tissue. Water the tree deeply after loosening the roots—this helps settle the soil and encourages new root growth in the newly created spaces.
Mulch and Monitor for Recovery
Apply a 2-3 inch layer of organic mulch around the base of the tree, keeping it 6 inches away from the trunk. This helps retain moisture and provides nutrients as it breaks down. Avoid piling mulch directly against the trunk, as this can cause rot.
Over the next 4-6 weeks, watch for new root growth at the cut edges. You'll see fresh, white root tips emerging as the tree sends out new roots to fill the spaces you created. Water deeply once a week if rainfall is light, and avoid fertilizing during this recovery period—your tree is already stressed and doesn't need extra nutrients.
Tips & tricks for perfect root-bound apple tree revival
Here's what I've learned from saving more apple trees than I can count—these simple tricks make all the difference between a struggling plant and one that thrives.
Precision in Step 1: When removing that top 2-3 inches of soil, work gently but deliberately. You're not digging a hole—you're uncovering a puzzle. Look for the telltale spiral pattern of girdling roots. If you see them tightly wrapped around the trunk like a bracelet, that's your clear signal to act. The key is to expose just enough to see the full root structure without damaging healthy roots deeper down.
The Cutting Technique: Those four vertical cuts in Step 2 should feel like you're making clean, surgical incisions—not hacking through with brute force. Use sharp pruning shears or a saw, and work at that 45-degree angle to minimize tearing. Pro tip: If you're working with thick roots, make two shallower cuts rather than one deep one. This reduces bleeding and gives the tree more surface area for new root growth.
Root Spreading Strategy: When you spread those roots outward like spokes in Step 3, think of it as creating a starburst pattern. The goal is to position them horizontally, not just fan them out randomly. This encourages outward growth rather than the circular pattern that caused the problem in the first place. After spreading, give the roots a gentle shake to help them settle into their new positions before adding back soil.
Post-Operation Care: That 2-3 inch layer of mulch in Step 4 isn't just decoration—it's a protective blanket. Keep it loose enough to allow water penetration but thick enough to regulate soil temperature. And here's the thing about that 6-inch clearance from the trunk: it's crucial. Piling mulch against the bark creates a moist environment that invites rot. Think of it as creating a donut of mulch around your tree, not a solid ring.
Pro Tips for Apple Tree With Roots
- Here's what I've learned from saving more apple trees than I can count—these simple tricks make all the difference between a struggling plant and one that thrives.
- Precision in Step 1: When removing that top 2-3 inches of soil, work gently but deliberately.
- The Cutting Technique: Those four vertical cuts in Step 2 should feel like you're making clean, surgical incisions—not hacking through with brute force.
Frequently asked questions
Got questions about reviving a root-bound apple tree? You’re not alone! Here are some of the most common concerns—plus clear, actionable answers to get your tree thriving again.
Why does my apple tree have roots growing out of the soil?
Root-bound trees push roots above ground when their root system outgrows the container or compacted soil. This happens due to lack of space or poor drainage. It’s a sign your tree needs root pruning or repotting to encourage healthier growth downward. Ignoring it can stunt growth or weaken the tree over time.
How often should I prune the roots of my apple tree?
For container-grown apple trees, prune roots every 1–2 years during dormancy (late winter/early spring). If your tree is in the ground, root pruning is only needed if you notice circling roots or poor growth. Never prune roots more than 20–30% of the total system at once—this can shock the tree.
Can I cut roots without harming the tree?
Yes! Use sterilized pruners to make clean cuts at a 45-degree angle on roots thicker than a pencil. Focus on circling or congested roots—these strangle the tree’s growth. Avoid cutting <50% of the rootball at once. Water deeply afterward to reduce stress.
What if my apple tree is already planted in the ground?
If your tree’s roots are exposed or circling in-ground, dig carefully around the rootball (12–18 inches from the trunk) and trim any girdling roots with pruners. For severe cases, consider root zone aeration or adding organic matter (compost) to encourage outward growth. Mulch helps too!
My tree’s leaves are yellowing after root pruning—what’s wrong?
Yellowing leaves post-pruning usually mean transplant shock or over-pruning. To help:
- Water deeply 2–3 times weekly for 4–6 weeks.
- Avoid fertilizing for 6 weeks—let roots recover first.
- Provide shade if temperatures exceed 85°F (29°C).
Wrapping up and next steps
Reviving a root-bound apple tree doesn’t have to be complicated—just strategic!
With the right tools and a few precise cuts, you can help your tree thrive again, ensuring healthy roots and abundant fruit for years to come. 🌱🍏 Whether you’re a seasoned gardener or just starting out, this method makes root-bound recovery simple and effective.
Now that you’re armed with the knowledge, roll up your sleeves and give your apple tree the care it deserves! Start by inspecting your tree this weekend—you’ve got this! 🌟