
Trees
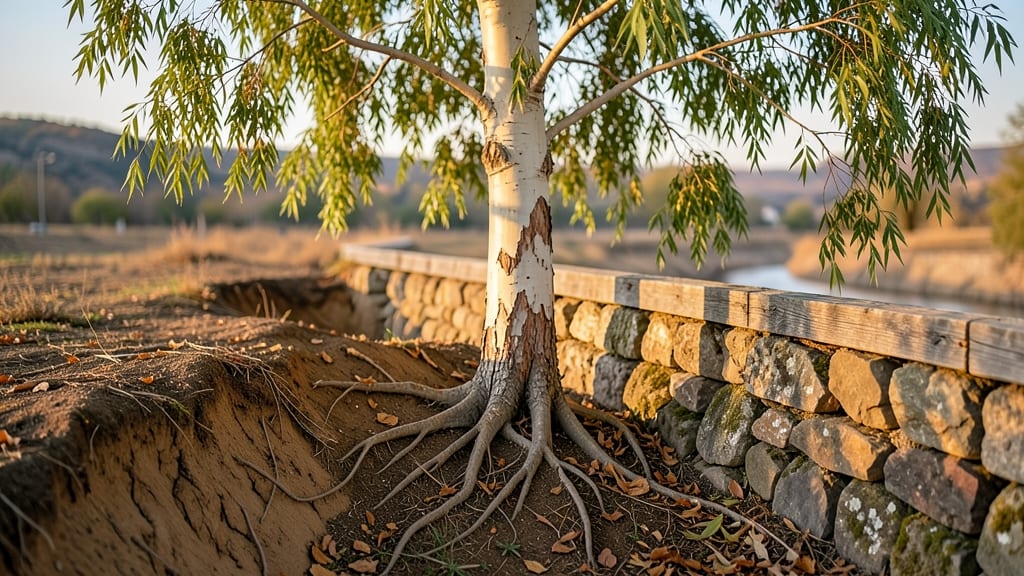
Your slopes won’t wash away when you plant trees for erosion control—they’ll become natural armor against rain and runoff. 🌳 I’ve seen bare hillsides transform into lush, stable landscapes just by choosing the right species and planting them strategically along water flow paths.
The secret lies in deep-rooted trees like willows, bald cypress, or black locust—their roots tangle into the soil like a living net, holding it together while absorbing excess water.
You’ll need a mix of fast-growing pioneers for immediate stabilization and slower-growing hardwoods for long-term strength, plus some smart spacing to create a "living dam" effect.
Within three years, you’ll notice fewer mudslides and more vibrant greenery clinging to the hillside. The roots break up runoff, the canopy slows raindrops, and the whole slope becomes a self-sustaining ecosystem that looks better every season.
Works for both steep backyards and large agricultural slopes—just adjust species and spacing to match your climate and soil type. Here’s how to make it happen without turning your property into a construction zone.
📚 In This Guide
- What you need
- Instructions
- Tips and common mistakes
- Wrapping up and next steps
What you need
- ● Native tree saplings or seedlings: 5–10 per 100 sq. ft. (choose deep-rooted species like willows, dogwoods, or redwoods for maximum erosion control).
- ● Erosion control fabric (biodegradable or woven): 1 roll (3–6 ft. wide, 100–200 ft. long, depending on slope size).
- ● Stakes or pins: 10–20 galvanized or biodegradable stakes (18–24 inches long) to secure fabric.
- ● Mulch (straw, wood chips, or coconut coir): 2–3 cubic yards to retain moisture and suppress weeds.
- ● Compost or topsoil: 1–2 cubic yards for planting beds.
- ○ Root barriers (optional but recommended): HDPE plastic or galvanized metal sheets (3–6 ft. tall, cut to slope length).
- ● Gravel or riprap (for living dams): 1–2 tons of 2–4 inch river rock or crushed stone.
- ● Shovel and spade: For digging planting holes and trenches.
- ● Wheelbarrow: To haul soil, mulch, and gravel.
- ● Measuring tape and string line: For marking slope contours and barrier placement.
- ○ Post hole digger (optional): For securing stakes deeper into the slope.
- ● Pruners or shears: To trim saplings and fabric neatly.
- ● Garden hose or sprinkler: For watering newly planted trees.
- ● Safety gear: Gloves, knee pads, and sturdy boots (slopes can be slippery!).
- ● Check local regulations: Ensure native species and erosion control methods comply with environmental guidelines.
- ● Test soil moisture: Amend clay-heavy soil with compost to improve drainage for roots.
- ● Plant in layers: Start with deep-rooted trees at the top of the slope, then add shrubs and ground covers.
- ● Water deeply: First 2 weeks are critical—aim for 1–2 inches of water per week.
- ● Monitor progress: Reinforce fabric or add plants if erosion persists in high-traffic areas.
How to design effective root barriers and living dams for slopes
Here's the method I've used to stabilize slopes—it's all about strategic plant placement and smart barriers.
🌱 Step 1: Assess Your Slope and Soil Conditions
Start by walking the entire slope to identify erosion hotspots—look for exposed roots, muddy runoff paths, and areas where soil has already washed away. These spots will need your most aggressive interventions. Test the soil moisture by pressing your finger into the ground: if water seeps up within 1-2 seconds, your slope is highly susceptible to erosion.
Note where water naturally collects after rain. These low points are prime locations for living dams, where you'll plant deep-rooted species to catch and absorb runoff. Avoid planting directly in fast-moving water channels—those areas need physical barriers first. Mark these zones with stakes so you don't accidentally plant in the wrong spots later.
🪴 Step 2: Install Physical Root Barriers Where Needed
For areas with severe erosion or where you want to direct root growth, install 18-inch deep root barriers made from heavy-duty landscape fabric or galvanized metal. Drive them vertically into the soil at a 45-degree angle to create a natural breakline that redirects water flow. Space barriers 6-8 feet apart along the slope's contour lines, not straight up and down.
I've found that fabric barriers work best for gentle slopes (15% grade or less) because they allow some water penetration while still slowing runoff. For steeper slopes, use metal barriers—they're more durable and won't degrade under heavy water pressure. Always leave 6 inches of barrier above ground level to prevent water from flowing over the top and undermining your work.
🌿 Step 3: Plant Deep-Rooted Species as Living Dams
Create living dams by planting 4-6 deep-rooted trees per 10-foot section along contour lines, spaced 8-10 feet apart. Willows, cottonwoods, and bald cypress are my top choices—they establish quickly and develop extensive root systems that bind soil. For smaller slopes, use shrubs like elderberry or serviceberry in the same pattern.
Dig holes twice as wide as the root ball but no deeper than the container size. This encourages roots to spread horizontally rather than growing deep, which is exactly what you want for erosion control. Water each plant immediately after planting with 5 gallons of water to help settle the soil around roots and eliminate air pockets.
☀️ Step 4: Layer with Erosion-Resistant Ground Cover
Between your trees and along the slope's surface, plant dense ground covers like creeping juniper, sedum, or clover to fill gaps and prevent soil exposure. These plants spread quickly and develop extensive root mats that hold soil in place. For slopes steeper than 30% grade, use erosion-control blankets made from coconut coir—these provide immediate protection while native plants establish.
Apply a 2-inch layer of wood chips between plants to reduce evaporation and suppress weeds. This mulch layer also helps maintain consistent moisture levels, which is critical during the first 6-12 months when plants are establishing their root systems. Replenish mulch annually to maintain coverage.
⏰ Step 5: Implement Maintenance Checks
Schedule quarterly inspections during the first year to check for new erosion channels or plant stress. Look for yellowing leaves, which often indicate either overwatering or poor drainage. In the first 3 months, you may need to water deeply once every 7-10 days during dry spells to help roots establish.
After the first year, maintenance becomes simpler—just monitor for gaps in your plant coverage and fill them with additional ground cover or small shrubs. The key is to keep the entire slope covered with living vegetation. If you notice water consistently flowing in one path, redirect it with additional barriers or plant more dense vegetation in that area.
Tips & tricks for perfect slope stabilization with trees
These practical strategies will help you create a resilient erosion control system that lasts for years.
Site Assessment Accuracy: When testing soil moisture in Step 1, press your finger about 2 inches deep—this gives you a better sense of moisture retention at the root level where erosion really matters. I've seen slopes where surface soil looked dry but deeper layers were saturated, leading to unexpected erosion after rain. Mark your erosion hotspots with biodegradable flags rather than metal stakes to avoid leaving permanent markers in your landscape.
Barrier Installation Technique: For the 18-inch deep root barriers in Step 2, I recommend using a post hole digger to create pilot holes before driving the barriers in. This prevents soil compaction around the edges where water might otherwise bypass the barrier. When working with metal barriers on steep slopes, consider adding a small berm (6-8 inches high) behind each barrier to create additional water capture capacity. The 6-inch above-ground requirement is critical—this prevents water from simply flowing over the top during heavy storms.
Plant Selection Strategy: In Step 3, while willows and cottonwoods establish quickly, bald cypress actually performs better in wetter conditions and has deeper roots that penetrate clay soils. For slopes with poor drainage, consider adding a few black willows—they can tolerate both saturated and occasionally dry conditions. When planting your 4-6 trees per 10-foot section, stagger the spacing slightly (8-12 feet apart) to create a more natural, interlocking root system that better resists water flow.
Maintenance Timing: Those quarterly inspections in Step 5 are non-negotiable during the first year, but don't overlook seasonal adjustments. In late winter, check for any winterkill (brown, crispy leaves) which indicates plants may need protection from cold winds. During the first 3 months, I've found that watering in the early morning (before 9 AM) reduces evaporation and gives roots more time to absorb moisture before the heat of the day. The 6-12 month mulch replenishment schedule works well, but for the first year, check mulch levels every 3 months to ensure consistent coverage.
Pro Tips for Trees Erosion Control
- These practical strategies will help you create a resilient erosion control system that lasts for years.
- Site Assessment Accuracy: When testing soil moisture in Step 1, press your finger about 2 inches deep—this gives you a better sense of moisture retention at the root level where erosion really matters.
- Barrier Installation Technique: For the 18-inch deep root barriers in Step 2, I recommend using a post hole digger to create pilot holes before driving the barriers in.
Frequently asked questions
How long does it take for trees to effectively stabilize soil?
Trees take time to establish strong root systems—typically 3 to 5 years for significant erosion control. Fast-growing species like willows or poplars can show results sooner, while deeper-rooted trees (e.g., oaks or pines) take longer but provide long-term stability. Pairing trees with root barriers or living dams accelerates the process by reducing immediate soil loss.
Will trees damage my root barriers if planted too close?
Yes! Planting trees within 2–3 feet of a root barrier can weaken it over time as roots seek moisture or nutrients. To avoid damage, maintain a minimum 3-foot distance between tree trunks and barriers. If space is limited, opt for shallow-rooted species (like dogwoods) and monitor growth closely.
Are living dams more cost-effective than traditional retaining walls?
Living dams (e.g., willow or bamboo plantings) cost $1–$5 per linear foot to establish, compared to $20–$50+ per foot for concrete or stone walls. While they require maintenance (pruning, watering), they’re self-sustaining and improve soil health over time. For steep slopes, combine them with root barriers for extra support.
What if heavy rain washes away my newly planted trees before roots take hold?
Use erosion-control blankets or biodegradable coir logs to shield seedlings until roots establish (usually 6–12 months). For slopes, plant in contour lines to slow water flow, and mulch heavily to retain moisture. If erosion persists, consider temporary silt fences until vegetation matures.
Can I use native trees for erosion control, or do I need special species?
Native trees are ideal—they’re adapted to local conditions, require less water, and support biodiversity. Examples:
- Willows (fast-growing, great for wet areas)
- Red Alder (nitrogen-fixing, stabilizes clay soil)
- Eastern Red Cedar (drought-tolerant, deep roots)
Wrapping up and next steps
Trees are nature’s unsung heroes—their roots bind soil, stabilize slopes, and protect landscapes from erosion with minimal effort. Whether you’re planting a living dam or installing root barriers, the key is action: start small, monitor progress, and let time work in your favor. 🌱
Ready to take the next step? Assess your slope today, gather the right tools, and begin your erosion-control project with confidence. Every tree planted is a hillside saved—your future landscape will thank you!