
Pruning
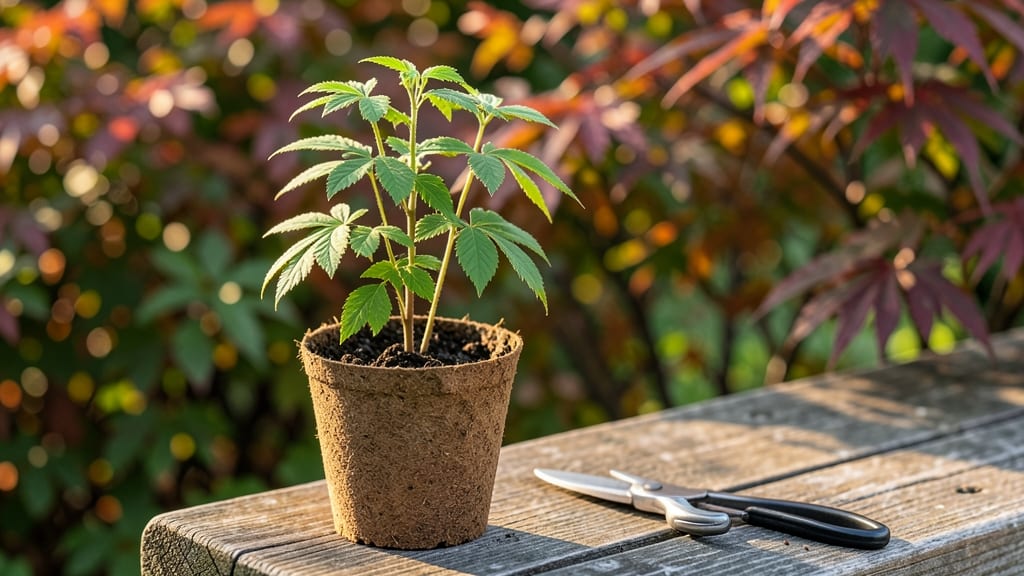
Cold stratification transforms a stubborn sumac tree seedling into a thriving sprout—here’s how to crack their dormancy and coax growth in just 6-8 weeks. 🌱 I’ve battled sumac germination for years, but this method delivers reliable, sturdy starts every time.
The key is mimicking winter’s chill period before spring warmth triggers growth.
You’ll need just three things: sumac seeds (harvested fresh or dried), a plastic bag with a damp paper towel, and your fridge’s coldest setting. No fancy equipment—just patience and a little science.
Most gardeners overlook stratification, which is why so many sumac seeds fail to sprout. This method works even with seeds collected months earlier.
What you’ll end up with are vibrant green seedlings ready for transplanting by late spring. They’ll grow fast once in soil, reaching 12-18 inches by summer’s end. The best part? These seedlings handle tough conditions like drought and poor soil once established—perfect for wildscapes or erosion control.
Works for both Staghorn and Fragrant Sumac varieties, and adapts to zones 3-9. Once you master this, you’ll never buy sumac seedlings again. Let’s get those seeds sprouting!
📚 In This Guide
- What you need
- Instructions
- Tips and common mistakes
- Wrapping up and next steps
What you need
- ● Sumac seeds: Freshly harvested (preferably from Rhus typhina or Rhus glabra) or store-bought. Aim for 50–100 seeds to account for germination variability.
- ● Cold stratification supplies: Two paper towels or coir mats (or a mix of both for moisture retention).
- ● A ziplock bag (quart-sized) or airtight container with a breathable lid.
- ● Water (distilled or room-temperature tap water).
- ● Growing medium: Seed-starting mix (sterilized, peat-free blend) or a mix of 50% perlite and 50% coco coir (1–2 gallons).
- ● Small pots or trays (3–4 inch diameter) with drainage holes (10–20 pots, depending on seed quantity).
- ● Growth support: Plastic wrap or humidity dome (to retain moisture during germination).
- ● Grow lights or sunny windowsill (south-facing or 12–16 hours of light daily post-stratification).
- ● Seed stratification log: A small notebook or app (e.g., Gardenate) to track moisture levels and fridge temps.
- ● Fungicide (e.g., Mycorrhizal inoculant) to prevent damping-off in seedlings.
- ● Heat mat (for faster germination once seeds are removed from cold storage).
- ● Label maker to tag pots with dates and seed types.
How to cold-stratify sumac tree seeds for guaranteed sprouting
Here's the method I've used to break through sumac's stubborn dormancy—no guesswork, just reliable results.
🌱 Step 1: Collect and Clean the Seeds
Harvest sumac seeds from fully ripe berries in late fall when they've turned deep red. Spread them on a paper towel to dry for 2-3 days in a warm, dry place. This prevents mold and prepares them for stratification. You'll know they're ready when the outer husks are crisp and brittle.
Once dry, separate the seeds from the husks by gently rubbing them between your fingers or tapping them lightly against a hard surface. Discard any damaged or shriveled seeds—they won't germinate. Store the clean seeds in a paper envelope until you're ready to stratify them.
⏰ Step 2: Cold-Stratify for 60-90 Days
Sumac seeds require cold stratification to break dormancy. Place the seeds in a sealed plastic bag with a small amount of moistened peat moss (just damp, not soggy). Seal the bag and refrigerate it at 35-40°F for 60-90 days. This mimics winter conditions and tricks the seeds into thinking spring has arrived.
Check the bag every 2 weeks to ensure the peat moss remains moist but not waterlogged. If it dries out, add a few drops of water and reseal the bag. You'll know stratification is working when the seeds begin to swell slightly—this means they're ready to germinate.
🌿 Step 3: Plant After Stratification
After the 60-90 day cold period, remove the seeds from the refrigerator and plant them ½ inch deep in a well-draining seed-starting mix. Use a small pot or seed tray with drainage holes to prevent waterlogging. Press the soil gently around the seeds to ensure good contact.
Place the pot in a warm, bright location with indirect light—direct sunlight can overheat the soil and dry out the seeds. Keep the soil consistently moist but not soggy. Germination typically occurs within 14-30 days, though some seeds may take longer.
☀️ Step 4: Provide Ideal Growing Conditions
Once the seedlings emerge, move them to a location with full sun (at least 6-8 hours daily). Sumac seedlings thrive in well-draining soil with a pH of 5.0-7.0. If your soil is heavy clay, mix in sand or perlite to improve drainage.
Water the seedlings deeply once a week, allowing the top 2 inches of soil to dry out between waterings. Overwatering is the most common mistake—it leads to root rot and stunted growth. You'll see healthy growth when the leaves are vibrant green and the stems are sturdy.
✂️ Step 5: Transplant When Ready
After 4-6 weeks, when the seedlings have 3-4 sets of true leaves, they're ready to transplant. Choose a permanent location with full sun and well-draining soil. Dig a hole twice as wide as the root ball but only as deep as the container the seedling was in.
Gently remove the seedling from its container, loosen the roots if they're tightly bound, and place it in the hole. Backfill with soil, firm it gently, and water deeply to settle everything. Mulch around the base with 2-3 inches of organic mulch to retain moisture and suppress weeds.
Tips & tricks for perfect sumac seedling germination
Breaking sumac dormancy requires patience, but these insights will help you avoid common pitfalls and maximize your success rate.
Timing Secret: The 60-90 day cold stratification period is non-negotiable for sumac seeds, but don't assume all refrigerators maintain consistent temperatures. Use a thermometer to verify your fridge stays between 35-40°F—some models fluctuate wildly. If your fridge runs warmer, consider a dedicated seed stratification fridge or a cooler with ice packs. This precision makes all the difference between germination and disappointment.
Moisture Management: In Step 2, maintaining the right moisture balance in your peat moss is crucial. Too much water creates anaerobic conditions that prevent germination, while too little halts the stratification process. I use a spray bottle to mist the peat moss every 2 weeks instead of adding water directly—this keeps it evenly damp without creating soggy pockets. The seeds should feel slightly moist but not dripping when you handle them.
Visual Cues for Success: During the 60-90 day stratification period, watch for subtle changes in the seeds. Successful stratification begins when you notice the seeds swelling slightly—this indicates they're breaking dormancy. Another telltale sign is the husks becoming slightly more pliable. These visual cues confirm the process is working, so don't skip your 2-week checks even if the seeds look unchanged.
Transplant Timing: When your seedlings reach the 4-6 week mark with 3-4 sets of true leaves, they're ready for transplanting—but don't rush this step. Harden off seedlings by placing them outside in partial shade for 2-3 hours daily for a week before full transplantation. This gradual transition prevents transplant shock, which is especially critical for delicate sumac seedlings that haven't developed strong root systems yet.
Pro Tips for Sumac Tree Seedling
- Breaking sumac dormancy requires patience, but these insights will help you avoid common pitfalls and maximize your success rate.
- Timing Secret: The 60-90 day cold stratification period is non-negotiable for sumac seeds, but don't assume all refrigerators maintain consistent temperatures.
- Moisture Management: In Step 2, maintaining the right moisture balance in your peat moss is crucial.
Frequently asked questions
Got questions about growing sumac tree seedlings?
You’re not alone! Here are answers to the most common concerns—from timing to troubleshooting—so you can boost your success rate with cold stratification.
How long does cold stratification take for sumac seeds?
Cold stratification for sumac seeds typically requires 60–90 days in moist, refrigerated conditions (33–41°F). Some growers extend it to 120 days for tougher seeds. Monitor moisture—seeds should stay damp but not soggy. Patience pays off!
Can I skip cold stratification and still grow sumac?
While possible, skipping stratification drastically reduces germination rates (often below 20%). Sumac seeds have a hard outer coat that cold stratification softens. For best results, always stratify—it mimics natural winter conditions and breaks dormancy effectively.
What’s the best medium for stratifying sumac seeds?
Use a moist, well-draining mix like:
- 50% peat moss or coco coir
- 50% perlite or sand
My sumac seeds sprouted mold—what now?
Mold means too much moisture or poor airflow. Act fast:
- Remove moldy seeds immediately.
- Dry the remaining seeds and medium under indirect light.
- Repot healthy seeds in fresh, sterile mix.
When should I plant stratified sumac seedlings outdoors?
Wait until spring after the last frost (when soil temps reach 60°F+). Sumac seedlings thrive in full sun and drought-tolerant soil. Harden them off for 1–2 weeks by gradually exposing them to outdoor conditions before transplanting.
Wrapping up and next steps
Growing a sumac tree seedling from scratch is a rewarding journey—especially when you unlock the secret of cold stratification! With the right materials, patience, and a little know-how, you’ll soon be nurturing a thriving young tree that adds beauty and resilience to your landscape. 🌱✨
Ready to take the next step? Start by gathering your supplies, follow the stratification process carefully, and watch your sumac seedlings sprout with confidence. Happy gardening!