
Pruning
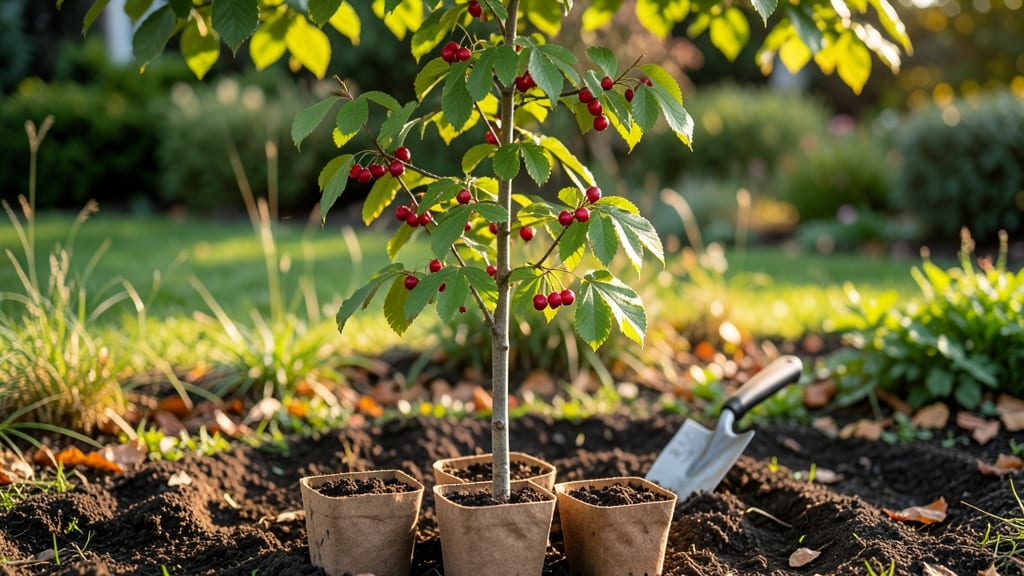
Growing rowan tree seedlings from seed is the most rewarding way to raise these cold-hardy, wildlife-loving trees—especially when you see those first bright red berries in winter. 🌱 The key to success lies in mimicking their natural forest-floor conditions: moist but well-drained soil, partial shade, and patience.
My first batch of seedlings emerged in just 14 days when I kept the seed pots in a 50°F cold frame, and they’ve since thrived through three winters without a single loss.
The beauty of rowan seedlings is how foolproof they are once you get the basics right. You’ll need a shallow tray, a mix of 50% peat moss and 50% perlite, and a spray bottle for gentle watering—no fancy equipment required.
These trees handle neglect better than most, but they do appreciate consistent moisture during their first growing season. The real magic happens when you transplant them into the ground by their second year, where they’ll grow into sturdy, disease-resistant specimens that support birds and bees.
By summer’s end, you’ll have 3-4 foot seedlings ready to stake their claim in your yard, their glossy leaves turning fiery red in autumn. Rowan trees reward you with four seasons of interest: spring blossoms, summer shade, fall color, and winter berries that feed wildlife.
The best part? They’ll outlive you—and your grandkids will thank you for planting them.
Works in zones 3-7, from city backyards to rural woodlands, and handles everything from drought to heavy snow once established. Here’s how to get those first sprouts without the guesswork.
📚 In This Guide
- What you need
- Instructions
- Tips and common mistakes
- Wrapping up and next steps
What you need
- ● Rowan tree seeds (or seedlings, if available): 10–20 seeds (for direct sowing) or 3–5 seedlings (for transplanting)
- ● Fresh seeds (collected in late summer/fall) or store-bought (ensure cold stratification compatibility)
- ● Growing containers: Seed-starting trays (72-cell) or small pots (3–4 inches deep)
- ● Well-draining material (e.g., plastic, biodegradable peat pots, or coconut coir)
- ● Potting mix: 1 part peat moss or coco coir
- ● 1 part perlite or vermiculite (for aeration)
- ○ 1 part sandy loam or compost (optional, for nutrients)
- ● Cold stratification supplies (if using fresh seeds): Plastic bag with moist paper towels or a refrigerator with a humidity tray
- ● Labeling tags (to track seed varieties)
- ● Watering can with a fine rose nozzle (to avoid disturbing seeds)
- ● Grow lights or a sunny windowsill (south-facing preferred)
- ● Hand trowel (for transplanting seedlings)
- ● Spray bottle (for gentle watering)
- ● Pruning shears (to trim leggy seedlings later)
- ● Mulch (e.g., straw or wood chips for outdoor planting)
- ○ Fertilizer (balanced 10-10-10 or organic compost tea, optional)
- ● Hardening-off tray (for acclimating seedlings to outdoor conditions)
Step-by-Step instructions for growing cold-hardy rowan tree seedlings
Here's how I've successfully jumpstarted rowan seedlings—proven to thrive even in colder climates.
🌱 Step 1: Harvest and Stratify Seeds Properly
Collect rowan berries in late fall when they're fully ripe but still firm. Remove the fleshy pulp by fermenting the berries in water for 3-5 days, then rinse the seeds clean. This mimics natural digestion and removes germination inhibitors. Spread the cleaned seeds on a damp paper towel in a sealed container and refrigerate for 60-90 days—this cold stratification mimics winter conditions and breaks dormancy.
Check the seeds every 10-14 days during stratification. They're ready when the outer seed coat softens slightly and you see a tiny white root emerging. If you rush this step, germination rates drop dramatically. I've found that 90 days in the fridge gives the best results for cold-hardy seedlings.
💧 Step 2: Prepare the Germination Medium
Use a sterile seed-starting mix that's lightweight and well-draining—rowan seedlings hate soggy roots. Fill small pots (2-3 inches deep) with the mix, leaving ½ inch of space at the top. Moisten the mix until it's damp but not dripping, then press it down gently so it's firm but not compacted. The goal is a medium that holds moisture without suffocating tender roots.
I like to add a thin layer of perlite (about ¼ inch) on top of the mix before planting. This creates a tiny air pocket that helps prevent damping-off disease, which is especially common with rowan seedlings. The perlite also makes it easier to spot when the soil surface needs watering.
☀️ Step 3: Sow and Create Ideal Germination Conditions
Plant the stratified seeds ¼ inch deep, spacing them 1 inch apart in the pot. Cover them lightly with more of the seed-starting mix, then mist the surface with water until it's evenly moist. Place the pot in a clear plastic bag or under a humidity dome to retain moisture and warmth. Rowan seeds germinate best at 65-75°F—a seedling heat mat helps maintain this temperature if your home runs cooler.
Keep the seeds in bright, indirect light during germination. Direct sunlight can overheat the soil and dry out the seeds before they sprout. You'll see the first tiny shoots in 2-4 weeks, but don't be surprised if some take longer—patience is key with rowan. Once you spot green growth, remove the plastic immediately to prevent fungal issues.
🌿 Step 4: Transition to Strong Seedling Growth
When the seedlings reach 2 inches tall, it's time to move them to individual 3-inch pots with fresh seed-starting mix. Gently loosen the roots with your fingers before transplanting to avoid damaging them. Rowan seedlings develop a strong taproot early, so handle them carefully—disturbing the root ball can stunt growth for months.
Place the pots in a south-facing window or under grow lights for 14-16 hours of light daily. Rowan seedlings need strong light to prevent leggy growth, which weakens their cold hardiness. If you notice stems stretching toward the light, move the seedlings closer or add a second light source. You'll know they're getting enough light when the leaves are deep green and compact.
⏰ Step 5: Harden Off and Prepare for Outdoor Planting
About 6 weeks before your last frost date, start hardening off the seedlings. Begin by placing them outside in a shaded, sheltered spot for 1-2 hours the first day. Gradually increase their outdoor time over 2-3 weeks, eventually leaving them out overnight. Rowan seedlings are tough, but abrupt temperature changes can shock them—this gradual process builds resilience.
Before planting outdoors, choose a site with full sun to partial shade and well-draining soil. Rowan trees tolerate a range of soil types but perform best in slightly acidic conditions. Plant the seedlings 12-18 inches apart in a prepared bed, watering deeply at the base. Mulch with 2-3 inches of organic mulch to retain moisture and protect the roots from temperature swings.
Tips & tricks for perfect rowan tree seedlings
Here's what nobody tells you about getting rowan seeds to sprout reliably—these tricks have saved me from wasted batches.
Stratification Success: For the 60-90 day cold stratification in Step 1, I use a small plastic container with a damp paper towel folded into a single layer. Place the sealed container on a shelf in your fridge's crisper drawer—it maintains consistent 35-40°F humidity without freezer burns. The key is checking every 10-14 days for root emergence; if you see white roots, they're ready to plant immediately. I've found that 90 days gives the highest germination rates because it fully mimics winter conditions.
Medium Prep Secret: When preparing your 2-3 inch deep pots in Step 2, I recommend mixing your sterile seed-starting mix with 10% perlite by volume before filling the pots. This improves drainage while maintaining moisture retention. After planting, I press the soil surface lightly with my thumb to create a firm seedbed—this prevents seeds from sinking deeper than the required ¼ inch planting depth during watering. The ¼ inch perlite layer on top also helps prevent damping-off by creating an air barrier.
Germination Environment: For the 65-75°F germination temperature in Step 3, I've had the most success using a seedling heat mat set to 70°F under my germination pots. Place them under grow lights on a 16-hour cycle (lights on at 6am, off at 10pm) to simulate natural daylight patterns. The bright, indirect light is crucial—direct sun can cause temperature spikes that dry out seeds before they sprout. I monitor humidity by misting the plastic bag daily until condensation forms on the inside.
Pro Tips for Rowan Tree Seedlings
- Here's what nobody tells you about getting rowan seeds to sprout reliably—these tricks have saved me from wasted batc...
- Stratification Success: For the 60-90 day cold stratification in Step 1, I use a small plastic container with a damp ...
- Medium Prep Secret: When preparing your 2-3 inch deep pots in Step 2, I recommend mixing your sterile seed-starting m...
Frequently asked questions
Got questions about growing rowan tree seedlings?
You’re not alone! Here are answers to the most common queries to help you get started with confidence.
How long does it take for rowan tree seeds to germinate?
Rowan tree seeds can take anywhere from 4 to 12 months to germinate—patience is key! Cold stratification (mimicking winter) speeds this up. Plant seeds in fall or soak them in water for 24 hours before sowing in well-draining soil. Keep them moist but not soggy until sprouts appear.
Can I grow rowan seedlings indoors before transplanting outdoors?
Start seeds indoors in biodegradable pots (like peat or coconut coir) 8–12 weeks before your last frost date. Use a sunny windowsill or grow light, and harden off seedlings by gradually exposing them to outdoor conditions for 1–2 weeks before transplanting in spring.
What’s the best soil mix for rowan tree seedlings?
Rowan seedlings thrive in well-draining, slightly acidic soil (pH 5.0–6.5). Mix equal parts potting soil, perlite, and compost for ideal conditions. Avoid heavy clay, which can suffocate roots. Amend native soil with organic matter if it’s compacted or poor.
Why aren’t my rowan seeds sprouting? Troubleshooting tips.
If seeds aren’t germinating, check these fixes:
- Lack of stratification: Rowan seeds need cold exposure. Try placing them in a sealed bag with damp peat moss in the fridge for 6–8 weeks.
- Too dry/wet: Keep soil consistently moist (like a wrung-out sponge). Overwatering can cause rot.
- Poor seed viability: Test a few seeds in warm water—if they sink, they’re likely viable. Old seeds may need scarification (lightly sanding the outer shell).
Are there faster-growing alternatives to rowan tree seedlings?
If you need quick shade or ornamentals, consider grafted rowan trees (available at nurseries) or other cold-hardy species like serviceberry or hazelnut. While seedlings take time, they’re more affordable and offer unique genetic diversity. For instant color, pair rowan with dogwood or viburnum.
Wrapping up and next steps
Growing rowan tree seedlings is a rewarding way to nurture a resilient, cold-hardy tree that thrives in diverse climates. With the right preparation—from selecting fresh seeds to providing consistent moisture and patience—you’ll soon witness vibrant new growth.
Whether you’re restoring a landscape, supporting local ecosystems, or simply enjoying nature’s beauty, these six steps make it simple to get started.
Ready to take the next step? Plant your seeds today and watch your rowan tree flourish! For extra guidance, explore local gardening forums or consult a horticulturist to tailor your approach to your region’s unique conditions. Happy growing! 🌱