
Pruning
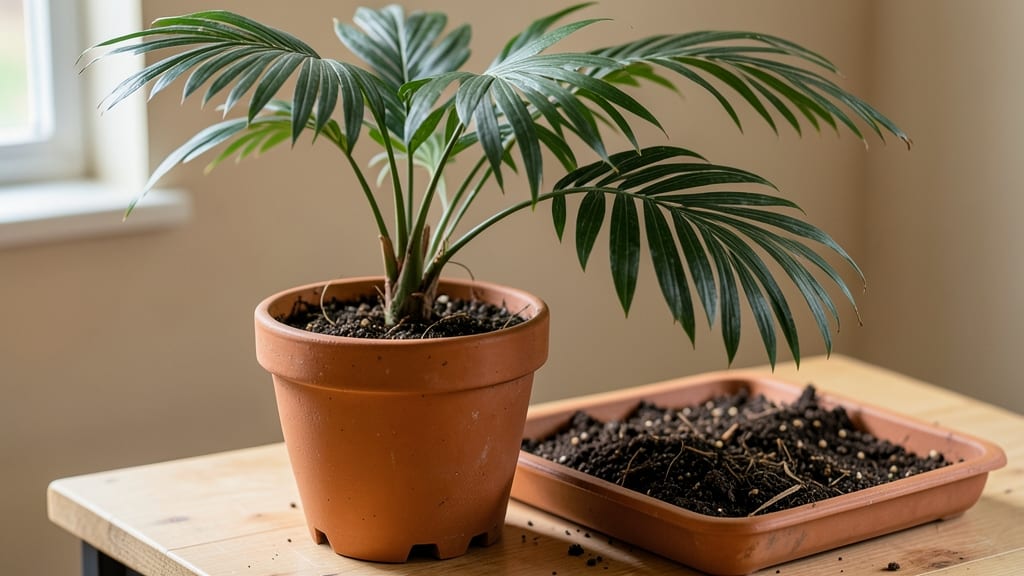
Repotting a palm tree isn't just about giving it more space—it’s the key to unlocking that healthy, vibrant growth you love. 🌿 I’ve watched palms languish in cramped pots, their fronds yellowing from root-bound stress, and now I know exactly when and how to refresh them.
The timing matters: do it in early spring when roots are active but before summer’s heat hits, or late summer for tropical varieties craving a change before winter slows them down.
You’ll need a pot 2-4 inches larger in diameter than the current one, with drainage holes—palms hate soggy feet—and a well-draining mix of 50% potting soil, 30% perlite, and 20% orchid bark. Skip the heavy garden soil; it compacts and suffocates roots.
For species like Kentia or Areca, a slightly snug pot encourages slower, stronger growth, while Canary palms can handle a roomier upgrade. The goal? Mimic their natural habitat: airy, fast-draining, and never waterlogged.
After gently teasing the roots free, you’ll see the difference between a struggling plant and one ready to thrive: firm, white roots (healthy) versus dark, mushy ones (rotted). Trim any circling roots with sterilized shears, then nestle the palm into its new home, backfilling with fresh mix.
Water lightly at first—just enough to settle the soil—and keep it out of direct sun for a week to reduce transplant shock. Within months, you’ll spot new fronds unfurling, proof that you’ve given it the fresh start it needed.
The secret to long-term success? Repot every 2-3 years for young palms, or when roots circle the pot like a nest. And here’s the pro tip: if your palm drops fronds after repotting, it’s normal—just don’t overwater.
Patience pays off: a well-repotted palm can live for decades, its roots spreading like a hidden network beneath the soil, supporting every leaf above. Ready to give yours the upgrade it deserves?
📚 In This Guide
- What you need
- Instructions
- Tips and common mistakes
- Wrapping up and next steps
What you need
- ● New pot: Choose one 2-4 inches larger in diameter than the current pot (e.g., if your palm is in a 12-inch pot, opt for a 14-16-inch one). Ensure it has drainage holes at the bottom.
- ● High-quality potting mix: Use a well-draining, slightly acidic mix (pH 5.5–6.5) designed for palm trees or tropical plants. Avoid garden soil—it compacts too easily! Aim for 3–5 gallons, depending on pot size.
- ● Gloves: Heavy-duty gardening gloves to protect your hands from sharp fronds and potential irritants.
- ● Pruners or shears: Sterilized, sharp pruners to trim dead fronds or roots if needed.
- ● Watering can or hose: For gentle watering after repotting (avoid over-saturating the roots).
- ● Root stimulator: A liquid or powder rooting hormone to encourage healthy regrowth (follow label instructions).
- ● Pot saucer or tray: To catch excess water and prevent messes.
- ● Knee pad or stool: For comfort if your palm is large or heavy.
- ● Aluminum foil or plastic wrap: To cover the pot temporarily if repotting in hot or cold weather.
Step-by-Step guide for repotting palm trees
Here's how to refresh your palm's home without stressing its roots.
🪴 Step 1: Choose the Right New Pot and Timing
Select a container 2-4 inches wider than the current pot—just enough room for roots to spread without overwhelming the plant. I always opt for terracotta or fiberglass because they breathe better than plastic and prevent root rot. Palm trees need repotting every 2-3 years, or when roots circle the pot's bottom.
Timing matters: spring or early summer gives roots time to establish before winter dormancy. Avoid repotting in fall or winter when growth slows. You'll know it's time when roots peek through drainage holes or the soil dries out in 2-3 days—a sign the root system has outgrown its space.
🌿 Step 2: Prepare the New Container and Soil Mix
Fill the new pot 1/3 full with a well-draining mix designed for palms or tropical plants. I blend 50% peat moss, 30% perlite, and 20% coarse sand to mimic the airy, fast-draining conditions palms thrive in. Avoid garden soil—it compacts and suffocates roots.
Add a 2-inch layer of orchid bark or pine bark fines at the bottom for extra drainage. This prevents waterlogging, which is deadly for palms. Moisten the mix lightly before adding the plant—dry soil can shock roots during transplant.
💧 Step 3: Carefully Remove and Transplant the Palm
Water the palm 24 hours before repotting to reduce root shock. Gently squeeze the sides of the old pot while tipping it to loosen the root ball. If roots are circling tightly, use a knife to tease them apart—this encourages outward growth. Place the palm in the new pot so the top of the root ball sits 1 inch below the rim for stability.
Fill gaps with your prepared mix, pressing lightly to eliminate air pockets. Don't pack it down too firmly—palm roots need room to breathe. After repotting, water thoroughly until water runs out the drainage holes. This settles the soil and rehydrates roots.
☀️ Step 4: Provide Recovery Care for Strong Growth
Place the repotted palm in bright, indirect light for the first 2 weeks—direct sun can stress newly transplanted roots. I keep mine near an east-facing window or under 50% shade cloth until new growth appears. Resume normal light exposure once you see new fronds unfurling.
Water lightly every 3-4 days for the first month, checking that the top 1-2 inches of soil feel dry before watering again. Overwatering now can drown fresh roots. Fertilize lightly with a balanced palm fertilizer (like 8-8-8) only after 6 weeks—roots need time to adapt before taking up nutrients.
⏰ Step 5: Monitor for Signs of Stress or Success
Watch for new fronds in 4-6 weeks—this is your sign the palm is recovering. Healthy growth means the repotting went well. If leaves yellow or brown at the tips, it’s usually overwatering or poor drainage. Adjust your watering schedule and check that excess water drains freely.
If the palm drops leaves suddenly, it’s likely root-bound shock. Trim any damaged fronds and reduce light slightly. Most palms bounce back within 8-12 weeks with proper care. This is the moment that matters: patience now ensures a thriving palm for years.
Tips & tricks for healthy palm tree repotting
Don't let repotting stress overwhelm you—these simple tricks will help your palm thrive.
Pot Size Matters: The 2-4 inch wider rule isn't just about space—it's about balance. Too much room causes soil to stay wet too long, while too little restricts roots. I always measure the root ball first: if it's 12 inches wide, I pick a 14-16 inch pot. This gives roots room to grow without overwhelming the plant immediately.
Root Health Check: When you see roots circling in Step 3, don't just cut them—tease them apart gently with your fingers first. This encourages outward growth. If roots are matted tightly, soak the root ball in water for 10 minutes to loosen it before transplanting. This makes the repotting process much smoother and reduces shock.
Soil Preparation Secret: That 2-inch layer of orchid bark at the bottom isn't just for drainage—it creates an air pocket that prevents waterlogging. I like to add a handful of activated charcoal to this layer too (optional), which helps prevent bacterial growth in the fresh soil. This small addition makes a big difference in keeping roots healthy during recovery.
Recovery Light Strategy: During those first 2 weeks of bright indirect light, position your palm near a window where it gets morning sun but afternoon shade. East-facing windows work perfectly. If you don't have that option, use a sheer curtain to diffuse direct sunlight—palms are tropical plants that need protection from intense midday rays while they recover.
Pro Tips for Repotting A Palm Tree
- Don't let repotting stress overwhelm you—these simple tricks will help your palm thrive.
- Pot Size Matters: The 2-4 inch wider rule isn't just about space—it's about balance.
- Root Health Check: When you see roots circling in Step 3, don't just cut them—tease them apart gently with your fingers first.
Frequently asked questions
Got questions about repotting your palm tree? You’re not alone! Here are some of the most common concerns—and their straightforward solutions—to keep your tropical beauty thriving.
How often should I repot my palm tree?
Palms typically need repotting every 2–3 years or when roots start circling the pot or poking out of drainage holes. Young palms grow faster, so they may need repotting annually. Always check for root-bound signs—if roots are densely packed, it’s time for a refresh!
What’s the best time of year to repot a palm tree?
Spring or early summer is ideal for repotting, as warmer temperatures encourage root recovery. Avoid winter or cold seasons—palms are dormant and stressed, making repotting riskier. If you must repot in cooler months, choose a mild day and protect your palm from drafts or chilly winds.
Can I repot a palm tree during flowering or fruiting?
Yes, but time it carefully! Repotting during flowering or fruiting won’t harm the plant, but it may cause stress that delays new blooms or fruit development. If your palm is flowering, wait until the blooms fade slightly before repotting. For fruiting palms, repot after harvest to avoid diverting energy away from root establishment.
What if my palm tree looks stressed after repotting?
Stress is normal—yellowing leaves, wilting, or slowed growth are common for 4–6 weeks. To help your palm recover, keep it in bright, indirect light, water moderately (let the top inch of soil dry), and avoid fertilizing for 2–3 months. If stress persists beyond 2 months or roots rot, check for overwatering or poor drainage.
Is it better to repot a palm tree in its original pot or upgrade to a larger one?
Upgrade to a pot that’s 2–3 inches wider than the current one for optimal root growth. If roots are severely tangled, gently tease them apart or trim the oldest, most compacted roots. Avoid oversizing—the extra soil can stay soggy, promoting root rot. For container palms, ensure the new pot has drainage holes!
Wrapping up and next steps
Repotting your palm tree doesn’t have to be intimidating—with the right tools, timing, and care, you’ll give your plant a fresh start for years of lush, healthy growth! 🌿 Remember, patience and gentle handling are key, whether you’re upgrading its pot or refreshing its soil.
Now that you’re equipped with the know-how, take the plunge and watch your palm thrive in its new home.
Ready to level up your green thumb? Check out our guide on palm tree care next to keep your tropical beauty flourishing year-round!