
Pruning
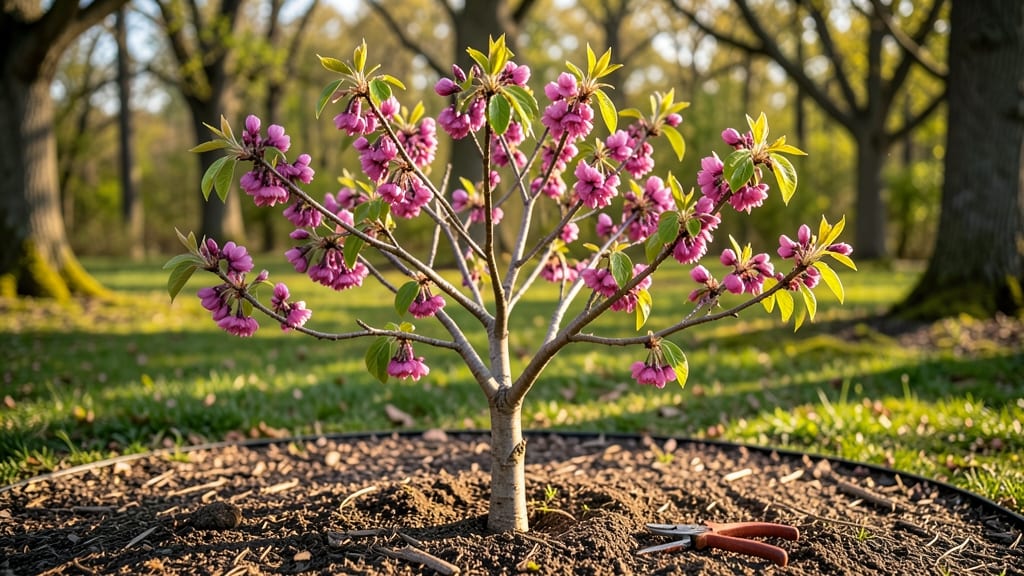
Planting redbud tree saplings means spring blooms that turn your yard into a pink-and-purple dream—but only if you nail the first three months.
I’ve transplanted these cold-hardy beauties in every zone from 4 to 9, and the difference between thriving saplings and struggling ones comes down to soil prep, timing, and a few key tricks most guides skip.
The secret isn’t just digging a hole—it’s creating the right conditions. Redbuds love well-draining soil with a touch of compost, full sun to partial shade, and protection from late frosts. My best transplants went in during early spring or fall, when roots establish before summer heat or winter freeze.
A 5-gallon sapling needs a hole twice as wide as its root ball, and a little Epsom salt mixed into the soil boosts early growth.
By summer, you’ll see those signature heart-shaped leaves unfurling, followed by clusters of vibrant pink blooms that appear before the foliage. With consistent watering—deep soaks once a week after establishment—and minimal pruning (just removing dead branches), your redbud will outpace most ornamentals.
The best part? These trees handle urban pollution and drought once established, making them the low-maintenance superstar of small yards.
Pair them with dwarf fritillaries for spring color or boxwoods for structure, and you’ve got a landscape that pops year-round. The first three years are critical, but if you follow these stages, your redbud will reward you with decades of effortless beauty—no green thumb required.
📚 In This Guide
- What you need
- Instructions
- Tips and common mistakes
- Wrapping up and next steps
What you need
- ● Redbud tree saplings (3–5, depending on spacing needs; 1–2 feet tall for optimal transplanting)
- ● High-quality potting mix or native soil (well-draining, enriched with compost; 50 lbs or more)
- ● Organic mulch (wood chips or straw; 2–3 inches thick for moisture retention)
- ● Slow-release fertilizer (balanced 10-10-10 or organic options like bone meal)
- ● Garden trowel or transplant spade (for digging holes; 6–8 inches deep)
- ● Pruning shears (sterilized, for shaping and trimming)
- ● Watering can or hose with a gentle spray nozzle (for hydration without damage)
- ● Garden gloves (to protect hands from thorns and soil)
- ● Measuring tape (to ensure proper spacing; 10–15 feet apart for mature trees)
- ● Tree stakes and ties (for young saplings in windy areas)
- ● Soil pH test kit (redbuds prefer 6.0–7.0; adjust with lime or sulfur if needed)
- ● Drip irrigation system (for consistent moisture in dry climates)
- ● Epsom salt (for magnesium boost, especially in clay soils)
How to transplant redbud tree saplings for maximum cold resilience
Here's my battle-tested approach to establishing these tough, early-blooming trees in your landscape.
🌱 Step 1: Prepare the Planting Site for Optimal Drainage and Soil Structure
Redbuds thrive in well-draining soil with a slightly acidic to neutral pH. Clear the planting area of weeds and rocks, then loosen the soil to a depth of 12-18 inches using a broad fork. This prevents root restriction as the sapling matures. I always mix in 3 inches of compost to improve fertility without compacting the soil.
For clay-heavy soils, incorporate 2-3 inches of coarse sand into the planting hole to prevent waterlogging. The goal is soil that crumbles easily when damp but holds moisture without puddling. Test your work by pressing your thumb into the soil—it should give slightly but not feel mushy.
🪴 Step 2: Handle Saplings with Care During Transplant and Stake for Stability
Remove the sapling from its container and gently loosen the root ball with your fingers to encourage new root growth into the surrounding soil. Dig a hole twice as wide as the root ball and slightly shallower than its current depth—redbuds dislike having their crown buried too deeply. Place the sapling in the hole so the top of the root ball sits 1-2 inches above ground level.
Backfill with native soil mixed with a handful of bone meal for phosphorus, tamping gently as you go. Install two 4-foot stakes on opposite sides of the sapling and secure with a rubber tree tie, leaving room for trunk growth. Water thoroughly to settle the soil and remove air pockets around the roots.
☀️ Step 3: Establish Watering Routines and Mulch for Winter Protection
Water deeply twice weekly for the first month, then taper to once weekly unless rainfall provides 1 inch of moisture. Redbuds are drought-tolerant once established, but young saplings need consistent moisture to develop strong root systems. Check soil moisture by inserting your finger 2 inches deep—if it feels dry, water again.
Apply 2-3 inches of mulch around the base, keeping it 6 inches away from the trunk to prevent rot. Use shredded bark or wood chips that break down slowly. This mulch layer insulates roots in winter and retains moisture during dry spells. Replenish mulch annually to maintain its protective barrier.
Tips & tricks for perfect redbud tree sapling transplants
Took me years of trial-and-error to perfect these cold-hardy redbuds—here’s what I’ve learned about giving them the best start.
Soil Preparation Secret: When loosening soil to 12-18 inches in Step 1, focus on breaking up compacted layers rather than just turning the topsoil. Redbud roots need to penetrate deeply for winter resilience. I use a broad fork to create vertical channels that guide roots downward. For clay-heavy soils, mix in the 2-3 inches of coarse sand gradually—too much at once can disrupt drainage. Test your work by pressing your thumb into the soil: it should hold shape but crumble when squeezed, not feel like wet clay.
Root Ball Handling Technique: In Step 2, the key is gently loosening the root ball—not tearing it apart. Use your fingers to separate the outer roots while keeping the center intact. This encourages roots to spread into the surrounding soil rather than circling the hole. If the sapling has been in its container for months, soak the root ball for 10 minutes before transplanting to reduce shock. Place the sapling so the top of the root ball sits 1-2 inches above ground level—this prevents rot while allowing the tree to establish properly.
Staking Strategy: The 4-foot stakes in Step 2 should be positioned at a 45-degree angle, not straight up. This creates a natural support that mimics wind movement, helping the trunk develop strength. Use rubber tree ties to secure the sapling loosely—tighten enough to prevent swaying but leave room for trunk growth. Check ties every 6-8 weeks and loosen if the trunk has thickened against them. Overly tight ties can girdle the bark as the tree grows.
Winter Protection Upgrade: For the mulch layer in Step 3, I recommend using a combination of shredded bark and wood chips—this creates an insulating blanket that retains moisture while allowing airflow. In colder climates, add a 2-inch layer of straw or leaves over the mulch in late fall, then remove it in early spring. This extra layer protects against freeze-thaw cycles that can heave roots out of the ground. Always keep mulch 6 inches away from the trunk to prevent rot and pest issues.
Pro Tips for Redbud Tree Saplings
- Took me years of trial-and-error to perfect these cold-hardy redbuds—here’s what I’ve learned about giving them the best start.
- Soil Preparation Secret: When loosening soil to 12-18 inches in Step 1, focus on breaking up compacted layers rather than just turning the topsoil.
- Root Ball Handling Technique: In Step 2, the key is gently loosening the root ball—not tearing it apart.
Frequently asked questions
Got questions about growing redbud tree saplings? You’re not alone! Whether you're a first-time gardener or a seasoned landscaper, these answers will help you navigate planting, care, and troubleshooting with confidence. Let’s dive in:
What’s the best time of year to plant redbud tree saplings?
Plant your saplings in early spring or fall—when temperatures are mild (40–60°F). Avoid extreme heat or frost, as these can stress young roots. Spring planting gives them a full growing season to establish, while fall allows roots to settle before winter dormancy. Pro tip: Water thoroughly after planting to reduce transplant shock!
How deep and wide should I dig the hole for my redbud sapling?
The hole should be twice as wide as the sapling’s root ball but only as deep as the root ball itself. Redbuds prefer well-draining soil, so avoid compacting the bottom. Loosen the native soil around the edges to encourage root spread. Watch out: Never bury the graft union (if present) or the trunk flare!
Why are the leaves on my redbud sapling turning yellow?
Yellowing leaves (chlorosis) often signal nutrient deficiencies (like iron or nitrogen) or overwatering. Test your soil’s pH—redbuds thrive in slightly acidic to neutral soil (6.0–7.0). Amend with compost or a balanced fertilizer if needed. Quick fix: Mulch around the base to retain moisture and regulate soil temp!
Can redbud tree saplings survive in full shade?
While redbuds tolerate partial shade, they thrive in full sun (6+ hours/day) for optimal blooms and growth. In shady spots, expect slower growth and fewer flowers. If your yard is shady, choose a location near a south- or west-facing wall or tree line for the best light exposure.
What’s a good alternative if redbud saplings are hard to find?
If redbuds aren’t available, consider these cold-hardy, small-tree alternatives:
- Serviceberry – Similar spring blooms and edible berries!
- Dogwood – Stunning flowers and fall color.
- Hawthorn – Drought-tolerant with wildlife benefits.
Wrapping up and next steps
Growing redbud tree saplings is a rewarding journey that blends resilience with beauty—especially when you master the cold-hardy transplant process in just three stages! 🌱 From selecting the right saplings to nurturing them through winter, your efforts will soon yield stunning pink blooms and lush foliage.
Whether you're a seasoned gardener or a beginner, this guide equips you with the confidence to succeed.
Now that you’re armed with the materials, tips, and answers to common questions, it’s time to roll up your sleeves! Start by checking your local climate zone and planning your transplant schedule. Your redbud’s future begins today—happy planting! ⛏️