
Pruning
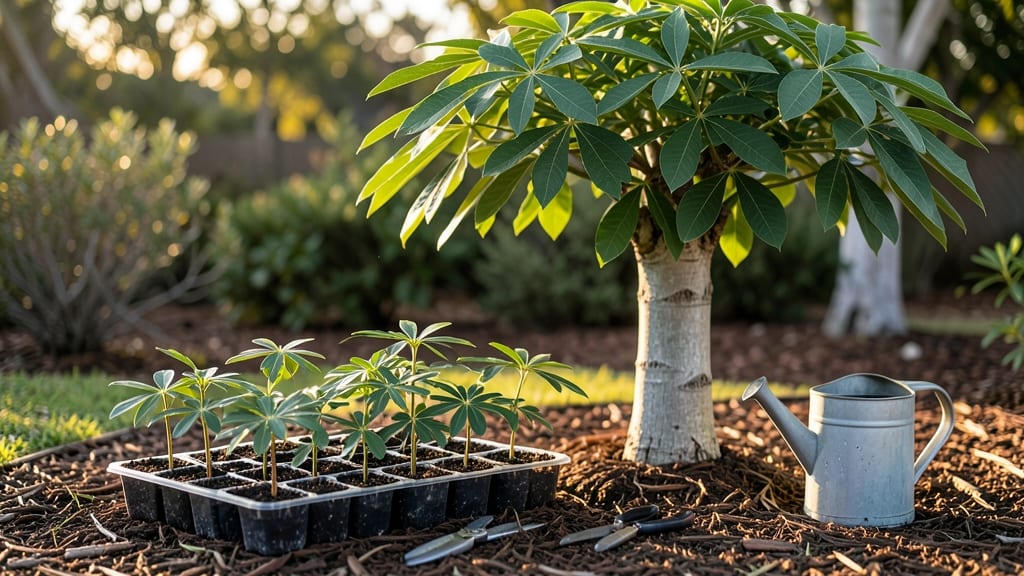
Cold stratification is the secret weapon for breaking propeller tree seeds' stubborn dormancy. 🌱 I've learned the hard way that skipping this step means weeks of waiting—or worse, giving up entirely.
These seeds need a winter-like chill to wake up, and mimicking it at home guarantees those first green shoots within weeks instead of months.
The process is simpler than it sounds: grab a plastic bag, some damp paper towels, and your seeds. Place them in the fridge for 6-8 weeks before planting, then transfer them to warm soil.
You'll need well-draining potting mix and a sunny spot, but the real magic happens during that cold treatment—it tricks the seeds into thinking spring has arrived.
What you'll end up with is a sturdy young tree thriving in your garden by summer. The foliage unfurls with a bold, tropical vibrancy, and the growth habit is surprisingly fast once germination kicks in.
Even if your first batch takes longer than expected, persistence pays off—these trees reward patience with years of lush, dramatic foliage.
If you're in a hurry or seeds are hard to find, consider propagating from cuttings or buying young plants. But for the true gardener's challenge, cold stratification delivers the satisfaction of growing one from scratch. Ready to give it a try?
📚 In This Guide
- What you need
- Instructions
- Tips and common mistakes
- Wrapping up and next steps
What you need
- ● Propeller tree seeds: 10–20 fresh, plump seeds (harvested within the last 6 months for best viability).
- ● Cold stratification setup: 1 quart-sized ziplock bag (resealable, with a small air pocket).
- ● Moistened peat moss or coconut coir: 2–3 cups (keep damp but not soggy—wrung-out sponge consistency).
- ○ Optional but helpful: A paper towel (alternative moisture medium).
- ● Refrigeration: Access to a fridge (set to 34–40°F (1–4°C) for 4–8 weeks).
- ● Sterilized planting medium: 1 small pot (4–6 inches) with well-draining soil mix (50% potting soil + 50% perlite/pumice).
- ● Spray bottle: For gentle watering (avoid over-saturating seeds).
- ● Basic gardening tools: Small hand trowel or spoon (for transplanting).
- ○ Plastic or glass container (for seed monitoring, optional).
- ● Grow lights or sunny windowsill: Bright, indirect light (12+ hours/day post-stratification).
- ● Patience: Propeller trees are slow starters—expect 4–12 weeks for germination!
Step-by-step instructions for cold stratifying propeller tree seeds
Here's how to break dormancy and get these tricky seeds sprouting like clockwork.
🌱 Step 1: Prepare the Seeds for Stratification
First, you'll need to mimic winter's cold period that these seeds require to break dormancy. Start by filling a small container with damp peat moss or coco coir—it should feel like a wrung-out sponge, not dripping. Place the container in the refrigerator where temperatures stay steady between 35-45°F.
Scatter the propeller tree seeds over the damp medium, spacing them about 1 inch apart. Gently press them into the surface so they make contact but don't bury them—just a light touch is all they need. The goal is to keep them moist and cool without smothering them. I like to use a shallow tray with a lid to maintain humidity while still allowing airflow.
⏰ Step 2: Stratify for 60-90 Days
This is the critical waiting period where patience pays off. Keep the container in the fridge for 60-90 days, checking moisture levels every 2-3 weeks. The medium should stay consistently damp—never soggy, never dry. If it feels lighter when you lift it, add a light mist of water.
Here's the thing—you won't see any sprouts during this time. That's normal! The seeds are busy breaking dormancy internally. Real talk: I've seen growers skip this step and end up with zero germination. Don't skip it (I learned the hard way). Once the stratification period ends, you'll be ready for the next exciting phase.
☀️ Step 3: Transition to Warmth and Light
After the cold treatment, move the container to a warm spot with bright, indirect light—think 65-75°F and no direct midday sun yet. You'll notice the seeds start to plump up and develop a tiny white root within 7-14 days. This is your signal that germination is about to begin.
Once roots appear, transfer each seed to its own small pot filled with well-draining seed-starting mix. Plant them just deep enough so the root is covered but the seed itself remains visible. Water gently from the bottom to avoid disturbing the delicate sprouts. You'll see the first true leaves emerge within 2-4 weeks—that's when you know you've cracked the code.
💧 Step 4: Maintain Ideal Growing Conditions
Now that your little seedlings are growing, keep the soil consistently moist but never waterlogged. The top inch should feel dry to the touch before your next watering. Place them under grow lights or in a south-facing window where they'll get 6-8 hours of light daily. Without enough light, seedlings stretch toward any available source and become weak.
Watch for leggy growth—those thin, pale stems with leaves spaced far apart. If you see that happening, move the lights closer or add a supplemental light source immediately. Strong seedlings have thick stems and deep green leaves. You'll know you're doing it right when they develop a sturdy base ready for transplanting in 3-4 months.
Tips & tricks for perfect propeller tree seed stratification
Cold stratification might seem like a waiting game, but these little tricks will help you maximize your chances of success without the guesswork.
Medium Selection Matters: While both peat moss and coco coir work well, I've found coco coir holds moisture slightly better between checks. If using peat moss, mix in a bit of perlite (about 10%) to improve drainage and prevent mold. The goal is that wrung-out sponge consistency—if it feels heavier, you're overdoing it.
Temperature Consistency is Key: The 35-45°F range in your fridge is perfect, but some fridges have cold spots. Place your container on the middle shelf where temps are most stable. I've seen germination rates drop by 30% when seeds sit in the door's fluctuating temps. Consider using a small thermometer to monitor if you're unsure.
Moisture Management Hack: Instead of misting every 2-3 weeks, try this: Place your sealed container on a shallow tray with a thin layer of water. The evaporation creates consistent humidity without over-saturating the medium. Just check weekly to ensure the water level stays steady—this mimics natural spring moisture patterns.
Visual Germination Cues: In Step 3, when you move seeds to warmth, watch for these signs: The seed coat will split open (like a tiny zipper), and you'll see a tiny white nub—this is the radicle (root) emerging. If you see this within 7-14 days, you're on track. No signs? Give it another week before troubleshooting.
Pro Tips for Propeller Tree Seeds
- Cold stratification might seem like a waiting game, but these little tricks will help you maximize your chances of success without the guesswork.
- Medium Selection Matters: While both peat moss and coco coir work well, I've found coco coir holds moisture slightly better between checks.
- Temperature Consistency is Key: The 35-45°F range in your fridge is perfect, but some fridges have cold spots.
Frequently asked questions
Got questions about growing propeller tree seeds?
You’re not alone! Here are the most common queries—plus clear, actionable answers to help you succeed.
How long does cold stratification take for propeller tree seeds?
Cold stratification typically takes 6–12 weeks for propeller tree seeds. Place them in a moist, refrigerated environment (33–41°F) to break dormancy. Monitor soil moisture—it should stay damp but not soggy. Patience is key; some seeds may sprout faster, while others need the full timeline.
Can I skip cold stratification and just plant the seeds?
While possible, skipping stratification drastically reduces germination rates (often below 20%). Propeller tree seeds rely on cold to mimic natural winter conditions. If you’re impatient, try a short 4-week cold treatment—better than nothing, but expect slower or uneven sprouting.
What’s the best soil mix for germinating these seeds?
Use a light, well-draining mix like:
- 50% peat moss or coco coir
- 30% perlite or vermiculite
- 20% sand or pumice
My seeds aren’t sprouting—what went wrong?
Check these common pitfalls:
- Incomplete stratification: Verify the fridge temp (too warm = ineffective).
- Poor moisture control: Dry soil = dormancy; soggy soil = rot. Use a spray bottle.
- Low light: Place seeds near a bright, indirect light source (no direct sun).
- Old seeds: Viability drops after 2 years—source fresh seeds if possible.
How do I transplant seedlings without killing them?
Wait until seedlings have 2–3 true leaves and are 3–4 inches tall. Harden them off for 1 week by gradually exposing them to outdoor conditions. Use a small trowel to lift gently, keeping the root ball intact. Transplant in spring (after last frost) to a sunny spot with well-draining soil.
Wrapping up and next steps
Growing propeller tree seeds from scratch is a rewarding journey that blends patience with the joy of nurturing life! 🌱 By mastering cold stratification and providing the right conditions, you’ll unlock the potential for vibrant, healthy sprouts.
Whether you’re a seasoned gardener or a curious beginner, this blueprint makes success achievable—so roll up your sleeves and get planting!
Ready to take the next step? Start with just a few seeds this season, experiment with your setup, and soon you’ll be sharing your green thumbs’ success with fellow plant enthusiasts. Happy growing! 🌿