
Pruning
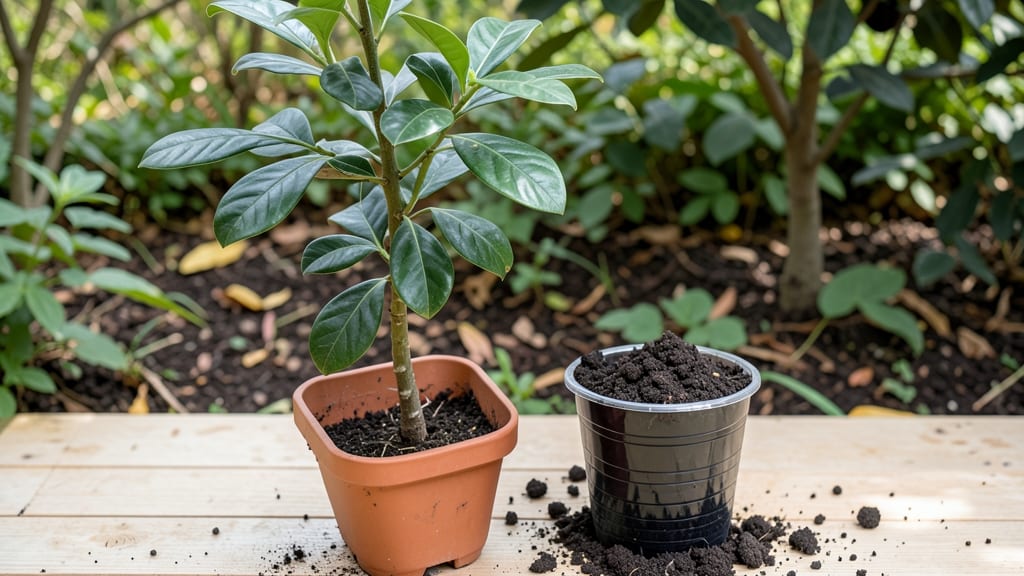
Potting your avocado tree is the moment it stops being a science experiment and starts becoming a houseplant you can actually grow. 🌱 That first little root poking through the pit is just the beginning—now you’ll turn it into a sturdy plant with the right pot, soil, and care routine.
The key is understanding what avocado trees actually need, not just what looks good on Pinterest.
You’ll need a 6-inch pot (or larger as it grows), well-draining potting mix, and a little patience—avocado trees hate soggy feet. I’ve repotted mine twice, and the difference in growth after switching to a terracotta pot with drainage holes was shocking.
No more yellow leaves or root rot, just steady upward progress.
By the time you’re done, you’ll have a plant that thrives in bright, indirect light and stays compact enough for a sunny windowsill. The first flush of new leaves after repotting is always a victory—proof you’ve given it exactly what it needs.
Here’s how to avoid the three mistakes that kill most avocado seedlings.
This method works whether you’re starting with a 6-month-old seedling or a mature plant needing an upgrade. The same principles apply: good drainage, the right soil mix, and a pot that gives roots room to breathe. Let’s get your avocado tree settled in for good.
📚 In This Guide
- What you need
- Instructions
- Tips and common mistakes
- Wrapping up and next steps
What you need
- ● Avocado pit: One fresh, clean pit (no residue from the fruit).
- ● Water: Filtered or room-temperature tap water (avoid chlorinated water if possible).
- ● Small glass or jar: 8–16 oz, with a mouth wide enough to fit the pit (e.g., a mason jar or clean glass).
- ● Toothpicks or chopsticks: 3–4, to suspend the pit.
- ● Well-draining potting mix: 1–2 gallons of a blend like cactus/succulent mix or 50% potting soil + 50% perlite/pumice.
- ● 6–8 inch pot: With drainage holes (terracotta or plastic).
- ○ Spray bottle: For gentle watering (optional but helpful for humidity).
- ● Rooting hormone: Speeds up germination (apply when transplanting).
- ● Humidity dome or plastic wrap: Creates a mini greenhouse for the pit.
- ● Grow lights: If your space lacks bright, indirect sunlight.
- ● Fertilizer: Balanced, water-soluble fertilizer (e.g., 10-10-10) for later stages.
- ● Pebbles or charcoal: Adds drainage to the jar or pot.
How to pot an avocado tree from seed
Here’s how to turn that avocado pit into a sturdy, leafy plant ready for its first home.
🌱 Step 1: Prepare the Pit for Germination
Rinse the avocado pit to remove any remaining fruit flesh, then dry it with a paper towel. The key here is to expose the bottom third of the pit where the roots will emerge. Use a toothpick to gently poke three evenly spaced holes—about ¼ inch deep—around the pit’s middle. These holes will help anchor the toothpicks later.
Here’s the thing—don’t skip the drying step. A damp pit left in the open will rot before it even sprouts. Place it in a warm, dry spot for 1-2 days while you set up the rest of your supplies. You’ll know it’s ready when the surface feels slightly rough to the touch, not slick.
🪴 Step 2: Set Up the Water and Support System
Fill a jar or glass with 3-4 inches of water—just enough to submerge the bottom 1 inch of the pit. Insert 3 toothpicks into the holes you made, spacing them evenly so the pit floats with the pointed end down. The toothpicks should rest on the jar’s rim, keeping the pit suspended above the water.
Cover the jar loosely with plastic wrap or a plastic bag to create a mini greenhouse. This traps humidity and speeds up germination. Place the jar in a warm spot (around 70-75°F) with bright, indirect light—like a windowsill away from direct afternoon sun. You’ll notice tiny roots sprouting in 2-6 weeks, depending on your home’s warmth.
☀️ Step 3: Transplant the Sprouted Pit
Once the roots reach 2-3 inches long, it’s time to move the pit into soil. Fill a 6-inch pot with well-draining potting mix—avoid garden soil, which compacts and drowns roots. Moisten the mix until it’s damp but not soggy, then create a small hole in the center with your finger.
Gently lower the pit into the hole, covering the roots with soil up to where the toothpick holes were. Press lightly around the base to secure it, but don’t pack the soil too tightly. Water gently until it drains from the bottom, then place the pot in bright, indirect light for the first week. Overwatering now will rot the delicate roots—wait until the top ½ inch of soil feels dry before watering again.
🌿 Step 4: Care for the Young Seedling
After 4-6 weeks, you’ll see the first true leaves emerge from the top of the pit—that’s your signal to start fertilizing. Use a balanced, water-soluble fertilizer (like 10-10-10) diluted to half strength once a month. Keep the soil consistently moist but never waterlogged; avocado seedlings hate soggy feet.
Rotate the pot a quarter turn weekly so the plant grows straight toward the light, not lopsided. If you notice yellowing leaves, it’s usually a sign of overwatering or poor drainage. Adjust your watering to every 7-10 days, checking the soil’s moisture level with your finger. Real talk: The first year is the hardest—patience here pays off with a sturdy trunk.
Tips & tricks for potting an avocado tree
Here's what nobody tells you about growing a thriving avocado tree from seed—lessons I learned after watching three pits fail.
Germination Setup: The toothpick holes in Step 1 should be spaced evenly around the pit's equator, not clustered near one side. This ensures balanced support when floating. I used wooden toothpicks instead of plastic—they grip the pit better and won't melt if the jar gets too warm. For extra stability, angle the toothpicks slightly outward from the pit.
Water Level Watch: Maintain that 1-inch submersion in Step 2, but check it weekly—the water level drops as roots absorb moisture. Top off with fresh water only, never tap water with chlorine. I keep a small measuring cup nearby to maintain consistency. If roots start curling or turning brown, you're either over-submerging or using hard water.
Transplant Timing: Don't wait until roots reach 3 inches before transplanting in Step 3—move them when they hit 2 inches. Longer roots in water become more fragile and prone to breakage during transfer. Gently rinse the roots with lukewarm water before planting to remove any mineral buildup from the jar water.
Light Conditions: That bright, indirect light in Step 4 is critical, but most windowsills get too much direct sun. If you notice leaves turning yellow or crispy, move the pot back 2 feet from the window. I use a grow light on a timer for 12 hours daily during winter months when natural light is weak. The goal is to mimic avocado trees' natural understory habitat.
Pro Tips for Potting An Avocado Tree
- Here's what nobody tells you about growing a thriving avocado tree from seed—lessons I learned after watching three pits fail.
- Germination Setup: The toothpick holes in Step 1 should be spaced evenly around the pit's equator, not clustered near one side.
- Water Level Watch: Maintain that 1-inch submersion in Step 2, but check it weekly—the water level drops as roots absorb moisture.
Frequently asked questions
Got questions about potting your avocado tree? You’re not alone—growing one from a seed is full of curiosity! Here are answers to the most common questions to keep your plant on the right path.
How long does it take for an avocado seed to sprout?
Patience is key! Most avocado seeds sprout within 2–6 weeks, though some take up to 8 weeks. Keep the toothpick moist (not soggy) and in a warm, bright spot. If nothing happens after 8 weeks, the seed may not be viable—try another!
When should I repot my avocado tree?
Repot your avocado tree every 1–2 years or when roots circle the pot (a sign it’s root-bound). Spring or early summer is ideal. Choose a pot 2–3 inches larger in diameter and ensure it has drainage holes to prevent root rot.
Why is my avocado seed rotting?
Overwatering is the #1 culprit! Avocado seeds rot when kept too wet. Let the top 1–2 inches of soil dry out between waterings. If you notice mold or a foul smell, reduce watering and improve drainage by adding perlite or sand to the potting mix.
How much sunlight does an avocado tree need?
Avocados thrive in bright, indirect light (6+ hours daily). Too little light? Leggy growth or yellow leaves appear. Too much direct sun? Leaves may scorch. Start with a south- or west-facing window and gradually acclimate to outdoor shade if moving outside.
Can I grow an avocado tree in water instead of soil?
Yes, but it’s temporary! You can root the seed in water for 4–6 weeks to encourage sprouting, but once roots are 2–3 inches long, transfer it to soil. Water-only growth can lead to weak roots and nutrient deficiencies. Soil provides the stability and nutrients your tree needs long-term.
Wrapping up and next steps
Potting an avocado tree from seed is a rewarding journey that blends patience with the joy of nurturing life! 🌱 By following these steps—from selecting the right pit to providing the ideal growing conditions—you’re not just growing a plant; you’re cultivating a piece of nature’s magic.
While results may take time, every watering, pruning, and sunny window is a step toward success.
Ready to watch your tiny seedling grow? Next, explore care tips for young avocado trees—like fertilizing, repotting, and troubleshooting common issues—to keep your green friend thriving for years to come! 🌿✨