
Pruning
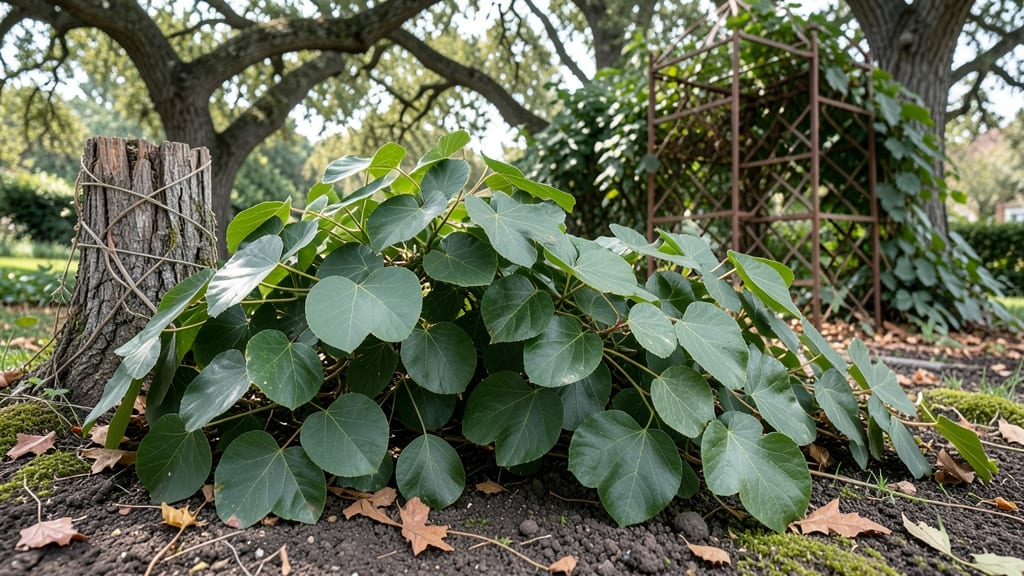
When a poison ivy tree invades your yard, it’s not just an eyesore—it’s a safety hazard that can ruin a weekend with blisters. I’ve wrestled with these stubborn vines, and the key to beating them is a methodical approach that protects you first.
One wrong move with those leaves, and you’ll be itching for days, no matter how careful you think you’re being.
The right tools and timing make all the difference. You’ll need heavy-duty gloves, long sleeves, and a sharp pruner to cut at the base, but the real secret is working on a clear day when the wind won’t carry those irritating oils into your clothes or skin.
I learned this the hard way after a gust sent me scrambling for the shower mid-project.
By the time you’re done, your yard will be free of those glossy, three-leafed invaders—and your skin will stay intact. The satisfaction of eradicating it completely is worth the effort, especially when you can finally enjoy that sunny spot without fear.
Just remember: patience and protection are your best allies here.
This method works for poison ivy growing up trees, along fences, or even in thick patches. The same rules apply whether you’re tackling a single vine or an entire infestation. Let’s get rid of it for good, the safe way.
📚 In This Guide
- What you need
- Instructions
- Tips and common mistakes
- Wrapping up and next steps
What you need
- ● Protective Gear: Long-sleeved shirt & pants (100% cotton or synthetic blend, no mesh or thin fabric)
- ● Heavy-duty work gloves (nitrile-coated, rated for chemical resistance—2 pairs for layering)
- ● Safety goggles (ANSI-rated, for debris and sap protection)
- ● N95 respirator mask (or higher, to avoid inhaling spores)
- ● Disposable coveralls (full-body, tyvek-style for ultimate protection)
- ● Removal Tools: Pruning shears (bypass-style, sharp—dull tools tear plants, spreading sap)
- ● Loppers (for thicker stems, 16-inch reach for safety)
- ● Handsaw (pruning saw with 7-9 teeth per inch for larger trunks)
- ● Shovel or mattock (for root removal, round-point for leverage)
- ● Heavy-duty trash bags (thick, 30-gallon minimum—5+ bags per tree)
- ○ Chemicals (Optional but Recommended): Glyphosate-based herbicide (e.g., Roundup, concentrate formula for cost savings)
- ● Horticultural vinegar (20-30% acetic acid, 1 gallon for spot treatment)
- ● Dish soap (unscented, 1 tbsp per gallon of water for sap cleanup)
- ● Weather Check: Schedule removal on a dry, wind-free day—moisture spreads oils faster!
- ● Safety Brief: Wash all gear in hot, soapy water (140°F+) post-use to kill lingering oils.
- ● Disposal Plan: Seal bags with duct tape and label "POISON IVY—DO NOT RECYCLE".
- ● Backup: Keep calamine lotion and hydrocortisone cream handy (just in case!).
Step-by-Step guide for safe poison ivy tree removal
Removing poison ivy from trees requires patience and the right approach. Here's how to tackle it without risking exposure or regrowth.
Protect Yourself and Your Work Area
First, gather your protective gear: long sleeves, thick gloves, goggles, and a mask to avoid skin contact or inhalation of spores. I always double-check that my clothes cover my arms and legs completely—even a small exposed patch can lead to a nasty rash. Lay down heavy-duty plastic sheeting or a tarp beneath the work area to catch falling debris, which can still contain urushiol oil.
Next, prepare a bucket of mild dish soap and water (1 tablespoon of soap per gallon of water). This solution helps neutralize the urushiol oil on tools and skin. Keep it nearby for immediate cleanup if any accidental contact occurs. I also recommend having a garden hose with a spray nozzle ready to rinse down tools and yourself after the job.
Cut and Remove the Poison Ivy
Start by cutting the poison ivy vine at its base using pruning shears or loppers. Work from the top down, making clean cuts about 6 inches below the leaf nodes to prevent regrowth. If the vine is thick, cut it into manageable sections—this makes disposal easier and reduces the risk of spreading seeds. I always wear my gloves while handling the plant, even when cutting, because the oil can linger on tools.
For larger infestations, you may need to repeat the process over several days to avoid overwhelming yourself. After cutting, bundle the vines into 3-foot-long sections and place them in heavy-duty trash bags. Seal the bags tightly to prevent any accidental contact with the oil. If the poison ivy is growing on a tree trunk, scrape off any remaining stems or roots with a putty knife or stiff brush, then dispose of the debris immediately.
Clean and Monitor for Regrowth
Once the poison ivy is removed, thoroughly clean all tools and equipment with the soap-and-water solution. Scrub pruners, loppers, and brushes with a stiff brush to remove any residual oil. Rinse everything with water and wipe down surfaces with a damp cloth. I also like to spray tools with rubbing alcohol for an extra layer of protection—it helps break down any remaining urushiol.
After removal, monitor the area for at least 2-3 weeks to check for new growth. Poison ivy can sprout from roots or seeds left behind, so stay vigilant. If you notice any regrowth, repeat the cutting process immediately. Keep protective gear on hand during these check-ins, just in case.
Dispose of the Poison Ivy Safely
Never throw poison ivy in your regular trash or compost—it can contaminate other materials and spread the oil. Instead, place the sealed trash bags in a heavy-duty contractor bag and tie it securely. Check your local waste disposal guidelines, as some areas require special handling for hazardous plants. I always double-bag the trash to be extra cautious, especially if the poison ivy was heavily infested.
If possible, dispose of the poison ivy at a designated hazardous waste facility. This ensures the material is handled safely and doesn’t pose a risk to waste collectors or the environment. After disposal, wash your hands thoroughly with soap and water, even if you wore gloves—urushiol can still get under them.
Tips & tricks for safe poison ivy tree removal
These practical strategies will help you tackle poison ivy removal without the risks or regrowth headaches.
Protective Gear Double-Check: In Step 1, make sure your gloves fit snugly—loose gloves can trap urushiol oil against your skin. I've learned the hard way that even a tiny gap can lead to a nasty rash. Also, consider wearing a long-sleeve shirt under your protective gear as an extra barrier, especially if you're working near your face or neck where skin is more sensitive.
Cutting Technique: When making those 6-inch cuts below leaf nodes in Step 2, use a sharp blade to avoid crushing the stems. Crushed stems release more urushiol oil, increasing your exposure risk. I recommend using a clean pair of pruning shears for each cut to prevent cross-contamination between healthy plants and poison ivy.
Cleanup Protocol: After Step 3's cleaning process, I've found that soaking tools in a solution of 1 tablespoon of bleach per gallon of water for 10 minutes provides extra protection against any remaining oil. This additional step gives me peace of mind knowing my tools are truly clean. Always dispose of the bleach solution properly after use.
Monitoring Strategy: During your 2-3 week monitoring period, I recommend marking the area with small flags or stakes to clearly identify where you've already checked. This visual reminder helps prevent missed spots and ensures you don't accidentally walk through treated areas. Consider checking at the same time each week to build a consistent monitoring routine.
Pro Tips for Poison Ivy Tree
- These practical strategies will help you tackle poison ivy removal without the risks or regrowth headaches.
- Protective Gear Double-Check: In Step 1, make sure your gloves fit snugly—loose gloves can trap urushiol oil against ...
- Cutting Technique: When making those 6-inch cuts below leaf nodes in Step 2, use a sharp blade to avoid crushing the ...
Frequently asked questions
Got questions about dealing with poison ivy trees?
You’re not alone—this pesky plant can be tricky to handle. Below, we’ve answered the most common questions to help you stay safe and effective during removal.
What’s the best time of year to remove a poison ivy tree?
The ideal time is late fall or early spring when the plant is dormant. This reduces regrowth risks and makes identification easier since leaves aren’t present. Avoid summer when sap is most active, increasing irritation chances. Pro tip: Wear long sleeves, gloves, and goggles year-round for protection!
How do I safely remove poison ivy without getting a rash?
First, avoid touching the plant—use tools like pruners or a shovel wrapped in plastic. Spray the area with vinegar or a commercial herbicide (like glyphosate) before cutting. Wear disposable coveralls and rinse tools with soap and water afterward. Pro tip: Shower immediately after with cold water and soap to remove urushiol oil!
Will cutting down a poison ivy tree make it grow back?
Yes! Poison ivy is resilient—cutting it alone often leads to regrowth from the roots. To fully eradicate it, you must apply herbicide to the stump or dig up the roots. For large trees, hire a professional to ensure complete removal. Pro tip: Monitor the area for new shoots for at least a year!
Can I burn poison ivy trees to get rid of them?
No!
Burning poison ivy releases urushiol oil into the air, which can cause severe rashes or even respiratory issues. Instead, bag the debris and dispose of it in sealed trash bags. Check local regulations—some areas require special disposal for invasive plants. Pro tip: Wet the plant first to reduce smoke and sap spread!
What’s a natural alternative to chemical herbicides for poison ivy?
For small patches, try vinegar (20-30% acetic acid) or dish soap mixed with water. Spray directly on leaves and stems, repeating weekly. Salt can also work but may harm surrounding plants. For trees, these methods are less effective—herbicides or professional help are often needed. Pro tip: Test natural solutions on a small area first!
Wrapping up and next steps
Removing a poison ivy tree safely is all about preparation, patience, and protection—never rushing into the process without the right gear or knowledge. By following the steps outlined here, you’ll minimize risks to yourself, your property, and the environment while ensuring the ivy doesn’t return. You’ve got this! 🌿✨
Ready to tackle the job? Start by gathering your supplies, then suit up in long sleeves, gloves, and goggles. If the infestation is large or near structures, consider calling a professional—safety first! For smaller patches, roll up your sleeves (literally!) and begin with the cut-and-treat method.