
Pruning
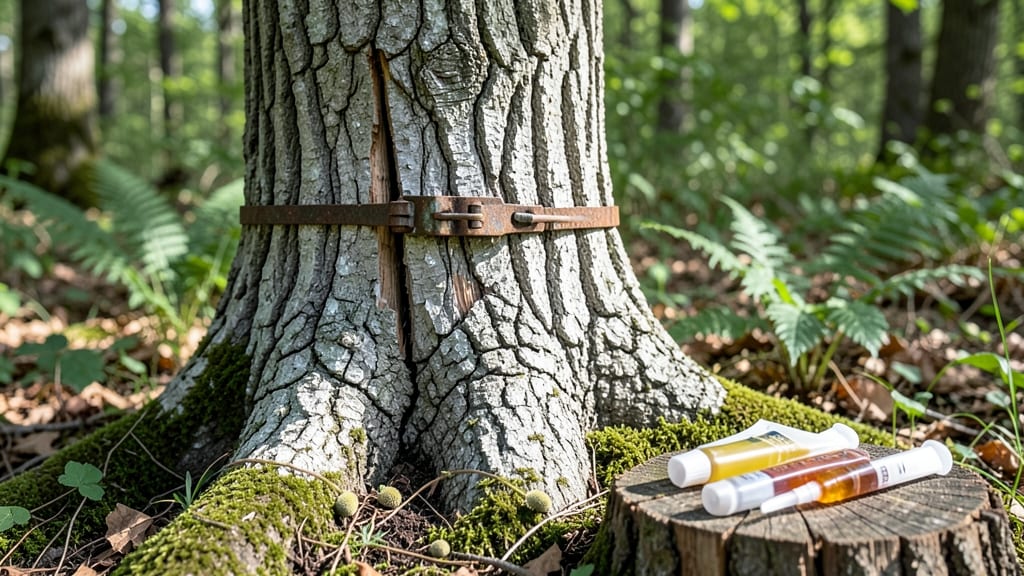
Learning how to fix a broken tree trunk might seem daunting, but with the right repair techniques, you can often save your beloved shade provider. The key is acting fast—before the crack widens or disease sets in—and using the proper materials to stabilize the break while the tree heals itself.
I’ve seen oak trunks that looked doomed bounce back with just a little structural support and consistent monitoring.
You’ll need basic tools like pruning shears, a sturdy brace or cable system, and grafting tape or tree wrap to hold everything in place. For deeper splits, a professional-grade splint might be necessary, but even simple repairs can buy your tree years of life.
The process takes 1-2 hours depending on the damage, and the long-term payoff—keeping your tree standing strong—is worth every minute.
What you’ll end up with is a stabilized trunk that won’t snap in the next windstorm, plus a tree that continues growing as if nothing happened. The bark will eventually seal over the repair site, and new growth signals success.
Just be patient—some trees take 1-2 seasons to fully recover, but with the right care, they often outlast expectations.
This method works for most common trees—maples, oaks, and fruit trees—but always check the size of the break first. If the trunk is split more than one-third of its diameter, it’s time to call an arborist.
For smaller cracks, though, you might just save your tree’s life with a little elbow grease and the right supplies.
📚 In This Guide
- What you need
- Instructions
- Tips and common mistakes
- Wrapping up and next steps
What you need
- ● Safety gear: Work gloves (heavy-duty, cut-resistant) – 1 pair
- ● Safety goggles – 1 pair
- ● Ear protection (if using power tools) – 1 pair
- ● Pruning tools: Pruning saw (bypass or bow saw) – 1 (for clean cuts)
- ● Hand pruners or loppers – 1 pair (for smaller branches)
- ● Repair supplies: Tree repair clamp or forked branch (for splinting) – 1-2
- ● Tree repair tape or flexible tape (e.g., Tree Frog or Tanglefoot) – 1 roll
- ○ Epoxy or tree wound dressing (optional but helpful for sealing) – 1 small container
- ● Cleanup & prep: Rag or paper towels – 2-3 (for wiping sap or debris)
- ● Disinfectant (rubbing alcohol or bleach solution) – small bottle
- ● Hose or bucket of water – 1 (for cleaning tools)
- ● Scaffolding or ladder – 1 (if the break is high up)
- ● Drill & screws (for securing splints) – small pack
- ● Pruning sealant (to prevent disease) – 1 tube
- ● Second pair of hands (a friend helps!) – 1 volunteer 😉
Step-by-Step guide to repairing a broken tree trunk
Here's how to stabilize and restore strength to a damaged tree trunk—without calling an arborist.
Assess the Damage and Determine the Best Approach
First, examine the break carefully. If the trunk is split but still attached, you can attempt a repair. Look for clean breaks with jagged edges—these are easier to stabilize than crushed or torn wood. If the trunk is completely severed or the break is more than half the trunk's diameter, professional help may be needed, as the tree's structural integrity is likely compromised beyond basic DIY fixes.
Check the height of the break. For breaks below 6 feet, you can work from a ladder or sturdy stool. For higher breaks, use a pruning saw and extension pole to make precise cuts from the ground. Never climb the tree—this risks further damage or injury. If the break is too high, consider hiring an arborist for safe access and proper equipment.
Clean and Prepare the Broken Edges
Use a pruning saw to trim away any loose, splintered, or rotting wood from both sides of the break. This creates a clean surface for the repair materials to adhere to. Focus on removing debris without cutting into healthy wood—you want to expose fresh, solid surfaces where the repair can bond effectively.
Wipe the edges with a clean cloth dampened with rubbing alcohol to remove sap, dirt, and any remaining fungal spores. This step is critical because residual sap can prevent adhesives from gripping properly, and dirt or fungi can compromise the repair. Work quickly to avoid letting the wood dry out too much during this process.
Stabilize the Break with a Temporary Support
Before applying any permanent fix, stabilize the break with a strong branch or wooden stake wrapped around the damaged area. Insert the stake or branch into the break at a slight angle, ensuring it fits snugly between the two pieces of wood. Secure it with tree repair tape or wide nylon straps to hold the pieces together temporarily.
This step prevents the break from widening while you work. If the break is large, you may need to use two stakes—one on each side—to provide even support. Test the stability by gently pushing and pulling on the stakes. If the trunk shifts or the break opens further, adjust the stakes or add more tape until the pieces hold firmly in place.
Apply Tree Repair Compound or Epoxy
Fill the gap between the broken edges with tree repair compound or epoxy designed for wood. Use a putty knife to press the compound deep into the crack, ensuring it fully seals the break. Smooth the surface evenly, avoiding excess buildup that could attract pests or trap moisture. Work quickly, as some compounds set within 15-30 minutes, so apply it only after the temporary support is securely in place.
For larger breaks, you may need to apply the compound in two thin layers, allowing each layer to dry slightly before adding the next. Avoid overfilling the gap—too much material can weaken the repair by creating an uneven surface that doesn’t blend naturally with the tree’s structure. Once applied, let the compound cure fully according to the manufacturer’s instructions, typically 24-48 hours.
Reinforce with a Permanent Brace or Cable System
After the repair compound has cured, reinforce the break with a permanent brace or cable system. For smaller breaks, a metal tree brace or wide nylon strap wrapped tightly around the damaged area can provide long-term support. For larger or more severe breaks, use a cable and turnbuckle system to distribute weight evenly and prevent further stress on the repair.
Install the brace or cables at a 45-degree angle to the trunk, positioning them above and below the break to create a triangle of support. Tighten the cables gradually to avoid sudden pressure that could cause additional damage. Check the system every 6 months to ensure it remains secure and adjust as needed. Over time, the tree’s natural healing process will strengthen the repair, but the brace should stay in place for at least 1-2 years to ensure stability.
Tips & tricks for perfect tree trunk repairs
Here's what I've learned from fixing broken tree trunks that actually hold up over time.
Assessment is Everything: In Step 1, when you're checking the break's severity, pay special attention to whether the break is vertical or horizontal. Vertical breaks (like a clean split) are much easier to repair than horizontal breaks, which often indicate deeper structural damage. If you're unsure, take photos from multiple angles before deciding whether to proceed—some breaks look worse than they are, while others appear minor but require professional help.
Safety First with Height: For breaks above 6 feet, I can't stress enough how important it is to avoid climbing. I once tried using a ladder to reach a break at 8 feet and nearly lost my balance—don't make my mistake. Instead, use your pruning saw with an extension pole to make precise cuts from the ground. This gives you better control and eliminates the risk of falling. If the break is truly too high, calling an arborist is the safest choice.
Clean Edges Make All the Difference: During Step 2, when you're cleaning the broken edges, don't rush this step. I've seen repairs fail because people skipped removing all the loose wood or didn't clean thoroughly enough. Use a sharp pruning saw to create clean, fresh surfaces—this is where the repair compound will bond. Also, keep that rubbing alcohol handy; it's the secret weapon against sap and fungal spores that could sabotage your repair.
Layering Compound for Larger Breaks: When applying the tree repair compound in Step 4, remember that two thin layers work better than one thick one. I learned this the hard way when I overfilled a gap and ended up with a weak, uneven repair that attracted pests. Start with a thin layer, let it set according to the manufacturer's instructions (usually 15-30 minutes), then add a second layer if needed. This creates a stronger bond and blends more naturally with the tree's structure.
Pro Tips for Fix A Broken Tree Trunk
- Here's what I've learned from fixing broken tree trunks that actually hold up over time.
- Assessment is Everything: In Step 1, when you're checking the break's severity, pay special attention to whether the ...
- Safety First with Height: For breaks above 6 feet, I can't stress enough how important it is to avoid climbing. I onc...
Frequently asked questions
Got questions about fixing a broken tree trunk? You’re not alone!
Here are some of the most common concerns—and straightforward answers—to help you tackle the job with confidence.
Can a broken tree trunk fully heal on its own?
A small crack or break might seal over time, but a large fracture rarely heals naturally. Trees lack the ability to "knit" broken wood like bone—so while callus tissue may form, the break weakens structural integrity. Pro tip: If the break is deep or jagged, professional intervention (like bracing or cabling) is often the best bet to save the tree.
What’s the best time of year to repair a broken tree trunk?
Late winter or early spring (before bud break) is ideal. The tree is dormant, so stress is minimized, and it can focus energy on healing. Avoid repairing in extreme heat or drought—these conditions slow recovery. Pro tip: If you must fix it in summer, water deeply before and after to support the tree’s healing process.
Do I need to sterilize tools before fixing a broken trunk?
Absolutely!
Sterilizing pruners, saws, or epoxy applicators with rubbing alcohol (70% or higher) prevents spreading disease. Even healthy-looking trees can harbor hidden pathogens. Pro tip: Disinfect tools between cuts if working on multiple trees to avoid cross-contamination.
What if the break is too large for traditional repair methods?
If the damage is severe (e.g., a split trunk or large missing section), consider these alternatives:
- Cabling/bracing: Installs steel cables to stabilize the trunk and branches.
- Tree removal: If the tree is hazardous or beyond saving, professional removal may be safest.
- Grafting (for young trees): In rare cases, a skilled arborist can graft a new leader onto the remaining trunk.
How do I know if my repair failed?
Watch for these red flags:
- New cracks forming near the repair site.
- Leaning or excessive swaying (signs of instability).
- Wilting leaves, dieback, or fungal growth at the break.
- Splintering or further separation of the wood.
Wrapping up and next steps
Fixing a broken tree trunk is a rewarding way to breathe new life into your landscape—whether it’s a cherished shade tree or a prized fruit-bearing plant. 🌱 By following the right techniques, using the proper materials, and giving your tree the care it needs, you can restore its strength and beauty for years to come. Don’t wait! Start your repair today, and watch your tree thrive with patience and proper aftercare.
Next steps:
- Monitor your tree’s progress over the next few months.
- Consider consulting a local arborist for complex cases.
- Share your success—inspire others to nurture their green spaces!