
Pruning
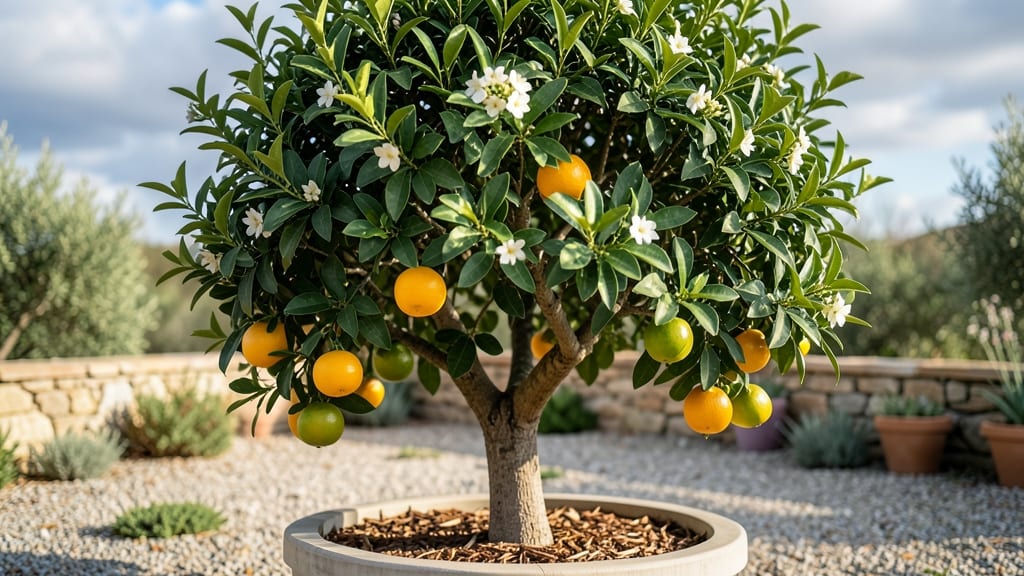
Your mature orange tree’s winter pruning is the secret weapon for next summer’s harvest. ✂️ I’ve pruned mine every February for five years, and the difference in fruit size and quantity is night-and-day—thicker branches, fewer blind spots, and blossoms that arrive like clockwork.
The key is timing and technique: cut back only during dormancy (late winter), remove crossing branches first, then thin out crowded growth to let sunlight reach the center. You’ll need sharp pruners, rubbing alcohol for sterilizing cuts, and a bucket for clippings—no fancy tools, just the right approach.
Even a tree with dead wood can bounce back with proper pruning.
What you’ll end up with is a tree that bursts into bloom in spring, with fruit developing faster and larger than ever before. The air smells like citrus sunshine, bees hum around the blossoms, and your neighbors start asking for cuttings.
It’s the kind of transformation that makes gardening feel like magic.
Works for both container-grown and in-ground trees, though frost-sensitive varieties need extra protection. Here’s exactly how to do it without over-pruning or inviting pests—my tried-and-tested method that’s saved more than one tree from my well-meaning but overzealous hands.
📚 In This Guide
- What you need
- Instructions
- Tips and common mistakes
- Wrapping up and next steps
What you need
- ● Pruning shears: Bypass pruners (for small branches, ¼”–¾” thick), 1 pair.
- ● Loppers: For medium branches (¾”–2” thick), 1 pair (with long handles for reach!).
- ● Pruning saw: For thick branches (2”+ thick), 1 saw (bow or folding saw preferred).
- ● Gloves: Heavy-duty, cut-resistant gloves (1 pair to protect from thorns and sap).
- ● Disinfectant: 70% isopropyl alcohol or 1-part bleach to 9-parts water (small spray bottle for sterilizing tools between cuts).
- ● Rubbing alcohol or hand sanitizer: (travel-sized bottle for quick cleanups).
- ● Trash bags or bucket: (2–3 large bags for pruned debris; biodegradable if composting).
- ● Ladder or step stool: (1 stable, tall enough to reach branches—extendable ladders work best!).
- ● Sharpie or masking tape: (1 marker to label cuts if needed for future reference).
- ● Tree wound dressing: (e.g., Tanglefoot Tree Wound Pruning Sealer)—small tube (controversial but useful for large cuts).
- ● Extension pole pruners: (1 pair for high branches without a ladder).
- ● Knee pads: (1 pair if you’ll be kneeling frequently).
- ● Safety glasses: (1 pair to shield eyes from debris).
- ● Pruning guide or app: (e.g., iNaturalist or a printed orange tree pruning diagram).
- ● Weather check: Prune on a dry, overcast day (avoid frost or rain within 24 hours).
- ● Tree health assessment: Inspect for diseased or dead branches (look for no leaves, discoloration, or soft spots).
- ● Safety first: Wear long sleeves and pants to avoid sap burns and thorn pricks.
- ● Clear the area: Remove nearby plants, hoses, or obstacles within a 10-foot radius.
Step-by-step guide to pruning a mature orange tree
Here’s how I transform winter’s dormant branches into next year’s fruit-heavy harvest.
✂️ Step 1: Remove Dead or Diseased Wood First
Grab your pruning shears and scan the tree from top to bottom. Look for branches that are completely brown, brittle, or covered in black spots—these are dead or diseased and must go. I start here because removing the bad wood prevents spreading problems to healthy branches.
Make clean cuts just outside the branch collar (the swollen area where the branch meets the trunk). Avoid leaving stubs—these invite rot. If a branch is thicker than your shears, use a pruning saw instead. Real talk: if you hesitate, the tree’s telling you to cut it.
✂️ Step 2: Thin Out Crowded Branches
Now focus on the tree’s structure. Aim for an open center with sunlight reaching all the way to the trunk. I target branches that cross each other or grow inward—they rub together and create wounds. Remove about 20-25% of the tree’s total branches, prioritizing the oldest wood first.
Cut back to the nearest outward-facing bud or branch. You’ll see where new growth emerges naturally—follow that path. Avoid over-thinning; a mature orange tree needs its leaf canopy to photosynthesize for fruit production. If you’re unsure, take a photo first.
✂️ Step 3: Shape for Airflow and Light
Step back and evaluate the tree’s silhouette. Your goal is to create a balanced, vase-like shape with a slightly wider top than bottom. Trim back any branches that grow straight up or down—they block light and airflow. I like to leave the lower branches slightly longer to protect the trunk from sunburn.
For larger branches, make cuts at a 45-degree angle just above a bud facing the outside of the tree. This encourages outward growth. Avoid cutting more than ¼ of the branch’s diameter at once—this prevents stress. If you’re pruning a heavily fruited tree, limit cuts to 10% of the canopy to avoid shocking the plant.
✂️ Step 4: Clean and Sterilize Tools
After pruning, wipe your shears and saw with rubbing alcohol or a 10% bleach solution to kill any lingering bacteria or fungi. I also sharpen the blades—dull tools tear wood, creating bigger wounds. Store them in a dry place until next season.
Finally, collect all pruned branches and dispose of them in the trash (not your compost). Diseased wood can harbor pathogens that survive in compost piles. This is the last step, but it’s critical—skipping it risks reinfecting your tree.
Tips & tricks for pruning a mature orange tree
Winter pruning is your chance to reset your orange tree for a bountiful spring harvest—here's how to do it right.
Branch Collar Awareness: The branch collar is your guidepost in Step 1. This swollen area where branches meet the trunk isn't just a detail—it's where the tree's natural defense system lives. Cutting too close to it creates wounds that heal poorly. I've seen too many trees develop rot from improper cuts. Always make your cut just outside this collar, about 1/8 inch away. This small detail prevents years of potential problems. Think of it as the tree's scar tissue—you wouldn't want to cut into someone's scar, would you?
Visual Pruning Technique: For Step 2, I've found that taking a step back and squinting helps visualize the tree's structure. Look for branches that create a "V" shape when they cross—these are prime candidates for removal. You're aiming for sunlight to penetrate all the way to the center. A good test is to hold a flashlight at the tree's center—if light doesn't reach the trunk, you need to thin more. This simple trick helps me avoid over-thinning while ensuring proper airflow. Remember, you're sculpting, not amputation—every cut should serve a purpose.
Seasonal Timing Insight: While the instructions don't specify exact timing, I've learned that late winter—just before buds begin to swell—is ideal for pruning. This timing gives your tree time to heal before the growing season begins. In most climates, this falls between late February and early March. You'll know you've timed it right when you see fresh green growth emerging from the pruned branches within a few weeks. This is when you'll see your careful cuts pay off with vigorous new shoots.
Tool Maintenance Secret: In Step 4, don't overlook the importance of sharpening your tools. Dull blades don't just make work harder—they tear wood instead of making clean cuts. I keep a small file in my toolkit and sharpen blades after every few uses. You'll notice the difference immediately—clean cuts heal faster and look professional. And here's a pro tip: wipe your tools with a rag dampened with rubbing alcohol after each use. This removes sap and prevents buildup that can harbor bacteria between pruning sessions.
Pro Tips for Mature Orange Tree
- Winter pruning is your chance to reset your orange tree for a bountiful spring harvest—here's how to do it right.
- Branch Collar Awareness: The branch collar is your guidepost in Step 1.
- Visual Pruning Technique: For Step 2, I've found that taking a step back and squinting helps visualize the tree's structure.
Frequently asked questions
When is the best time to prune a mature orange tree?
Prune your mature orange tree during late winter or early spring (just before new growth starts). This timing—right after winter dormancy—helps avoid frost damage and encourages robust spring blooms. Avoid pruning in summer or fall, as it can stress the tree and reduce fruit production.
How much can I trim back a mature orange tree?
For mature trees, aim to remove no more than 25% of the canopy in a single session. Focus on dead, diseased, or crossing branches first, then thin out excess growth to improve airflow. Over-pruning can weaken the tree and reduce next year’s fruit yield.
Will pruning my orange tree reduce its fruit production?
Not if done correctly! Pruning opens the tree to sunlight and air circulation, which actually boosts fruit quality and quantity by reducing disease risk. Just avoid heavy cuts in fruit-bearing years—prioritize shaping and thinning instead.
What should I do if my orange tree has pests after pruning?
Pruning exposes hidden pests like aphids or scale insects. Inspect cuts for signs of infestation and treat with neem oil or insecticidal soap. For severe cases, consult a local extension service for targeted solutions. Prevention tip: Sterilize tools with rubbing alcohol before and after pruning!
Can I prune a mature orange tree in containers?
Yes! Container-grown orange trees need regular pruning to control size and shape. Use the same late-winter timing, but be extra cautious—root-bound trees are more sensitive. Prune lightly, and repot every 2–3 years to prevent stress.
Wrapping up and next steps
Growing a mature orange tree with vibrant fruit starts with the right winter pruning—think of it as a springboard for a bountiful harvest! 🌿 By following these steps, you’ll boost airflow, sunlight exposure, and overall tree health, setting the stage for juicy, sweet oranges in the coming seasons.
Now that you’re armed with the knowledge, grab those pruners and get ready to transform your tree’s future—one strategic cut at a time.
Your next step? Mark your calendar for late winter (just before buds swell) and dive in! Watch your tree thrive—and soon, you’ll be savoring homegrown oranges like never before. 🍊✨