
Pruning
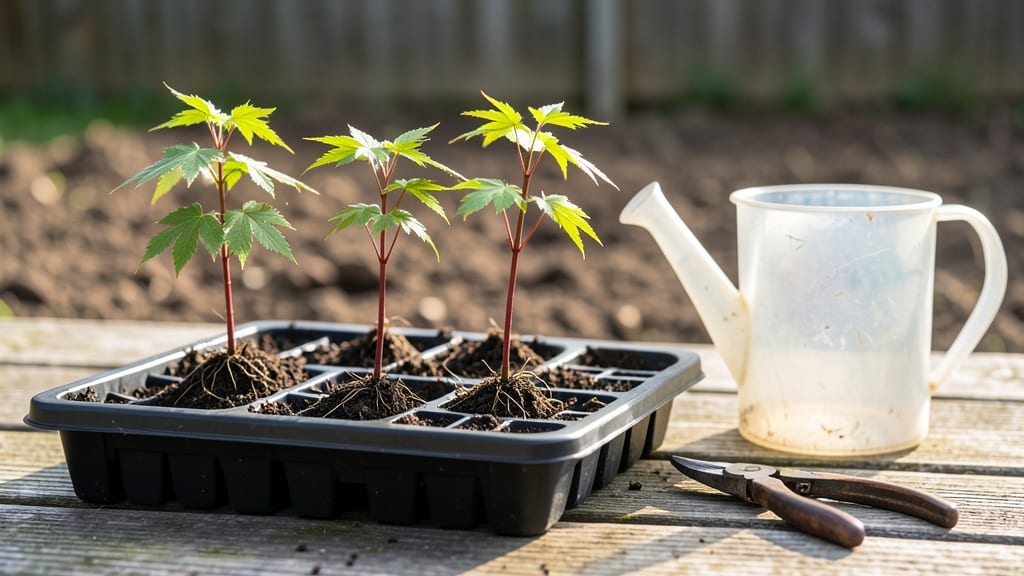
Growing maple tree seedlings from seed to sturdy saplings is the ultimate long-term project—imagine the shade canopy you’ll create in 20 years. 🌳 The secret to success lies in mimicking their natural forest floor conditions early on, whether you start indoors or outdoors.
Most people rush the process, but maple seedlings demand patience: they need consistent moisture, partial shade, and the right soil mix to avoid damping-off before they even get their first true leaves.
You’ll need just three key supplies: a seed-starting mix with perlite, a shallow container (or a peat pot for direct outdoor sowing), and a humidity dome or plastic wrap to keep those tiny seeds from drying out.
Maple seeds are finicky—if they don’t germinate within 30 days, they likely won’t. But once they do, you’ll see those delicate cotyledons push through the soil, signaling the start of something truly special.
By the time your seedlings are ready for transplanting—usually after their second growing season—they’ll be cold-hardy enough to handle your zone’s winters. You’ll watch them develop the classic lobed leaves and sturdy stems that maples are known for, and with proper care, they’ll outgrow any nursery sapling you could buy.
The payoff? A tree that thrives for centuries with minimal fuss once established.
This method works whether you’re starting seeds in a sunny basement window or sowing them directly in a protected outdoor bed. The key is adapting the timing to your climate—maples hate having their roots disturbed, so we’ll cover how to transplant them without shock. Let’s get those seeds going!
📚 In This Guide
- What you need
- Instructions
- Tips and common mistakes
- Wrapping up and next steps
What you need
- ● Maple tree seedlings: 1–5 (depending on your space; hardy varieties like Acer rubrum or Acer saccharum work best).
- ● Shovel or trowel: 1 medium-sized (for digging holes) or 1 small (for delicate seedlings).
- ● Garden gloves: 1 pair (to protect your hands from soil and sap).
- ● Mulch: 2–3 bags (shredded bark or wood chips; avoid fresh wood to prevent rot).
- ● Well-draining soil: 1–2 bags of organic potting mix or amended garden soil (pH 6.0–7.0).
- ● Watering can or hose: 1 with a gentle spray nozzle (to avoid disturbing seedlings).
- ○ Stakes (optional but helpful): 3–5 wooden or bamboo stakes (4–6 ft tall) + twine (for support if seedlings are tall or in windy areas).
- ● Root stimulator: 1 bottle (like Mycorrhizal fungi or seaweed extract to boost growth).
- ● Soil moisture meter: 1 (to monitor hydration levels, especially in dry climates).
- ● Fertilizer (slow-release): 1 bag (10-10-10 or balanced organic fertilizer; wait 6–8 weeks after planting).
- ● Planting hole marker: 1 (e.g., popsicle sticks or labels to track seedling placement).
- ● Frost cloth: 1 roll (for young seedlings in early spring or late fall).
How to transplant maple tree seedlings for cold-hardy growth
Here's the straightforward method I've used for years to establish resilient maple seedlings.
🌱 Step 1: Choose the Right Transplant Window
Timing is everything with maple seedlings. Aim for late fall—after the first hard frost when soil temperatures drop to 40-50°F but before winter dormancy sets in completely. This lets the roots establish before freezing. I always check the USDA hardiness zone map for my area to confirm the ideal window.
Seedlings will show dormant but healthy signs: leaves browned but still attached, no new growth. If you plant too early, they'll bolt new shoots that won't survive winter. Too late, and roots won't establish before cold sets in. The 4-6 week window before ground freeze is your target—use a soil thermometer to confirm.
🪴 Step 2: Prepare the Planting Site
Maples thrive in well-draining soil with partial sun (6 hours daily). Clear the area of weeds and loosen soil to a depth of 12 inches using a broadfork. I mix in 2 inches of compost from my materials list to improve fertility without compacting the soil. Avoid heavy clay—amend with sand or perlite if needed.
Dig holes twice as wide as the seedling's root ball but only as deep as the container's drainage holes. The top of the root ball should sit 1 inch above ground level. This prevents stem rot while allowing roots to spread. Tap the seedling gently to dislodge it from the container—don't pull by the stem, or you'll damage the roots.
☀️ Step 3: Plant and Water Deeply
Place the seedling in the hole and backfill with native soil, pressing firmly around the edges to eliminate air pockets. Water deeply—about 1 gallon per seedling—until moisture reaches 12 inches down. You'll see water pooling at the surface before it drains away completely. This ensures roots make immediate contact with moisture.
Mulch with 3 inches of wood chips (from your materials) around the base, keeping it 6 inches away from the trunk to prevent rot. The mulch insulates roots during temperature swings and retains moisture. Water again after 3 days to settle the mulch and encourage root growth into the surrounding soil.
⏰ Step 4: Monitor and Protect Through Winter
After planting, check seedlings weekly for the first month. Look for new growth in spring—this means roots have established. If leaves appear yellow or wilted, water deeply and adjust mulch thickness. Maple seedlings are tough, but they need consistent moisture during their first growing season.
In early spring, remove any winter mulch that's broken down and replace with fresh 2 inches. This prevents suffocation and allows soil to warm. By late spring, seedlings should show new leaves and 1-2 feet of growth. If they're leggy, they need more light—maples grow best with morning sun and afternoon shade in hot climates.
Tips & tricks for perfect maple seedling transplants
Here's what I've learned after years of trial and error with these delicate young trees.
Timing is everything: The 4-6 week window before ground freeze is critical, but don't just guess—use a soil thermometer to confirm those 40-50°F soil temperatures. I've seen seedlings planted too early bolt new growth that freezes back, and those that go in too late struggle to establish before winter. The key is catching that dormancy sweet spot when leaves are browned but still attached.
Soil prep makes all the difference: When loosening soil to 12 inches deep, focus on breaking up compaction without turning it into powder. I use a broadfork to create channels rather than fluffing the entire area. For clay-heavy soils, mix in sand or perlite during this step—it's easier than trying to fix drainage later. The goal is to mimic the seedling's container environment as closely as possible.
Watering technique matters: That initial gallon of water per seedling needs to penetrate 12 inches down, not just wet the surface. I use a slow, steady stream from a hose with a gentle spray nozzle to avoid disturbing the soil. The pooling you see at the surface is normal—it's how you know moisture is reaching the roots. After 3 days, that second watering helps settle the mulch and encourages roots to grow outward.
Winter protection secrets: The 3 inches of wood chips isn't just decoration—it's insulation. Keep that mulch 6 inches away from the trunk to prevent rot while still protecting roots from temperature swings. In areas with harsh winters, I add an extra 2 inches of mulch in early winter, then remove the decomposed portion in spring to prevent suffocation.
Pro Tips for Maple Tree Seedlings
- Here's what I've learned after years of trial and error with these delicate young trees.
- Timing is everything: The 4-6 week window before ground freeze is critical, but don't just guess—use a soil thermometer to confirm those 40-50°F soil temperatures.
- Soil prep makes all the difference: When loosening soil to 12 inches deep, focus on breaking up compaction without turning it into powder.
Frequently asked questions
Got questions about growing maple tree seedlings? You’re not alone! Whether you’re a first-time gardener or a seasoned landscaper, these common concerns can help you avoid pitfalls and set your seedlings up for success.
When is the best time to plant maple tree seedlings?
The ideal window is early spring (after the last frost) or fall (6–8 weeks before your first expected freeze). Planting in spring gives seedlings time to establish roots before summer heat, while fall planting allows them to settle before winter dormancy. Avoid planting in extreme heat or cold—root shock is more likely then!
How deep and far apart should I space maple seedlings?
Dig a hole twice as wide as the root ball but no deeper—planting too deep can suffocate the roots. For spacing, give seedlings 20–30 feet apart for mature shade trees or 10–15 feet if you’re growing them as smaller ornamental trees. Pro tip: Use a measuring tape to avoid overcrowding!
How often should I water newly planted maple seedlings?
Water deeply 2–3 times per week for the first month, ensuring the soil stays consistently moist (not soggy). After establishment, water once a week during dry spells, aiming for 1–1.5 inches of water per session. Mulch around the base (2–3 inches thick) to retain moisture and protect roots.
What should I do if my maple seedlings turn yellow or wilt?
Yellowing leaves often signal overwatering or poor drainage, while wilting can mean underwatering or root stress. Check the soil—it should feel like a wrung-out sponge. If roots are exposed or mushy, adjust watering habits. Fungal issues? Prune affected leaves and avoid wetting foliage. For pests (like aphids), use a hose spray or insecticidal soap.
Can I grow maple seedlings from store-bought maple syrup or seeds?
Nope! Maple syrup comes from sap tapped from mature trees, not seedlings. For seedlings, you’ll need helicopter seeds (samaras) collected from mature maples in fall or nursery-grown saplings. If growing from seed, stratify them (cold-moist treatment) for 60–90 days to break dormancy—patience is key!
Wrapping up and next steps
Growing maple tree seedlings with confidence is all about patience, preparation, and a little know-how! By choosing the right variety, timing your transplant carefully, and providing the ideal care, you’ll set the stage for a thriving tree that stands strong against winter’s chill. 🌳❄️
Now that you’re armed with the 4 key steps, it’s time to roll up your sleeves and get planting. Start small—even a single seedling can become the centerpiece of your landscape. Happy growing!