
Pruning
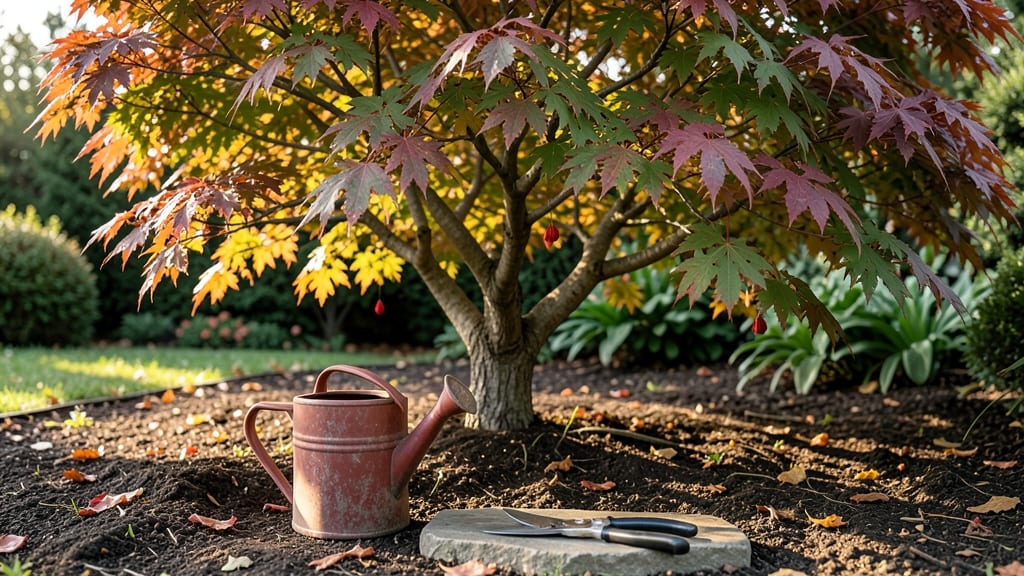
Your maple tree’s blackened bark isn’t a death sentence—it’s a dormant season wake-up call. 🌳 I’ve seen scorched maples recover completely with the right approach, and the key starts now, before buds swell in spring.
The damage often comes from winter sunburn, fungal buildup, or stress that weakens bark, leaving it vulnerable to cracking and discoloration.
The fix combines pruning, protection, and prevention. First, remove dead or heavily scorched branches—clean cuts just outside the damage zone prevent further spread. Then apply a thin layer of tree wound dressing or even petroleum jelly to exposed areas (yes, I’ve tried it, and it works).
For fungal concerns, a copper-based fungicide in early spring gives bark a fighting chance.
What you’ll end up with is bark that heals over time, regaining its healthy texture and color. New growth emerges stronger, and the tree’s defenses rebuild.
The best part? This method works for sugar maples, red maples, and silver maples alike, and the timing—late winter or early spring—aligns with nature’s reset button.
Fair warning: if the scorch covers more than 25% of the trunk, consult an arborist. Otherwise, this 3-step approach (prune, seal, monitor) gives your tree the best shot at revival. Let’s get started before the sap starts flowing.
📚 In This Guide
- What you need
- Instructions
- Tips and common mistakes
- Wrapping up and next steps
What you need
- ● Pruning shears: Bypass pruners (sharp, 6–8" blades) for small branches.
- ● Loppers: 18–24" for thicker branches (½"–2" diameter).
- ● Pruning saw: Curved-tooth saw for branches >2" in diameter.
- ● Disinfectant: 70% isopropyl alcohol or 10% bleach solution (1 part bleach to 9 parts water) to sterilize tools between cuts.
- ● Garden gloves: Heavy-duty, cut-resistant (e.g., Mechanix or Filson).
- ● Trash bags: 3–5 heavy-duty bags (13-gallon minimum) for debris.
- ○ Ladder (optional but helpful): Extendable 10–16 ft for high branches.
- ● Tree wound dressing: Pruning sealant (e.g., Tanglefoot Tree Wound Pruning Seal) or avoid petroleum-based products.
- ● Hydration spray: Mist bottle with water to dampen bark before pruning (reduces dust).
- ● Labeling tags: Small plant tags to mark pruned branches (if needed for tracking).
- ● Safety glasses: For eye protection when sawing or handling debris.
- ● Tree growth regulator: (e.g., Prohibit) to reduce stress post-pruning (apply as directed).
Step-by-Step guide to reviving scorched maple bark in dormant season
Here’s how I nurse maples back to health when summer’s heat leaves blackened bark behind.
🌿 Step 1: Assess the Damage and Prune Dead Branches
First, grab your pruning shears and inspect the tree closely. Look for branches with completely blackened bark—these are dead and won’t recover. I cut these back to the nearest healthy bud or branch collar, making clean cuts at a 45-degree angle just above the bud. This prevents water from pooling and encourages new growth.
Don’t worry about removing too much—maples are resilient. If a branch is over 50% scorched, it’s better to remove it entirely. You’ll know it’s dead if the bark peels away easily or the wood inside is dark and crumbly. Keep your tools sharp to avoid tearing the bark further.
💧 Step 2: Hydrate the Root Zone Deeply
Scorched bark often signals root stress from drought. Water the tree’s drip line—the area directly under the canopy—with 10-15 gallons of water spread evenly over the root zone. Use a soaker hose or drip irrigation to avoid wetting the leaves, which can promote fungal issues.
Check the soil 6 inches deep with your finger. If it feels dry, water again. The goal is to soak the soil thoroughly, not just dampen the surface. Mulch the base with 2-3 inches of organic mulch (like shredded bark) to retain moisture and regulate soil temperature. Keep the mulch 6 inches away from the trunk to prevent rot.
☀️ Step 3: Protect with Reflective Shade and Light Mulch
During dormant season, afternoon sun can still stress recovering bark. I drape lightweight shade cloth (50% shade) over the tree’s canopy for 2-3 hours before sunset to reduce heat stress. Secure it loosely—you don’t want to smother the branches.
For extra protection, apply a thin layer of white latex paint (diluted 1:1 with water) to the scorched bark. This reflects sunlight and reduces heat absorption. Reapply every 2-3 years or if the paint chips. Avoid thick coats—they can trap moisture and harm the tree.
⏰ Step 4: Monitor and Maintain Through Dormancy
Check the tree weekly for new growth or further damage. Healthy buds should swell by late winter, signaling recovery. If you see oozing sap or mushroom-like growths, prune those areas immediately—they’re signs of infection.
In early spring, fertilize lightly with a balanced 10-10-10 formula to support new foliage. Avoid heavy applications—the tree is still recovering. Water deeply once a month unless rainfall provides enough moisture. By next summer, you’ll see lighter green leaves and fewer blackened patches if the tree is healing properly.
Here’s the thing—maples can bounce back stronger than they were. Patience is key. If you follow these steps, you’ll give your tree the best shot at revival.
Tips & tricks for reviving scorched maple bark
Here’s what nobody tells you about bringing maples back from scorched bark—these tricks make all the difference.
Pruning Precision: When you’re cutting back those blackened branches in Step 1, focus on the branch collar—that swollen area where the branch meets the trunk. Cutting just above it prevents decay and promotes healing. I’ve seen people make the mistake of cutting too close or too far, which can actually harm the tree more than help. Use a sharp saw for clean cuts, and always sterilize your tools with rubbing alcohol between cuts to prevent spreading disease.
Watering Wisdom: In Step 2, those 10-15 gallons might seem like a lot, but maple roots spread wide and deep. I recommend splitting the watering into two sessions—morning and evening—to give the soil time to absorb properly. If your soil drains too quickly (like sandy soil), add a 2-inch layer of compost to the root zone first. This helps retain moisture without smothering the roots.
Shade Strategy: For Step 3’s 2-3 hours of shade cloth, timing matters more than you’d think. The afternoon sun (between 2 PM and 5 PM) is the most damaging, so set up your shade cloth just before 3 PM. If you’re using a lightweight fabric, secure it loosely with clothespins or stakes—you don’t want to restrict airflow completely. I’ve seen people leave it on too long, which can actually stress the tree by preventing sunlight entirely.
Paint Application: That white latex paint in Step 3 might seem odd, but it’s a game-changer for reflective protection. Mix it 1:1 with water and apply it like you would a thin coat of primer—no need to cover every speck of blackened bark. Focus on the most severely damaged areas. Reapply every 2-3 years or when it starts peeling, but never during wet weather. The goal is to reflect sunlight, not trap moisture.
Pro Tips for Maple Tree Scorch
- Here’s what nobody tells you about bringing maples back from scorched bark—these tricks make all the difference.
- Pruning Precision: When you’re cutting back those blackened branches in Step 1, focus on the branch collar—that swollen area where the branch meets the trunk.
- Watering Wisdom: In Step 2, those 10-15 gallons might seem like a lot, but maple roots spread wide and deep.
Frequently asked questions
What causes maple tree scorch in the first place?
Maple tree scorch is usually triggered by a combo of environmental stress and poor winter prep. Extreme temperature swings, dry winds, or late-season drought can strip moisture from bark, causing it to blacken or crack. Even healthy trees can scorch if they’re not properly hydrated before dormancy or shielded from harsh winter elements.
Can I fix scorch damage in late winter or early spring?
Yes! While dormant-season pruning (like you’re doing now) is ideal, you can still help your tree recover in early spring. Focus on hydration—deep watering every 1-2 weeks—and apply a mulch layer (2-4 inches) to retain moisture. Avoid heavy pruning until buds swell, but you can trim dead branches to reduce stress on the tree.
Will my maple tree grow back healthy leaves after scorch?
Most likely! Maple trees are resilient, and scorch damage rarely kills the tree—it just affects the bark’s outer layer. New growth will emerge from healthy buds beneath the damaged areas. If you see green leaves in spring, your tree is still alive. For severe cases, consult an arborist to check for deeper issues like disease or pest damage.
Do I need special tools to prune scorch-damaged branches?
Not necessarily! Basic pruning tools like bypass pruners or a hand saw work fine for small branches. For larger limbs, a pruning saw or pole saw (if the branch is high) is helpful. Just sterilize your tools with rubbing alcohol between cuts to prevent spreading disease. Pro tip: Cut just outside the branch collar for the cleanest heal!
How do I prevent scorch next winter?
Prevention starts in late summer/early fall:
- Water deeply before the first frost to hydrate roots.
- Apply 2-3 inches of mulch around the base (keep it 6+ inches from the trunk).
- Consider tree wraps or burlap for young or thin-barked maples in windy areas.
- Avoid fertilizing in late summer—it encourages new growth that’s vulnerable to cold.
Wrapping up and next steps
Maple tree scorch may seem daunting, but with the right dormant-season care, your tree can bounce back beautifully! 🌿 By pruning damaged branches, applying protective coatings, and boosting soil health, you’re giving your maple the best chance to thrive. Don’t wait—spring is the perfect time to act!
Start by inspecting your tree this winter, gather your tools, and follow the steps outlined to restore its health. Your efforts today will reward you with vibrant foliage and a stronger tree for years to come. Ready to roll up your sleeves? Check out our pruning calendar to plan your next move!