
Pruning
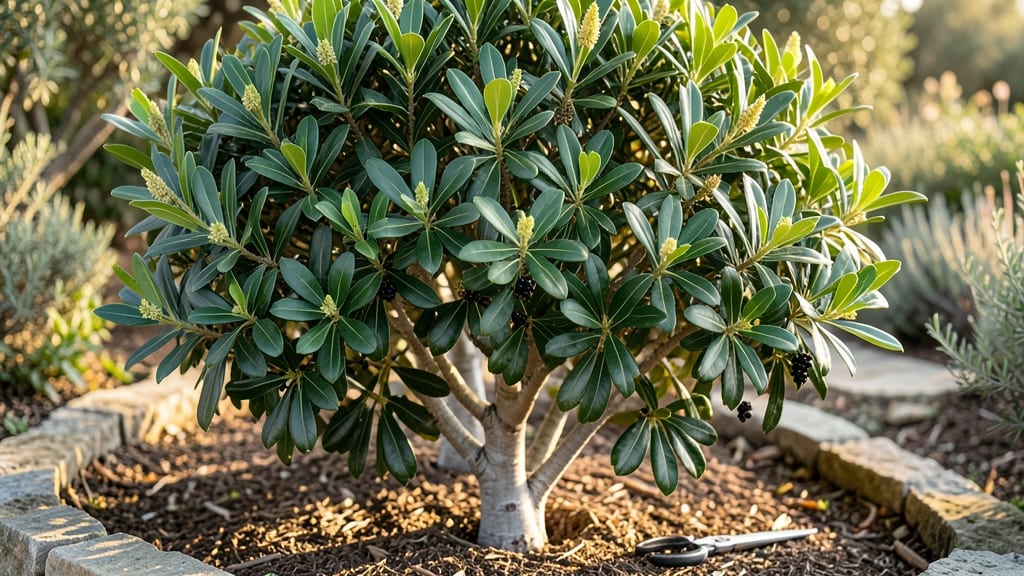
The Laurus nobilis bay leaf tree thrives as both a fragrant kitchen staple and a glossy evergreen showstopper—if you master its pruning rhythm. I’ve shaped mine into a neat 6-foot hedge that smells like a Mediterranean kitchen all year, and the secret lies in just four strategic cuts.
The first time I pruned wrong, my tree grew leggy and sparse—now I know exactly when and how to shape it for dense foliage and abundant leaves.
This evergreen handles pruning better than most, but timing matters: late winter or early spring is prime for shaping, while summer trims keep it tidy without stressing the plant. You’ll need sharp pruners, a ladder (for taller specimens), and 10-15 minutes to refresh its shape—no fancy tools required.
The payoff? Year-round dark green, leathery leaves that stay vibrant even in winter, plus the fresh bay scent that lingers when you brush past.
With the right cuts, your bay tree becomes a dual-purpose powerhouse: harvest leaves for soups and stews while keeping it manicured as a privacy screen or topiary. The key is balancing growth—never remove more than one-third of the foliage at once, or you’ll shock the tree.
I’ll show you exactly where to cut for fullness, how to encourage bushier growth, and when to stop before you overdo it.
Works for containers, hedges, or standalone trees—adjust the cuts based on your goals. Whether you’re growing it for culinary leaves or just love its glossy look, these pruning tricks will keep it thriving for decades. Let’s get started!
📚 In This Guide
- What you need
- Instructions
- Tips and common mistakes
- Wrapping up and next steps
What you need
- ● Pruning shears: Bypass pruners (for cuts up to ½ inch thick) – 1 pair (e.g., Felco F-2 or Corona 2-in-1).
- ● Loppers: For thicker branches (½–1.5 inches) – 1 pair (look for ratchet-assisted models for ease).
- ● Hand saw: Pruning saw with a curved blade (for branches 1.5+ inches) – 1 (e.g., Fiskars X7).
- ● Disinfectant: 70% isopropyl alcohol or diluted bleach (1 part bleach to 9 parts water) – small spray bottle (to sterilize tools between cuts).
- ● Garden gloves: Heavy-duty, cut-resistant (e.g., Mechanix or Wolverine) – 1 pair (protects from thorns and sap).
- ○ Pruning sealant: Optional but helpful for large wounds (e.g., Tanglefoot Tree Wound Pruning Seal) – small tube.
- ● Ladder or step stool: Sturdy, extendable (6+ feet tall) – 1 (for reaching higher branches safely).
- ● Trash bags: Heavy-duty (for collecting pruned branches) – 1–2.
- ● Weather check: Prune on a dry, overcast day (avoid midday sun to reduce stress on the tree).
- ● Safety gear: Safety glasses (to shield from debris) – 1 pair.
- ● Sharpener: Pruning tool sharpener or fine-grit sandpaper (to keep blades clean and precise).
- ○ Notebook & pen: Optional but handy for tracking cuts (e.g., "Year 1: Structural Pruning – Removed 3 branches").
How to prune a laurel tree for year-round fullness
This method keeps your bay leaf tree lush, healthy, and productive all year.
Identify the Four Key Pruning Zones
Start by examining your laurel tree for these four distinct areas. First, look for overcrowded branches—these are the thick clusters where stems grow too close together, blocking airflow and sunlight. You'll notice leaves turning yellow or brown at the base of these clusters, or stems rubbing against each other.
Next, locate dead or diseased branches. These will appear brown and brittle, or have black spots and peeling bark. Run your fingers along the stems—healthy wood feels firm, while dead wood crumbles easily. Finally, spot crossing branches where limbs grow directly over or under each other, creating weak points where they'll eventually snap.
Lastly, identify overly leggy growth—long, thin stems with sparse leaves. These often grow toward the light and weaken the tree's structure. Mark these areas with a small piece of twine or a popsicle stick if you're unsure which branches to trim later.
Prune for Airflow and Light Penetration
Using clean, sharp pruning shears, remove the overcrowded branches first. Cut just above a leaf node or outward-facing bud, making the cut at a 45-degree angle. This encourages new growth in the right direction. Avoid cutting into the main trunk or large branches—focus only on the smaller stems within the crowded clusters.
For dead or diseased branches, cut back to the nearest healthy growth. If the branch is thick (over ½ inch in diameter), use loppers instead of shears. Sterilize your tools with rubbing alcohol between cuts to prevent spreading disease. You'll see fresh green tissue underneath the dead wood—this is your stopping point.
Next, address crossing branches. Remove one of the two branches entirely, choosing the weaker or more awkwardly positioned one. Always cut back to a strong branch or the main trunk. Never leave a stub—this invites rot and pests. After these cuts, step back and check if sunlight now reaches the center of the tree.
Shape for Balance and Encourage Bushiness
Now focus on the leggy growth. Trim back the longest, thinnest stems by one-third to one-half of their length. Cut just above a leaf node or outward-facing bud to encourage branching. You'll notice the remaining leaves are denser and spaced more evenly—this is the tree's natural response to pruning.
To shape the tree, step back and visualize an open, rounded canopy. Remove any branches growing inward or downward, as these block light and create a messy silhouette. For a more formal look, trim the outer edges evenly. Laurel trees respond well to shaping, so don’t be afraid to make bold cuts—just avoid removing more than one-third of the tree’s foliage in a single session.
After shaping, water the tree deeply to help it recover. You'll see new growth emerging from the cut nodes within 4-6 weeks, especially if you prune in early spring or late summer when the tree is actively growing.
Maintain Year-Round with Seasonal Trims
Lightly prune your laurel tree every 3-4 months to keep it tidy and encourage continuous growth. In spring, focus on shaping and removing any winter-damaged branches. In summer, trim back any leggy growth that appears after the spring flush. By fall, remove only dead or diseased branches—avoid heavy pruning now, as the tree needs to harden off for winter.
In winter, give your tree a final check for any lingering deadwood or weak branches. Laurel trees are evergreen, so they don’t need heavy winter pruning, but a light cleanup keeps them looking their best. After each pruning session, apply a balanced fertilizer to support new growth, especially if you’ve made significant cuts.
Watch for signs of stress, like yellowing leaves or wilting. If this happens, reduce watering slightly and avoid pruning until the tree recovers. With consistent care, your laurel tree will stay lush, productive, and full of aromatic leaves year-round.
Tips & tricks for perfect laurel tree pruning
Here's what nobody tells you about pruning your bay leaf tree—these little details make all the difference between a tree that thrives and one that struggles.
Tool Preparation: Always sterilize your pruning shears between cuts, especially when removing dead or diseased branches. I use rubbing alcohol on a paper towel—it takes 30 seconds and prevents spreading any potential infections. For thicker branches over ½ inch, switch to loppers immediately to avoid damaging the tools or the tree. I keep a small spray bottle of alcohol handy during sessions to stay efficient.
Visual Cues for Healthy Cuts: When cutting back to healthy growth, look for fresh green tissue just beneath the brown or dead wood. This is your stopping point—cutting into green means you've gone too far and damaged live tissue. For leggy growth in Step 3, aim to cut back to where the stem is about pencil-thick (½ inch) to encourage bushier regrowth.
Seasonal Timing Matters: The 4-6 week recovery window mentioned after shaping works best when you prune in early spring or late summer. These are the tree's active growth periods. If you prune in fall or winter, new growth may be slower to appear, and the tree might struggle to recover before dormancy sets in. I've learned this the hard way after seeing winter pruning result in sparse regrowth the following spring.
Pro Tips for Laurus Nobilis Bay Leaf Tree
- Here's what nobody tells you about pruning your bay leaf tree—these little details make all the difference between a tree that thrives and one that struggles.
- Tool Preparation: Always sterilize your pruning shears between cuts, especially when removing dead or diseased branches.
- Visual Cues for Healthy Cuts: When cutting back to healthy growth, look for fresh green tissue just beneath the brown or dead wood.
Frequently asked questions
Got questions about your Laurus nobilis (bay leaf tree)?
Here are answers to the most common ones—whether you're pruning, troubleshooting, or just curious about this evergreen star!
1. When is the best time to prune a bay leaf tree?
Prune your Laurus nobilis in late winter or early spring (before new growth starts). This timing ensures healthy regrowth and avoids stressing the tree during dormancy. Avoid heavy pruning in fall—it can leave branches vulnerable to cold damage. For shaping, light trims can be done anytime, but spring is ideal for major cuts.
2. How do I prune a bay leaf tree to keep it compact?
Use 4 key cuts for a tidy shape:
- Deadheading: Remove dead or diseased branches at the base.
- Thinning: Trim 1/3 of the oldest growth to encourage bushier regrowth.
- Heading back: Cut just above a leaf node to promote branching.
- Shaping: Use hand pruners for clean lines—avoid over-trimming inner branches.
Pro tip: Never cut more than 1/3 of the tree’s foliage at once!
3. Why are my bay leaf tree branches turning brown or yellow?
Brown/yellow leaves usually signal overwatering, underwatering, or pests. Check soil moisture—bay trees prefer well-draining soil. Yellowing edges often mean chlorosis (iron deficiency), common in alkaline soil. For pests (like spider mites), spray with neem oil or insecticidal soap. If branches are crispy, it’s likely drought stress—water deeply and mulch.
4. Can I grow a bay leaf tree from a kitchen bay leaf?
Yes! Soak a whole, organic bay leaf in water for 24 hours, then plant it horizontally in moist potting mix (1/4 inch deep). Keep soil damp and place in bright, indirect light. Roots may take 4–8 weeks to sprout—patience is key! Note: This method works best with fresh leaves (not dried).
5. Are bay leaf trees toxic to pets or kids?
Laurus nobilis is mildly toxic if ingested in large amounts, causing stomach upset (vomiting, diarrhea). The essential oils can irritate skin or eyes. Keep pets away during pruning, and wash hands after handling leaves. Never eat fresh bay leaves—they’re bitter and can cause nausea. Cooked leaves (like in your kitchen!) are safe and delicious.
Wrapping up and next steps
The Laurus nobilis bay leaf tree isn’t just a kitchen staple—it’s a year-round beauty that thrives with the right pruning care! By mastering the 4 key cuts (spring shaping, summer thinning, fall cleanup, and winter renewal), you’ll keep it lush, healthy, and productive.
Whether you’re trimming for aesthetics or harvest, consistency is key—your bay tree will reward you with fragrant leaves and vibrant growth.
Ready to elevate your pruning game? Grab your shears and start today! 🌿✂️ Your bay tree—and your meals—will thank you.