
Pruning
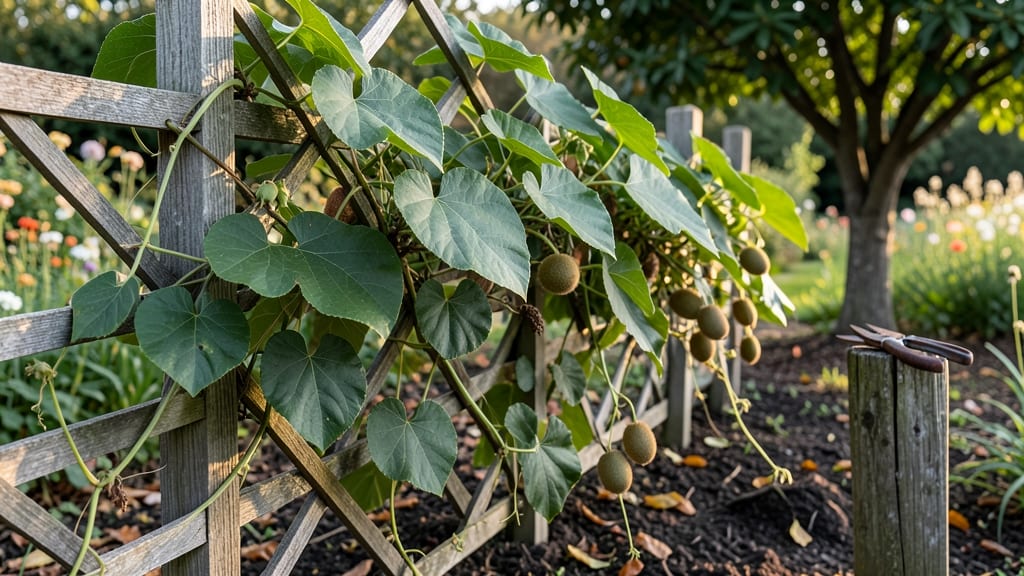
Caring for a kiwi tree means unlocking those sweet, fuzzy fruits that taste like sunshine and tropical vacations combined. 🌱 I learned the hard way that kiwi vines need more than just good intentions—they demand strategic pruning, patient training, and a little seasonal TLC to thrive year-round.
My first vine nearly choked itself with tangled growth, but after mastering these three pruning tricks, it now produces enough fruit to share with neighbors.
The secret isn’t complicated—it’s about timing, tools, and a little elbow grease. You’ll need sharp pruners, a sturdy trellis (for hardy kiwis) or a strong fence (for actinidia deliciosa), and a clear plan for winter dormancy.
Hardy kiwis handle colder climates down to zone 5, while tropical varieties need winter protection or warmer zones. Both types reward you with vibrant green leaves and eventually, those iconic golden fruits if you prune correctly in late winter and early summer.
By summer’s end, you’ll see lush, productive vines bursting with flowers and tiny green fruits. The pruning isn’t just about shaping—it’s about directing energy where you want it: more fruit, not more foliage.
With these tricks, even a beginner can turn a wild, unruly vine into a structured, productive powerhouse. Let’s get those shears ready and transform your kiwi into the star of your garden.
Works for both backyard gardens and small urban spaces—just adjust the trellis size. Whether you’re dealing with hardy kiwis or actinidia deliciosa, these same principles apply. Here’s how to keep your vine happy, healthy, and heavy with fruit all season long.
📚 In This Guide
- What you need
- Instructions
- Tips and common mistakes
- Wrapping up and next steps
What you need
- ● Pruning shears: Bypass pruners (sharp, 4- to 6-inch blades) for clean cuts on small branches.
- ● Loppers: 20- to 24-inch handles for thicker branches (up to 2 inches in diameter).
- ● Pruning saw: Curved-tooth saw for branches thicker than 2 inches.
- ● Disinfectant: 70% isopropyl alcohol or a 10% bleach solution (1 part bleach to 9 parts water) to sterilize tools between cuts.
- ● Gloves: Heavy-duty, cut-resistant gloves (kiwi vines have thorns!).
- ● Ladder or step stool: Sturdy and tall enough to reach the tree’s canopy safely.
- ○ Twine or zip ties: For temporarily securing branches during pruning (optional but helpful).
- ● Hand saw: For stubborn, oversized branches.
- ● Tree wound dressing: Pruning sealant (controversial but useful for large cuts).
- ● Garden hose or spray bottle: To rinse tools and clean sap off hands.
- ● Notebook & pen: To jot down pruning notes or track growth patterns.
Step-by-Step guide to pruning your kiwi vine year-round
Here's how I keep my kiwi vines productive and healthy—no guesswork, just proven techniques.
✂️ Step 1: Winter Pruning for Structure and Airflow
Late winter, before buds swell, is prime time to prune. Remove all dead, diseased, or crossing branches first—these compete with healthy growth and invite pests. I cut back to the main stem or outward-facing buds, making clean cuts at a 45-degree angle about ¼ inch above the bud. This ensures water runs off and prevents rot.
Next, thin out crowded canes to improve airflow. Aim for 4-6 main vines per plant, spaced evenly. You'll see new growth emerge from the base in spring—these are your future fruit-bearing canes. Never remove more than ⅓ of the plant in one season, or you'll shock the vine.
🌿 Step 2: Summer Pruning to Encourage Fruit Production
During summer, when vines are actively growing, focus on shaping and directing energy. Pinch back new shoots that grow toward the center of the plant—they’ll never get enough light. Instead, encourage outward growth by cutting just above a leaf node where new branches form.
Here’s the trick: leave 6-8 buds on each fruiting cane. You’ll know you’re on track when the vine has 3-4 main branches with clusters of leaves and flowers. This balance prevents overloading, which leads to small, bitter fruit. Watch for yellowing leaves—they signal overcrowding or too much shade.
🌱 Step 3: Fall Cleanup to Prepare for Dormancy
As temperatures drop, prune again to remove any remaining weak or damaged growth. Kiwi vines store energy in their roots, so this step ensures they enter dormancy strong. Cut back any shoots shorter than 12 inches—they won’t survive winter and will waste the plant’s resources.
I also remove all fruit that didn’t ripen by fall. Unharvested fruit saps energy the vine needs to harden off. After pruning, apply a 2-inch layer of mulch around the base (if using the provided materials) to insulate roots. You’ll see fewer dead branches in spring if you do this right.
⏰ Step 4: Spring Maintenance for New Growth
When new shoots appear in early spring, prune again to 6-8 inches if they’re leggy. This forces the vine to produce bushier, stronger branches. Avoid heavy pruning now—kiwi vines are sensitive to cold, and late cuts delay flowering.
Here’s the key: wait until after the last frost but before leaves unfurl. You’ll know it’s time when you see tight buds but no open leaves. Prune at this stage, and you’ll set the vine up for a bountiful summer harvest with fewer pests and diseases.
Tips & tricks for perfect kiwi vine pruning
These seasonal strategies will transform your kiwi vine from struggling to spectacular—no fancy tools required.
Pruning Angle Precision: When making cuts at a 45-degree angle in Step 1, visualize slicing a pie wedge—this angle directs water away from the cut, preventing rot. Use clean, sharp pruners to avoid tearing the bark, which invites disease. I mark my cuts with a pencil first to ensure consistent angles across multiple branches.
Bud Counting Matters: In Step 2, those 6-8 buds per fruiting cane aren't arbitrary—they create the perfect balance between fruit production and vine health. Count buds from the base upward, removing any extra growth that would compete. I use a small notepad to track bud counts on each main branch to avoid over-pruning.
Mulch Thickness Technique: That 2-inch mulch layer in Step 3 isn't just decoration—it's insulation. Use organic mulch like wood chips or straw, keeping it 2-3 inches away from the vine's base to prevent rot. I always refresh mulch in early spring to maintain this protective barrier during winter.
Frost Timing: Spring pruning's secret weapon is patience—waiting until after the last frost but before leaves unfurl (Step 4) gives your vine the best chance to recover. I check my local frost date calendar and set reminders for this critical window. If you prune too early, cold-sensitive vines can suffer; too late, and you delay flowering.
Pro Tips for Kiwi Tree Care
- These seasonal strategies will transform your kiwi vine from struggling to spectacular—no fancy tools required.
- Pruning Angle Precision: When making cuts at a 45-degree angle in Step 1, visualize slicing a pie wedge—this angle directs water away from the cut, preventing rot.
- Bud Counting Matters: In Step 2, those 6-8 buds per fruiting cane aren't arbitrary—they create the perfect balance between fruit production and vine health.
Frequently asked questions
Got questions about keeping your kiwi tree happy and productive?
Here are answers to the most common ones—so you can prune with confidence and enjoy those sweet, fuzzy fruits!
When is the best time to prune a kiwi tree?
The ideal time is late winter or early spring (just before buds swell) when the tree is dormant. This promotes vigorous new growth and fruit production. Avoid pruning in fall—it can stimulate tender shoots that may not survive winter. For established trees, a light prune in summer (after fruiting) can also help maintain shape.
Can I prune a kiwi tree in winter?
Yes, but only in mild climates (USDA Zones 7-9). Heavy pruning in freezing temps stresses the tree. If you must prune in winter, do it on a warm day and avoid cutting into old wood—kiwi trees are sensitive to cold damage. In colder areas, wait until spring when the threat of frost has passed.
What do I do if my kiwi tree isn’t fruiting?
Poor fruiting often stems from lack of pruning, incorrect sex ratios, or weak growth. Ensure you have both male and female vines (kiwi trees are dioecious). Prune to improve airflow, remove excess foliage, and balance growth. Also, fertilize with nitrogen in early spring and potassium/phosphorus before flowering. Patience helps—young trees may take 3-5 years to fruit!
How much should I prune a young kiwi tree?
For saplings (1-3 years old), focus on training the main trunk and branches. Remove competing shoots, leaving 2-3 strong leaders. Prune back overcrowded branches by 1/3 to 1/2 their length to encourage bushiness. Avoid heavy cuts—kiwi trees are delicate and may struggle to recover if over-pruned.
Can I use the same pruning tools for kiwi trees as for fruit trees?
While you can use similar tools (like bypass pruners or loppers), kiwi vines are thicker and more brittle than many fruit trees. Invest in sharp, high-quality tools to avoid crushing the stems. Disinfect blades between cuts to prevent disease spread (especially if your tree has had issues like canker).
Wrapping up and next steps
Caring for your kiwi tree is a rewarding journey that combines patience, precision, and a little love! 🌱 By mastering the three key pruning tricks—structural shaping, seasonal maintenance, and disease prevention—you’ll set your vine up for lush growth, bountiful harvests, and long-term health.
Remember, consistency is key, so schedule those check-ins and adjust as your tree evolves.
Now that you’re armed with the know-how, roll up your sleeves and give your kiwi tree the TLC it deserves. Start with a quick pruning session this weekend—your future fruit will thank you! For extra inspiration, explore our pruning timeline guide to keep your tree thriving year-round.