
Pruning
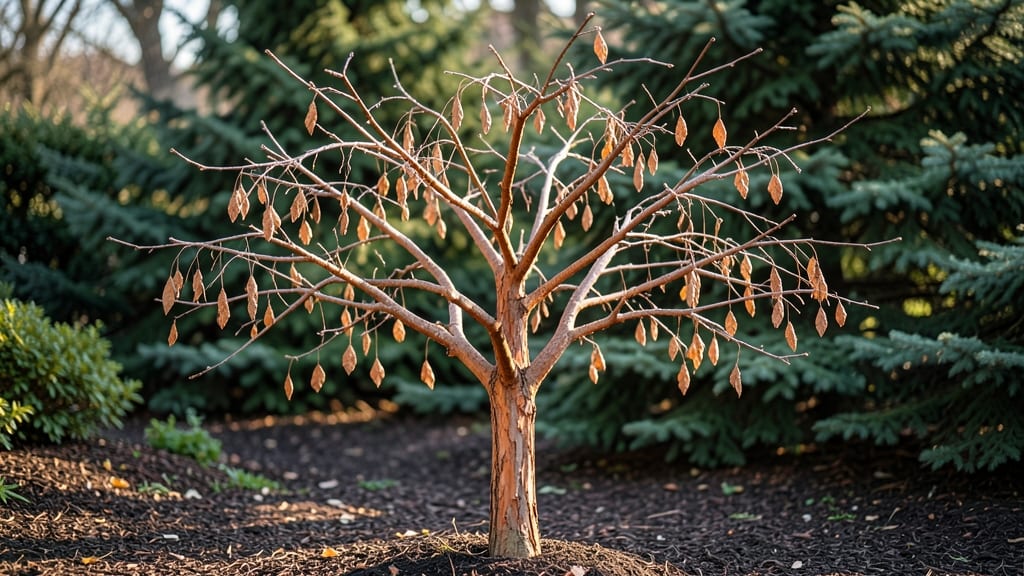
When your katsura tree stands bare in winter, that’s actually the perfect time to shape its future. ✨ The dormant season reveals weak branches and hidden problems, letting you prune with confidence for stronger spring growth.
I’ve learned that winter pruning isn’t just about cleanup—it’s about setting up a healthier, more vibrant tree by next summer.
Here’s the thing—katsura trees handle cold well, but their winter routine matters. Start by removing dead or crossing branches first, then thin out crowded areas to improve airflow. A sharp pair of pruners and a clear day are all you need, plus a little patience to avoid over-pruning.
The goal is to encourage new growth without stressing the tree.
You’ll see the results in early spring when fresh green shoots emerge from your cuts, signaling the tree is responding well. Proper winter pruning also reduces the risk of disease and pests, giving your katsura a strong start to the growing season.
Think of it as a reset button for your tree’s health.
Works for both young and mature katsura trees, though larger branches may need a saw. Just remember: winter’s the time to plan, not to rush. Let’s get your tree ready for its best spring yet!
📚 In This Guide
- What you need
- Instructions
- Tips and common mistakes
- Wrapping up and next steps
What you need
- ● Pruning shears: Bypass pruners (for cuts up to ½ inch thick) – 1 pair (sharp, clean, and sterilized with rubbing alcohol).
- ● Loppers: Bypass loppers (for branches ½ to 2 inches thick) – 1 pair (with a ratchet mechanism for leverage).
- ● Pruning saw: Curved-tooth saw (for branches >2 inches thick) – 1 (lightweight, with a comfort grip).
- ● Disposable gloves: Nitrile or leather – 2 pairs (to protect from thorns and sap).
- ○ Pruning sealant: Tree wound dressing (optional but recommended for large cuts) – 1 small tub (e.g., Tanglefoot Tree Wound Pruning Seal).
- ● Ladder: Aluminum extension ladder (height based on tree size) – 1 (with non-slip feet and a weight limit exceeding your body weight).
- ● Bucket: 5-gallon plastic – 1 (for collecting debris).
- ● Rag or paper towels: Unbleached – 5-10 sheets (for cleaning tools between cuts).
- ● Hand saw: For stubborn, thick branches (backup to loppers).
- ● Pole pruner: Extendable bypass pruners (for high branches without a ladder).
- ● Safety glasses: To shield eyes from debris or sap splashes.
- ● Marking spray: Biodegradable (to tag branches for removal).
- ● First-aid kit: Basic (for minor cuts or scrapes).
- ● Camera: Smartphone or instant camera – to document before/after progress!
- ● Check the weather forecast: Aim for a dry, calm day (no rain for 24–48 hours before/after pruning).
- ● Gather tree health info: Note any dead, diseased, or crossing branches to prioritize.
- ● Wear sturdy footwear: Closed-toe shoes with traction (e.g., hiking boots).
- ● Have a helper on standby: For large trees or ladder stability.
Step-by-Step guide for pruning katsura trees in winter
Here's how I approach winter pruning to keep your Katsura tree thriving for years.
✂️ Step 1: Wait for the Right Time
Prune your Katsura tree during its dormant season, typically between late winter and early spring—just before buds begin to swell. This is usually February or March in most climates, but check your local frost dates. The tree will be easier to work with when it's completely dormant, and you'll avoid stimulating new growth that could be damaged by late frosts.
Look for bare branches with no leaves and tight, brown buds along the stems. These are your cues that the tree is ready. If you see any green emerging from the buds, wait a few more weeks. Pruning too early can stress the tree, while pruning too late risks encouraging tender new growth that won't survive cold snaps.
✂️ Step 2: Inspect and Plan Your Cuts
Start by examining the tree's structure from all sides. Look for dead, diseased, or crossing branches—these are your top priorities. Dead branches will be brittle, cracked, or completely devoid of bark, while diseased branches may show discoloration, fungal growth, or unusual oozing. Crossed branches rub against each other, creating wounds that invite pests and disease.
Use a sharp pair of pruning shears to make clean cuts just outside the branch collar—the swollen area where the branch meets the trunk. Avoid cutting flush with the trunk, as this can damage the tree's healing tissues. Sketch a rough plan if needed, but focus on opening the canopy to improve airflow and sunlight penetration. This reduces humidity in the branches, which helps prevent fungal issues.
✂️ Step 3: Make Strategic Cuts for Structure and Health
Begin by removing any suckers or water sprouts—these are fast-growing, vertical shoots that appear at the base of the tree or along the trunk. They sap energy from the main structure. Cut these back to the ground or to a lateral branch, depending on their location. Next, address thinning out crowded branches to improve airflow. Aim to remove no more than 25% of the tree's foliage in a single pruning session to avoid overstressing it.
For larger branches, use pruning saws or loppers to make clean cuts at a 45-degree angle just outside the branch collar. Avoid leaving stubs, as these can rot and attract pests. If a branch is too large to cut in one go, make a notch on the underside first to control the direction of the cut and prevent tearing. Step back occasionally to assess the tree's balance—you want to maintain its natural shape while improving its overall health.
✂️ Step 4: Clean Up and Protect the Tree
After pruning, sterilize your tools with rubbing alcohol or a bleach solution to prevent spreading disease between cuts. Remove all cuttings and debris from the base of the tree and dispose of them properly—never leave them on the ground, as they can harbor pests and fungi. If you notice any sawdust-like residue (a sign of powdery mildew or other fungal spores), clean up thoroughly to minimize risks.
Apply a layer of mulch around the base of the tree, keeping it 2-3 inches deep and 6 inches away from the trunk. This helps retain moisture and regulate soil temperature as the tree prepares for spring growth. Water the tree deeply but infrequently—once every 2-3 weeks—unless you experience an extended dry spell. Avoid overwatering, as soggy soil can suffocate roots and invite rot.
Tips & tricks for perfect katsura tree winter pruning
Winter pruning transforms your Katsura tree from a tangled mess into a thriving landscape star. Here's how to get it right the first time.
Timing is Everything: The February-March window is non-negotiable for Katsura trees. I learned this the hard way after pruning too early and seeing tender new growth get frostbitten. Check for those tight brown buds—when they're still closed but the tree is completely dormant, that's your cue. If you're unsure, wait until after the last frost date in your area. This timing prevents stressing the tree while it's still vulnerable to cold snaps.
Branch Collar Matters: When making cuts in Step 2 and Step 3, focus on cutting just outside the branch collar—the swollen area where the branch meets the trunk. I see so many people cut flush with the trunk, which creates wounds that never properly heal. Use your pruning shears to make clean cuts at a slight angle, leaving that protective collar intact. This simple technique dramatically improves healing and reduces disease risk.
Sucker Control Strategy: Those fast-growing suckers at the tree's base are energy vampires. In Step 3, cut them back to the ground immediately—don't leave any stubs. I've seen homeowners try to "save" them by cutting partway, only to have them grow back stronger. For larger suckers along the trunk, cut back to a lateral branch. This redirects the tree's energy to where you want it—your main canopy branches.
Cleanup Prevents Problems: After pruning in Step 4, sterilize your tools between each cut to prevent spreading disease. I use a 1:9 bleach-to-water solution and wipe down tools thoroughly. Remove all cuttings and debris from the base—don't just pile them nearby. Those branches can harbor pests and fungi that will attack your freshly pruned tree. The 2-3 inch mulch layer you apply afterward helps protect against these very issues while regulating soil temperature.
Pro Tips for Katsura Tree Winter
- Winter pruning transforms your Katsura tree from a tangled mess into a thriving landscape star.
- Timing is Everything: The February-March window is non-negotiable for Katsura trees.
- Branch Collar Matters: When making cuts in Step 2 and Step 3, focus on cutting just outside the branch collar—the swollen area where the branch meets the trunk.
Frequently asked questions
Got questions about keeping your katsura tree thriving during winter? You’re not alone! Here are some of the most common concerns—plus straightforward answers to help you prune with confidence.
When is the best time to prune a katsura tree in winter?
The ideal window is late winter (after the worst cold snaps but before buds swell), typically February to early March. Pruning too early risks frost damage, while waiting too late may encourage early growth. Aim for dormant season—when the tree isn’t actively growing—to minimize stress.
Should I prune a katsura tree if it’s still covered in snow?
Nope! Wait until the ground thaws and the snow melts. Pruning in icy or frozen conditions can damage branches and stress the tree. A light shake of the branches should tell you it’s safe—if they’re brittle, hold off for a few more weeks.
How much can I trim back a katsura tree in winter?
For mature katsura trees, aim to remove no more than 25% of the canopy in a single pruning session. Focus on dead, diseased, or crossing branches first. Over-pruning can weaken the tree and reduce next year’s fragrant spring blooms.
What if my katsura tree doesn’t have any obvious dead branches to prune?
Even if the tree looks healthy, use winter’s clear visibility to thin out the canopy for better airflow. Target water sprouts (fast-growing vertical shoots) and branches growing inward. This promotes stronger structure and prevents future congestion.
Are there alternatives if I miss winter pruning?
Yes! You can prune in early spring (before buds break) or late summer (after flowering), but winter is still best. If you skip it entirely, focus on removing only dead/diseased wood in the next dormant season to avoid over-stressing the tree.
Still unsure? Drop your specific concerns in the comments—we’re happy to help!
Wrapping up and next steps
Winter is the perfect time to give your katsura tree the care it needs for a vibrant spring!
By following this dormant-season pruning blueprint, you’re not just trimming branches—you’re shaping a healthier, more resilient tree. 🌿✨ Think of it as a fresh start, where every cut paves the way for stronger growth and stunning blooms ahead.
Ready to roll up your sleeves? Grab your tools, dust off your gloves, and schedule that pruning session before the first buds appear! Your future spring garden will thank you—one careful snip at a time.