
Pruning
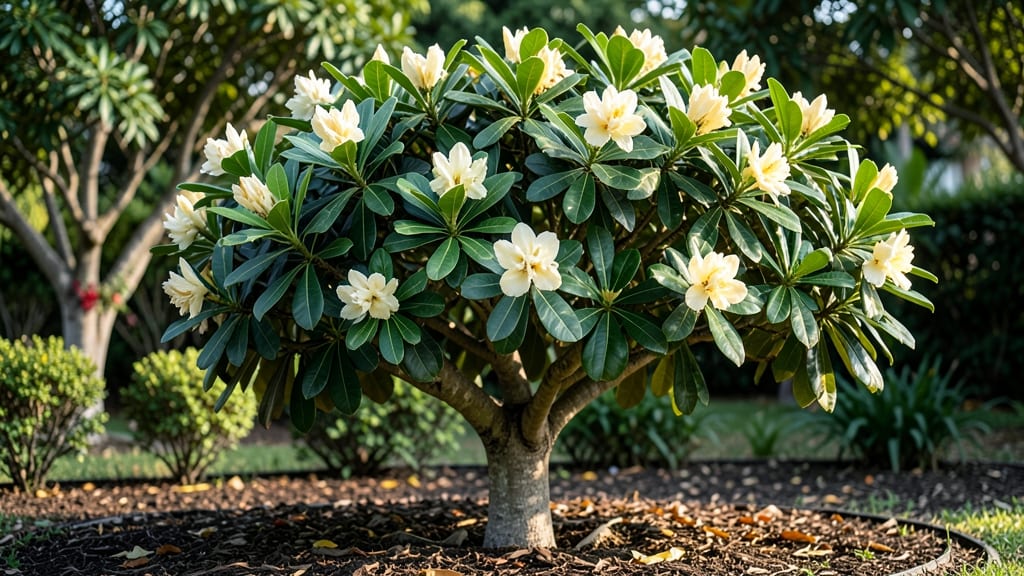
The joy perfume tree (Michelia champaca) transforms any space into a fragrant sanctuary with its creamy-white blooms that smell like vanilla and gardenia. 🌸 I first fell for this tropical beauty when a single branch filled my living room with intoxicating perfume—now I grow mine in containers on my balcony, and every summer brings that same magic.
The secret isn’t just its scent, but how well it adapts to container life while still thriving.
This isn’t your average houseplant—it’s a tropical bloom master that rewards patience with velvety flowers and glossy leaves. You’ll need a well-draining potting mix (think 60% peat moss, 30% perlite, 10% compost) and a large container (at least 15 gallons) to accommodate its roots.
Bright, indirect light keeps it happy, and watering should be consistent but never soggy—think damp soil, not swampy. Pruning after blooming encourages bushier growth, and with the right care, you’ll get those signature flowers by midsummer.
What makes this tree special is how it turns even small spaces into fragrant retreats. The blooms open at night, releasing their signature perfume, and the leaves stay lush year-round with proper winter care.
Yes, it’s slow to mature (expect 3-5 years for first flowers), but once established, it’s nearly indestructible—just watch for spider mites and keep humidity high. Imagine waking up to your balcony smelling like a tropical paradise—this is how you make that happen.
Perfect for containers, patios, or even as a striking indoor plant in warm climates. Whether you’re growing it for the scent, the looks, or both, this tree delivers on all fronts. Let’s get you started on cultivating your own fragrant masterpiece!
📚 In This Guide
- What you need
- Instructions
- Tips and common mistakes
- Wrapping up and next steps
What you need
- ● Michelia Champaca Seedlings or Saplings: 1–2 healthy nursery-grown plants (ensure they’re disease-free and 1–3 years old for best results).
- ● Container: 1 large, well-draining pot (18–24 inches in diameter) with drainage holes.
- ○ Optional: Self-watering containers for convenience.
- ● Potting Mix: 3 parts high-quality well-draining cactus/succulent mix.
- ● 1 part perlite or pumice (for aeration).
- ● 1 part compost or worm castings (for nutrients).
- ● Pruning Tools: 1 pair sterilized bypass pruners (for clean cuts).
- ● 1 small hand saw (for thicker branches, if needed).
- ● Gloves & Safety Gear: 1 pair gardening gloves (to protect from sap and thorns).
- ○ Optional: Safety goggles (if pruning near the face).
- ● Location: Full sun to partial shade (6+ hours of sunlight daily).
- ● Temperature: Thrives in 70–90°F (21–32°C); protect from frost (<32°F/0°C).
- ● Humidity: Mimic tropical conditions with 50–70% humidity (use a humidifier or pebble tray if indoors).
- ● Watering: Keep soil consistently moist but not soggy (water when top 1–2 inches are dry).
- ● Fertilizer: Balanced 10-10-10 fertilizer (diluted to half-strength) every 4–6 weeks during growing season.
- ○ Optional: Organic options like fish emulsion or compost tea.
- ● 🌱 Test soil pH: Aim for 5.5–6.5 (use a soil kit if unsure).
- ● 🔄 Rotate containers: Every few weeks to ensure even sunlight exposure.
- ● 🚫 Avoid overcrowding: Prune early to encourage a bushier, more fragrant shape.
Step-by-step instructions for cultivating Michelia champaca in containers
Here's how to coax these fragrant tropical beauties into thriving container specimens.
🌱 Step 1: Select the Right Container and Prepare the Soil Mix
The Michelia champaca needs excellent drainage to prevent root rot, so choose a container with drainage holes at least 12 inches deep and 18 inches wide for each plant. I recommend using a heavy ceramic pot—it retains moisture better than plastic while allowing excess water to escape. Avoid glazed containers, as they trap moisture against the roots.
Create a well-draining mix by combining 60% peat-based potting soil, 30% perlite, and 10% coarse sand. This ratio mimics the champaca's native tropical forest floor, where roots need air as much as they need moisture. Test the mix by squeezing a handful—it should hold together but crumble easily when released. If it sticks together like clay, add more perlite.
🌿 Step 2: Plant Your Seedling at the Correct Depth
Gently remove the champaca from its nursery pot and loosen the roots if they're circling. The root flare—where the roots meet the trunk—should sit just ½ inch below the soil surface when planted. Burying it too deeply suffocates the trunk, while planting too shallowly exposes it to temperature swings and drying winds.
Fill the container with your prepared mix, pressing lightly around the base to eliminate air pockets. Water thoroughly until it drains freely from the bottom holes. The soil should feel evenly moist but not soggy. Place your finger 1 inch deep—if it comes out clean, water again. If it's damp but not wet, you're good to go.
☀️ Step 3: Position for Optimal Light and Humidity
Michelia champaca thrives in bright, indirect light with 4-6 hours of morning sun and afternoon shade. A south-facing window with sheer curtains works well, or place your container 3-5 feet from a west-facing window. Direct afternoon sun will scorch the glossy leaves, while too little light causes leggy growth and sparse blooms.
These tropical plants adore humidity—aim for 60-70% relative humidity. If your home runs dry, place the container on a tray filled with ½ inch of pebbles and water, ensuring the pot doesn't sit directly in water. Mist the leaves lightly every 2-3 days, focusing on the undersides where buds form. You'll see new growth within 4-6 weeks if conditions are right.
💧 Step 4: Water and Fertilize for Consistent Blooms
Water when the top 2 inches of soil feel dry—stick your finger in to check. Michelia champaca prefers consistent moisture but hates soggy roots. Water deeply until it runs out the drainage holes, then empty the saucer to prevent root rot. In summer, you may water every 3-4 days, while winter slows to once a week.
Feed with a balanced 10-10-10 fertilizer diluted to half-strength every 4 weeks during spring and summer. Reduce feeding in fall and winter, as the plant enters dormancy. I've found that a monthly application of Epsom salt (1 tablespoon per gallon of water) in spring boosts magnesium levels, leading to richer foliage and more abundant blooms.
✂️ Step 5: Prune and Encourage Bushier Growth
Prune after flowering to shape the plant and encourage new growth. Use clean, sharp pruners to cut back leggy stems by ⅓ of their length, always cutting just above a leaf node. This redirects energy to lateral branches, creating a fuller, more compact specimen. Remove any dead, diseased, or crossing branches immediately—they compete with healthy growth.
Here's the thing—Michelia champaca responds well to gentle training. If you want a tree form, select one central leader and remove competing stems. For a bushier look, pinch back the tips of new growth when they reach 6 inches. You'll see new shoots emerge within 2-3 weeks, signaling the plant is adapting well to your care.
Tips & tricks for thriving Michelia champaca in containers
Mastering these tropical beauties takes patience and precision—here's how to avoid common pitfalls and maximize your champaca's potential.
Container Selection Wisdom: While the instructions specify a minimum 12-inch depth, I've found that adding 2-3 inches of extra depth (up to 15 inches total) gives roots more room to establish before they hit the bottom. This is especially helpful for younger plants that will grow taller. The wider the container (up to 24 inches), the more stable the plant becomes—important for those glorious blooms that can get heavy!
Soil Mix Verification: The 60-30-10 ratio is perfect, but here's what I've learned: if your local peat-based soil contains a lot of sphagnum moss (common in many potting mixes), you can reduce the perlite slightly to 25% and add 5% coconut coir instead. The coir helps retain moisture without compromising drainage. Always test your mix by squeezing—it should feel like a damp sponge, not a brick.
Light Positioning Secret: Those crucial 4-6 hours of morning sun are non-negotiable, but here's the thing about afternoon shade: if your west-facing window gets intense late afternoon sun (after 3 PM), move the plant 1-2 feet farther back. I've seen champacas develop sunburn spots even with sheer curtains if they're too close. A simple test—if you can hold your hand near the plant and feel strong warmth, it's too close.
Pruning Timing Strategy: While the instructions recommend pruning after flowering, I've had better luck with a two-step approach: first prune immediately after blooms fade to remove spent flowers, then do the full shaping prune 4-6 weeks later. This prevents the plant from putting energy into seed production and gives you a cleaner shape. Always sterilize your pruners with rubbing alcohol between cuts to prevent bacterial spread.
Pro Tips for Joy Perfume Tree Michelia Champaca
- Mastering these tropical beauties takes patience and precision—here's how to avoid common pitfalls and maximize your champaca's potential.
- Container Selection Wisdom: While the instructions specify a minimum 12-inch depth, I've found that adding 2-3 inches of extra depth (up to 15 inches total) gives roots more room to establish before they hit the bottom.
- The coir helps retain moisture without compromising drainage.
Frequently asked questions
Got questions about growing your own Joy Perfume Tree (Michelia champaca)?
You’re not alone! Here are some of the most common queries—plus quick, practical answers to keep your tropical beauty thriving.
How fast does a Michelia champaca grow, and when can I expect flowers?
A healthy Michelia champaca grows 1–2 feet per year in ideal conditions (warmth, humidity, and bright indirect light). With patience, it typically blooms after 3–5 years—sometimes earlier in containers with proper care! Young trees may take longer, so be kind to your plant and reward it with regular pruning to encourage bushier growth.
Why aren’t my champaca leaves turning yellow, and how do I fix it?
Yellowing leaves usually signal overwatering, poor drainage, or root rot. Let the top 1–2 inches of soil dry out between waterings, and ensure your pot has drainage holes. If roots smell sour or look mushy, trim the affected parts and repot with fresh, well-draining soil. Pro tip: Mist leaves occasionally to mimic tropical humidity without soggy roots!
Can I grow Michelia champaca indoors year-round, or does it need outdoor seasons?
This tropical gem thrives indoors year-round if you mimic its natural habitat: bright, indirect light (east/west windows are ideal), 60–80% humidity, and warmth (65–85°F). However, a summer outdoor stint (6+ hours of shade) can boost growth and flowering. Just acclimate gradually to avoid shock!
When and how should I prune my champaca tree for better blooms?
Prune right after flowering (late spring/early summer) to shape the tree and encourage dense, bushier growth. Use sterilized shears to trim back 1/3 of the new growth, focusing on overcrowded or leggy branches. Avoid heavy pruning in winter—this tree hates cold stress! Bonus: Pruned branches can root in water for free propagation!
What’s the best alternative if my champaca isn’t blooming?
If your Michelia champaca stays flower-free, try these tweaks:
- Light upgrade: Move it closer to a south-facing window or use a grow light (12–14 hours/day).
- Fertilizer boost: Use a balanced, organic fertilizer (like fish emulsion) every 4–6 weeks in spring/summer.
- Stress reduction: Avoid drafts, sudden temperature drops, or overcrowded pots.
- Patience + pollination: Hand-pollinate flowers with a soft brush if bees aren’t visiting!
Still no luck? Consider Michelia figo (another fragrant relative) or Plumeria for similar tropical vibes!
Wrapping up and next steps
The Joy Perfume Tree (Michelia champaca) isn’t just a plant—it’s a fragrant masterpiece that brings tropical elegance to your space! With the right container, soil, and care, you can cultivate its intoxicating blooms year after year.
Whether you’re a seasoned gardener or a beginner, this guide has given you the tools to succeed.
Now that you’re armed with knowledge, take the next step! Start with a healthy cutting or seedling, and let your green thumb (or curiosity!) guide you. Watch as your Michelia champaca thrives—and soon, your home will be filled with its sweet, joy-inducing scent. Happy growing! 🌸✨